
Life Systems
A medical reference document for emergencies
Between my dad, Jen, and even our neighbor yesterday, I've dealt with a number of emergency room visits these last three weeks. And it's gotten us thinking about the accessibility of medical information, especially while traveling and during medical emergencies.
So we implemented what we're calling a medical reference document, which basically includes all the important "new patient" paperwork you'd fill out at your first visit with a new doctor.
Avoid annoying paperwork
I had already put together an earlier version of this for my dad, which made it so much easier to check-in to his various doctor offices. Instead of filling out yet another form to verify that everything's up to date, I simply print it off ahead of time and hand back the clipboard with the attachment.
Not only does this save a ton of time and effort (and hand cramps), but it also reduces transcription mistakes when someone can't read my handwriting as I try in vain to squeeze everything onto a blank line that's entirely too short for the information requested. Office staff are initially confused, but often thank me for making their transcription task so much easier.
So that's a handy enough reason to spend the 15 minutes to pull this together.
When an emergency happens
But it was the possibility of dealing with an emergency—especially while traveling—that made us decide we should both have all of our relevant medical information quickly and easily available in a single updated document.
After all, it's hard to remember lots of details when you suddenly find yourself in a stressful moment of crisis, and especially so if there's any sort of language barrier at play.
By having it all in writing, it's much easier to share important information quickly, and it wouldn't take much to use Google Translate to translate it into the local language prior to a trip, too.
Where we keep it
We are now keeping these documents saved in the cloud (which we can access from anywhere, even without our phones), and saved directly on both of our phones (so that we have offline copies available, too).
Anytime something needs to be updated—we get a new prescription for instance—we update it, share it with each other, and save copies of the new version to all the places.
What's on the doc?
So, what information do we include? Well, basically anything that we'd want medical or emergency personnel to know in a critical situation.
So obviously that's the basics, like general demographic and contact information, who to contact in an emergency, allergies, prescriptions, immunizations, major health illnesses, our doctor and other specialists, etc. We also include insurance and pharmacy information, though that's likely only relevant in-country. We even include surgical and family histories, and some other info we might need when filling out medical forms.
If you have unique conditions or things you'd someone to know in an emergency (such as the details about an implanted medical device, for instance), you should definitely customize it for your own needs. If you have any suggestions for something I've missed, please let me know!
Here's a template to get your started
That said, here's a general template you can start with. This is one of those things that is incredibly easy to put off doing, only to regret not having it later. But once you get it all pulled together, it's pretty easy to keep it updated, and you'll have it in case you ever need it.
PDF sample
Here's the template in pdf format, which is the file format we export to our phones.
Your_Full_Name_-_Medical_Reference.pdf
Plain text template
And here's a plain text version that you can edit:
Your Full Name - Medical Reference.txt
Notion template
And if you use Notion, you can one-click duplicate this to your account at this link.
Since we already use Notion for managing much of our lives, we keep the "source" files there, then just export and save the copies to our icloud drive, and then to both of our phones.
A 'Digital Garden' Approach to Travel Journaling
tl;dr: I’ve started keeping track of my travels in an interconnected system of notes. This helps me remember more, and to better connect the dots. Here’s a bit more on what that looks like and why I’m trying this.
Update: I've added a bit to this idea. You can read my additions and why I've enjoyed this journaling approach at Digital Gardening for Travel.
Ephemeral Consumption
So much of our daily lives revolves around what I call ephemeral consumption. We endlessly scroll social media, veg out in the front of the tv, and plow through books and documentaries. And by doing so, we ensure that much of the value of what we consume is fleeting. We quickly forget things and don’t get to make proper use of them in the future. Memory is a choice, and too often we don’t proactively choose to remember very much.
There is another approach. It involves some work, but its value compounds over time, making the endeavor more and more useful over time. It is the simple effort of taking some notes about what we learn, and linking those ideas together in an interconnected system.
I’ve started to deploy this strategy in various parts of my life, including in my travel. I spend an outsized portion of my free time and money on travel experiences, so it just makes sense to try to get as much lasting value out of those expenditures as possible.
Some call a system like this a “digital garden” (see below for some introductory links to the concept), though I named my own public version my "Ideas Notebook" (edit: I've since moved this to rscottjon.es and renamed it Public Notes) You might also think of it as a sort of personal wikipedia.
The beauty of this approach is that my notes are not static files I never look back on again, but are instead linked to and updated over time as I learn new things or gain new insights. Because they are interconnected, it’s easy to build upon my earlier knowledge and experiences, while making new mental connections. This helps shift tourism from passive consumption to active learning. It's easy to start connecting the dots between places I visit and the things I learn about. And because they’re written down, I can easily revisit them whenever I’d like. Simply put, I don’t forget what I had learned on that trip (or at minimum, much less of it).
What does this look like for travel?
I’m still in the “test drive” phase of using this, so I expect ongoing changes and improvements. Initially, I’ve divided my notes into three main buckets, though rich links connect all these notes no matter where they reside.
Places
First, there are places. Each place that I visit gets its own separate note. This note has some basic information, including when I visited, and some basic journaling about the experience I had there.
If there are interesting facts I learned, or insights I gained, I’ll keep track of them here too. I also add questions raised or things I might want to follow up on. The intent here isn’t to write a full report on the place, as much as it is to capture things that are interesting to me personally.
Here an example from a recent stop at Homestead National Historical Park in Nebraska.

Trips
Second, there are trips. Again, each trip gets its own separate note. This note contains both some basic information (similar to my trip dashboard) about when I went, with whom, and links to the specific places (see above) that I visited.
In addition, the trip note serves as home for my broader travel journaling. Specific experiences are already captured in the places notes, so the journaling here focuses more on the overall trip than on specific destinations.
Themes
Finally, there are themes. This is the most fluid and flexible part of the system. It’s also where the system really shines. I’ll write a theme note when a connection between multiple places strikes me as interesting. Themes help connect ideas, or observations, places, experiences, or even trips themselves.
Theme topics can be broad or specific, so there’s quite a bit of leeway here. One theme might focus on the decline of rural America, another might be observations on the migration of former slaves after the Civil War. Another might be small town ballparks, or roadside attractions along Route 66, or how local craft breweries often reclaim historic downtown buildings. Another theme might connect various trips I’ve taken.
Themes are the heart of the system because they foster mental connections, help you see larger trends, understand concepts better, and possibly even gain insights into yourself. They connect things you already know with the new things you're learning, and they allow you to update your understanding of a topic.
Themes also allow you to add some notes before your trip. If you're doing any research in preparation for upcoming travel, you can capture some of the ideas you encounter in theme notes. For instance, I just started reading a book on Icelandic culture in preparation for an upcoming trip to Iceland. If there are interesting topics I might want to explore more, I can add a theme note for it. Then, when I'm journaling about the trip itself and run across that idea again, I can easily link it to the theme note I had started prior to traveling.
In the screenshot above, you’ll notice several links that point to various theme notes. Here’s a graph view of what that looks like for this specific note:

Initially, themes will be a bit sparse until I visit more places and generate other notes. As my base of notes expands, each of these nodes will connect to multiple places, trips, and even other themes. But even after one trip, I’ve started to see the potential of thematically connecting my visits together.
Stories
Since first publishing this, I've also added another note type: Stories:
Story notes are focused on specific narratives you want to have as separate notes[1]. For instance, many of my trips often include some interesting story about something that happened. Having that as a separate note makes it more accessible to relive without having to dig through other trip notes. Want to quickly pull up the story about the time you lost your hiking boot off the cliff? Well, there's a note for that.
A side benefit of this approach is that you can reference the general story in the main trip narrative without getting bogged down in all of the details you want to remember in the future; those necessary (but sometimes tedious) details can simply live in the more comprehensive story note instead.
Other benefits
This approach offers three main benefits.
First, I notice that I pay closer attention to where I’m at, and process what I learn a bit more fully. Even in places where “learning” isn’t the primary goal, such as a brewery, I find myself interacting with the place in a deeper way. It’s like my brain knows that I’ll need to write a note about it, so it’s a bit more diligent and more present in the moment.
I’ve also noticed, especially in museum-like settings, that I find myself being more curious. Having a specific place to mark down a few of the “hmm, I wonder” thoughts makes it easier to have them.
Lastly, I definitely remember more. The “Generation Effect,” which posits that you remember things better if you rewrite them in your own wording, may play a role in this. But it may also be because I find myself revisiting older notes, updating them when I come into contact with new-but-related observations or experiences. So I'm just being reminded of the content more regularly than before.
I’m still early into testing this note taking journaling strategy, but I’m pretty excited about it so far. I’ll report back after more testing.
If you're interested in exploring this idea more, shoot me an email. If you're looking to experiment a bit, check out the free Obsidian app, which is what I use to capture these notes.
If you're interested in how I came across this idea, read this. If you want to learn more about the idea of digital gardening, I recommend this post and this essay.
Quick update: I've been using this approach for several trips now, and I'm quite happy with the results. I've also been experimenting with different workflows to make this more detailed journaling system easier to manage during and after a trip.
I'll write a more comprehensive review and update this post once I'm done experimenting. If you're considering adopting this approach, just jump in and give it a go! Oh, and let me know, too.
Here's an update: Digital Gardening for Travel
A simple system for managing shared account logins
This post outlines the username, email, and password "code" system that my wife and I use to manage accounts that we both need easy access to.
"Which login do we use for Netflix??”
If you’ve had this convo with your partner before, then this post will be useful.
Here is how Jen & I have solved the problem of accounts/services that have a single login but that we both need to access routinely.
First, we have a shared email alias that forwards incoming messages to both of our main inboxes. Our alias happens to be tied to a website we have together, but you could just as easily set it up using a free email account and filtering rules too.
We use this single email address as the main sign-up address for any account that’s shared: Netflix, Hotels.com, Verizon, etc. So any account information gets sent to both our email accounts. We also have a standard—and unusual—username that we use for any sites that require one.
Our password code system
We use a “code” system for the account passwords. This coding system is both easy-to-remember AND generates a unique password for each account. So if your account gets hacked, they only gain access to that one single password (don’t re-use one password at multiple sites!).
The password is comprised of four things: numbers, symbols, lowercase letters, and uppercase letters—and should be at least 8 characters long. This seems to satisfy the password requirements of most sites.
You then construct a “code” that is based on the name of the website you’re logging into, plus a standard set of symbols and numbers. So while the letters change based on the website, the rest of the password doesn’t. You just need to remember the “formula” for the password code to remember an unlimited number of unique passwords, each geared towards a different site.
So if your password code is:
The first two letters of the website name in uppercase + the number “707” + two “$” symbols + the third and fourth letters of the website name in lowercase.
Then your Netflix password would be: NE707$$tf
And your Hotels.com password would be: HO707$$te
And your Verizon password would be: VE707$$ri
See? All you have to do is remember the ONE password code, which in turn gives you a key for each of the unique passwords. There are countless ways to set this up, using different symbols, more letters or numbers, a different order, etc.
However, here are a few recommendations that will help you meet more site password requirements:
- Start with a letter
- Don’t use 4 or more letters of the site name in a row
- Don’t repeat letters or numbers more than 3 times in a row
- Don’t use “1234” or “password” in the code
Now, you may run across some sites that have odd username or password requirements. So we have a couple alternative password codes and alternative usernames that we can use if ours is already taken.
While we also have all of our login information saved at home, we usually don’t need to look it up. If the normal password code doesn’t work, we simply try the alternative instead.
If you're not keen on using a system like this, you can also use a password app. Our preference is to be able to remember our passwords ourselves and make them easily enterable, however, so we prefer this coding system to a separate app.
Use a free phone number
So what about sharing a phone number for things like store rewards cards? Well, we use a free Google Voice number for that, so that we don’t have to remember whose phone number we use at the grocery store versus the pharmacy and so forth. The number just goes to voicemail, as we don’t want to receive any actual calls there. It's a real number though, so it's accessible if we need it to be.
Google Voice is in the process of ending text message forwarding, but we use a workaround for receiving those important text message login verification codes. It’s a bit trickier, but you can set up message forwarding to your gmail account, and then create a filter rule there that passes the messages along to your shared email address.
So that’s it, that’s the system we use. For any shared account, we know the username, email address, password, and/or phone number we need. It takes a few minutes to set up, but it sure makes things easier in the future. If you have any related tips, or if this type of system has worked for you, let me know.
<form action="https://app.convertkit.com/forms/2142178/subscriptions" class="seva-form formkit-form" method="post" data-sv-form="2142178" data-uid="baa6fe722a" data-format="inline" data-version="5" data-options='{"settings":{"after_subscribe":{"action":"message","success_message":"Success! Now check your email to confirm your subscription.","redirect_url":""},"analytics":{"google":null,"facebook":null,"segment":null,"pinterest":null,"sparkloop":null,"googletagmanager":null},"modal":{"trigger":"timer","scroll_percentage":null,"timer":5,"devices":"all","show_once_every":15},"powered_by":{"show":false,"url":"https://convertkit.com?utm_source=dynamic&utm_medium=referral&utm_campaign=poweredby&utm_content=form"},"recaptcha":{"enabled":false},"return_visitor":{"action":"show","custom_content":""},"slide_in":{"display_in":"bottom_right","trigger":"timer","scroll_percentage":null,"timer":5,"devices":"all","show_once_every":15},"sticky_bar":{"display_in":"top","trigger":"timer","scroll_percentage":null,"timer":5,"devices":"all","show_once_every":15}},"version":"5"}' min-width="400 500 600 700 800" style="background-color: rgb(249, 250, 251); border-radius: 4px;">
Want more stuff like this?
Join my twice-a-month email list to explore more systems like this that make your adventures easier and more personally rewarding.
You'll also get free access to templates and opt-in guided email courses to help you implement the ideas I write about.
I won't send you spam and you can unsubscribe at any time.

From Idea to Adventure: How I plan trips using Notion
This post explains how I organize my From Idea to Adventure trip planning database in Notion. Below, I give you a video tour of my own system, and a short tutorial video of how to set up your own. I am planning on releasing a template version of my system soon at some point (sorry!), as well as a free series of emails to walk you through setting up and using your own version. Hop on the email list for those (see subscribe form below).
If you use a Travel Dashboard like me, you probably use some digital tool to chart out your trips. Not just when you might take them, but your itinerary, who is joining you, and all the other relevant details, too.
I use an app called Notion for this. The free version is sufficient, it works across devices, and also allows for easy collaboration. Notion can be hard to describe; it’s sort of a cross between a note-taking app, a nested database system, and a personal wiki. Because it’s so powerful, it can be a bit intimidating at first. But it's actually pretty easy to use.
My wife and I chose Notion for our Travel Dashboard because it was easy to bring together all of our travel related information: the seasonal trip brainstorming pages (since replaced by the system below), our quests, our Adventure Maps and Adventure Files, our travel budget and trip costs, Life Block Planning, as well as other planning and reference docs. It’s all in one single place, accessible to both of us.
Since then, I’ve rethought how we do our trip planning and built my own travel calendar database instead. It may sound complicated—ugh, a “database” sounds boring and tedious, right?—but it really does make things so, so much easier.
From trip idea to upcoming adventure
The best part of our From Idea to Adventure system is that it does most of the work for you.
You enter some basic trip ideas, whether they’re shorter day trips or longer international adventures, and add a few tags to note which season it works in and whether it’s a short or longer trip. Then, when you run across something useful for that trip, like a blog post, you simply add it to the trip idea using Notion’s simple web clipper. Just a couple clicks saves the page right to your trip.
We add all of our available weekends to the calendar, so we know when we're free. Then, it's just a matter of choosing which trip ideas to add to which free periods.
This is where the system really shines. Because this whole thing is a database, you can easily use custom views to show you just the relevant entries.
For instance, to plan a trip for the July 4th holiday weekend, I simply select the “Summer long weekend trip ideas” database view I set up, and bam, there’s a list of our existing destination ideas.
After choosing an idea, I just add the dates to the trip entry, and it now shows up as an upcoming trip (as opposed to just being an idea we saved). Now that it’s an upcoming trip, I add a few status tags (like “make reservations” or “invite”) so we can see what still needs to be done at a quick glance. One more click loads my long weekend road trip template, which includes all the sections I use, including a default packing list, other more detailed tasks (like turn down the thermostat when we leave), and a dedicated place to upload digital tickets and reservation confirmations.
Each of these trip entries can have countless things nested within it. You could have table databases to lay out your daily itinerary and keep track of expenses, and a place to embed a custom road trip map if you make one. You could have sub-pages dedicated to your travel journaling. Or it could just be a mostly blank page with a few quick notes. It’s all up to you, how detailed you want to be, and what the specific trip requires.
Because each of these trip entries are in this larger database, you can also have custom views for various statuses. I have one view that shows me all the trips where I still need to make reservations, for instance. We have another custom view set up to show us all the long weekends we still have available to plan a trip. We have other views to show us which group trips we’ve talked to friends about, but haven’t quite scheduled yet.
And once the trip dates pass, it automatically moves off the “upcoming trips” view and into the “archive” view, to help keep things tidy and uncluttered. And because we use these trip entries to aggregate all sorts of info about each trip we take—including the final expense tally, links to our photo albums from the trip, our travel journals, and so forth—each of these entries becomes its own Trip Dashboard. And so we also have a view set up to display the trips where we still need to complete these items.
And as you’d expect, having our travel history archived like this is an easy way to implement my Return on Adventure (#BetterROA) system.
A quick tour of my own From Idea to Adventure system
Here is a short, rather informal walk-through of my own system. I've made some additional modifications since then and plan on recording a more detailed screencast in the future.
How to build your own
While I am planning on releasing a template for this entire system—get on the email list for that—you may want to get started building your own right now. So I also recorded an abbreviated tutorial below, which shows you the basics of the main database.
Set up trip templates
Skip the videos, get on the email list instead
If you're not into building your own, don't despair. I'm working on improving and releasing a free template you can steal for yourself. (note: not sure when this will happen)
Hop on my email list below to get notified when it's available.

What I wish I knew before starting my national parks quest
Travel quests are among the most powerful ways to get yourself out more. My personal national parks quest—visiting all 417 national park units in the country—has been the driving force for the vast majority of my own travel. And it's been one of the most impactful endeavors in my life. I firmly believe that if you not already questing, you're missing out.
But there are a few lessons I wish I had known before I started. Here are six of them.
Be clear on what the quest entails
When I first started my national parks quest, my goal wasn't to visit every national park unit, as it is now. When the idea first occurred to me, I limited it to just the so-called "named" National Parks. That is, the ones that end in the iconic words "National Park." Well, I quickly realized that this is an arbitrary delineation. There are some astounding places that happen to be named "national monuments" or something else, often simply due to the happenstance of history. Indeed, many of the named national parks were first protected as national monuments. So the designation—especially after its been watered down with recent additions such as Gateway Arch—carries much less importance than commonly understood.
As a result, I ended up extending the quest to include national monuments. And then a year later, I extended it to all of the national park units. Well, all of them except national recreation areas, actually. I'm not a big fan of dammed rivers, so it seemed like national recreation areas shouldn't be part of my quest. And, as a result, I swifted bypassed those areas, failing to stop even when I was driving right by them.
I finally came to my senses and decided I might as well hit all of the National Park units, no matter what their designation. After all, by law, the National Park Service must treat them all equally, and they're all considered "national parks" even if their official names don't end in the words "National Parks." Unfortunately, that meant that I needed to do things like travel back to Montana to hit the lone park unit (a national recreation area) that I had skipped because I wasn't clear on what the places were included in the quest.
Don't make this same mistake—decide early on what the quest actually entails.
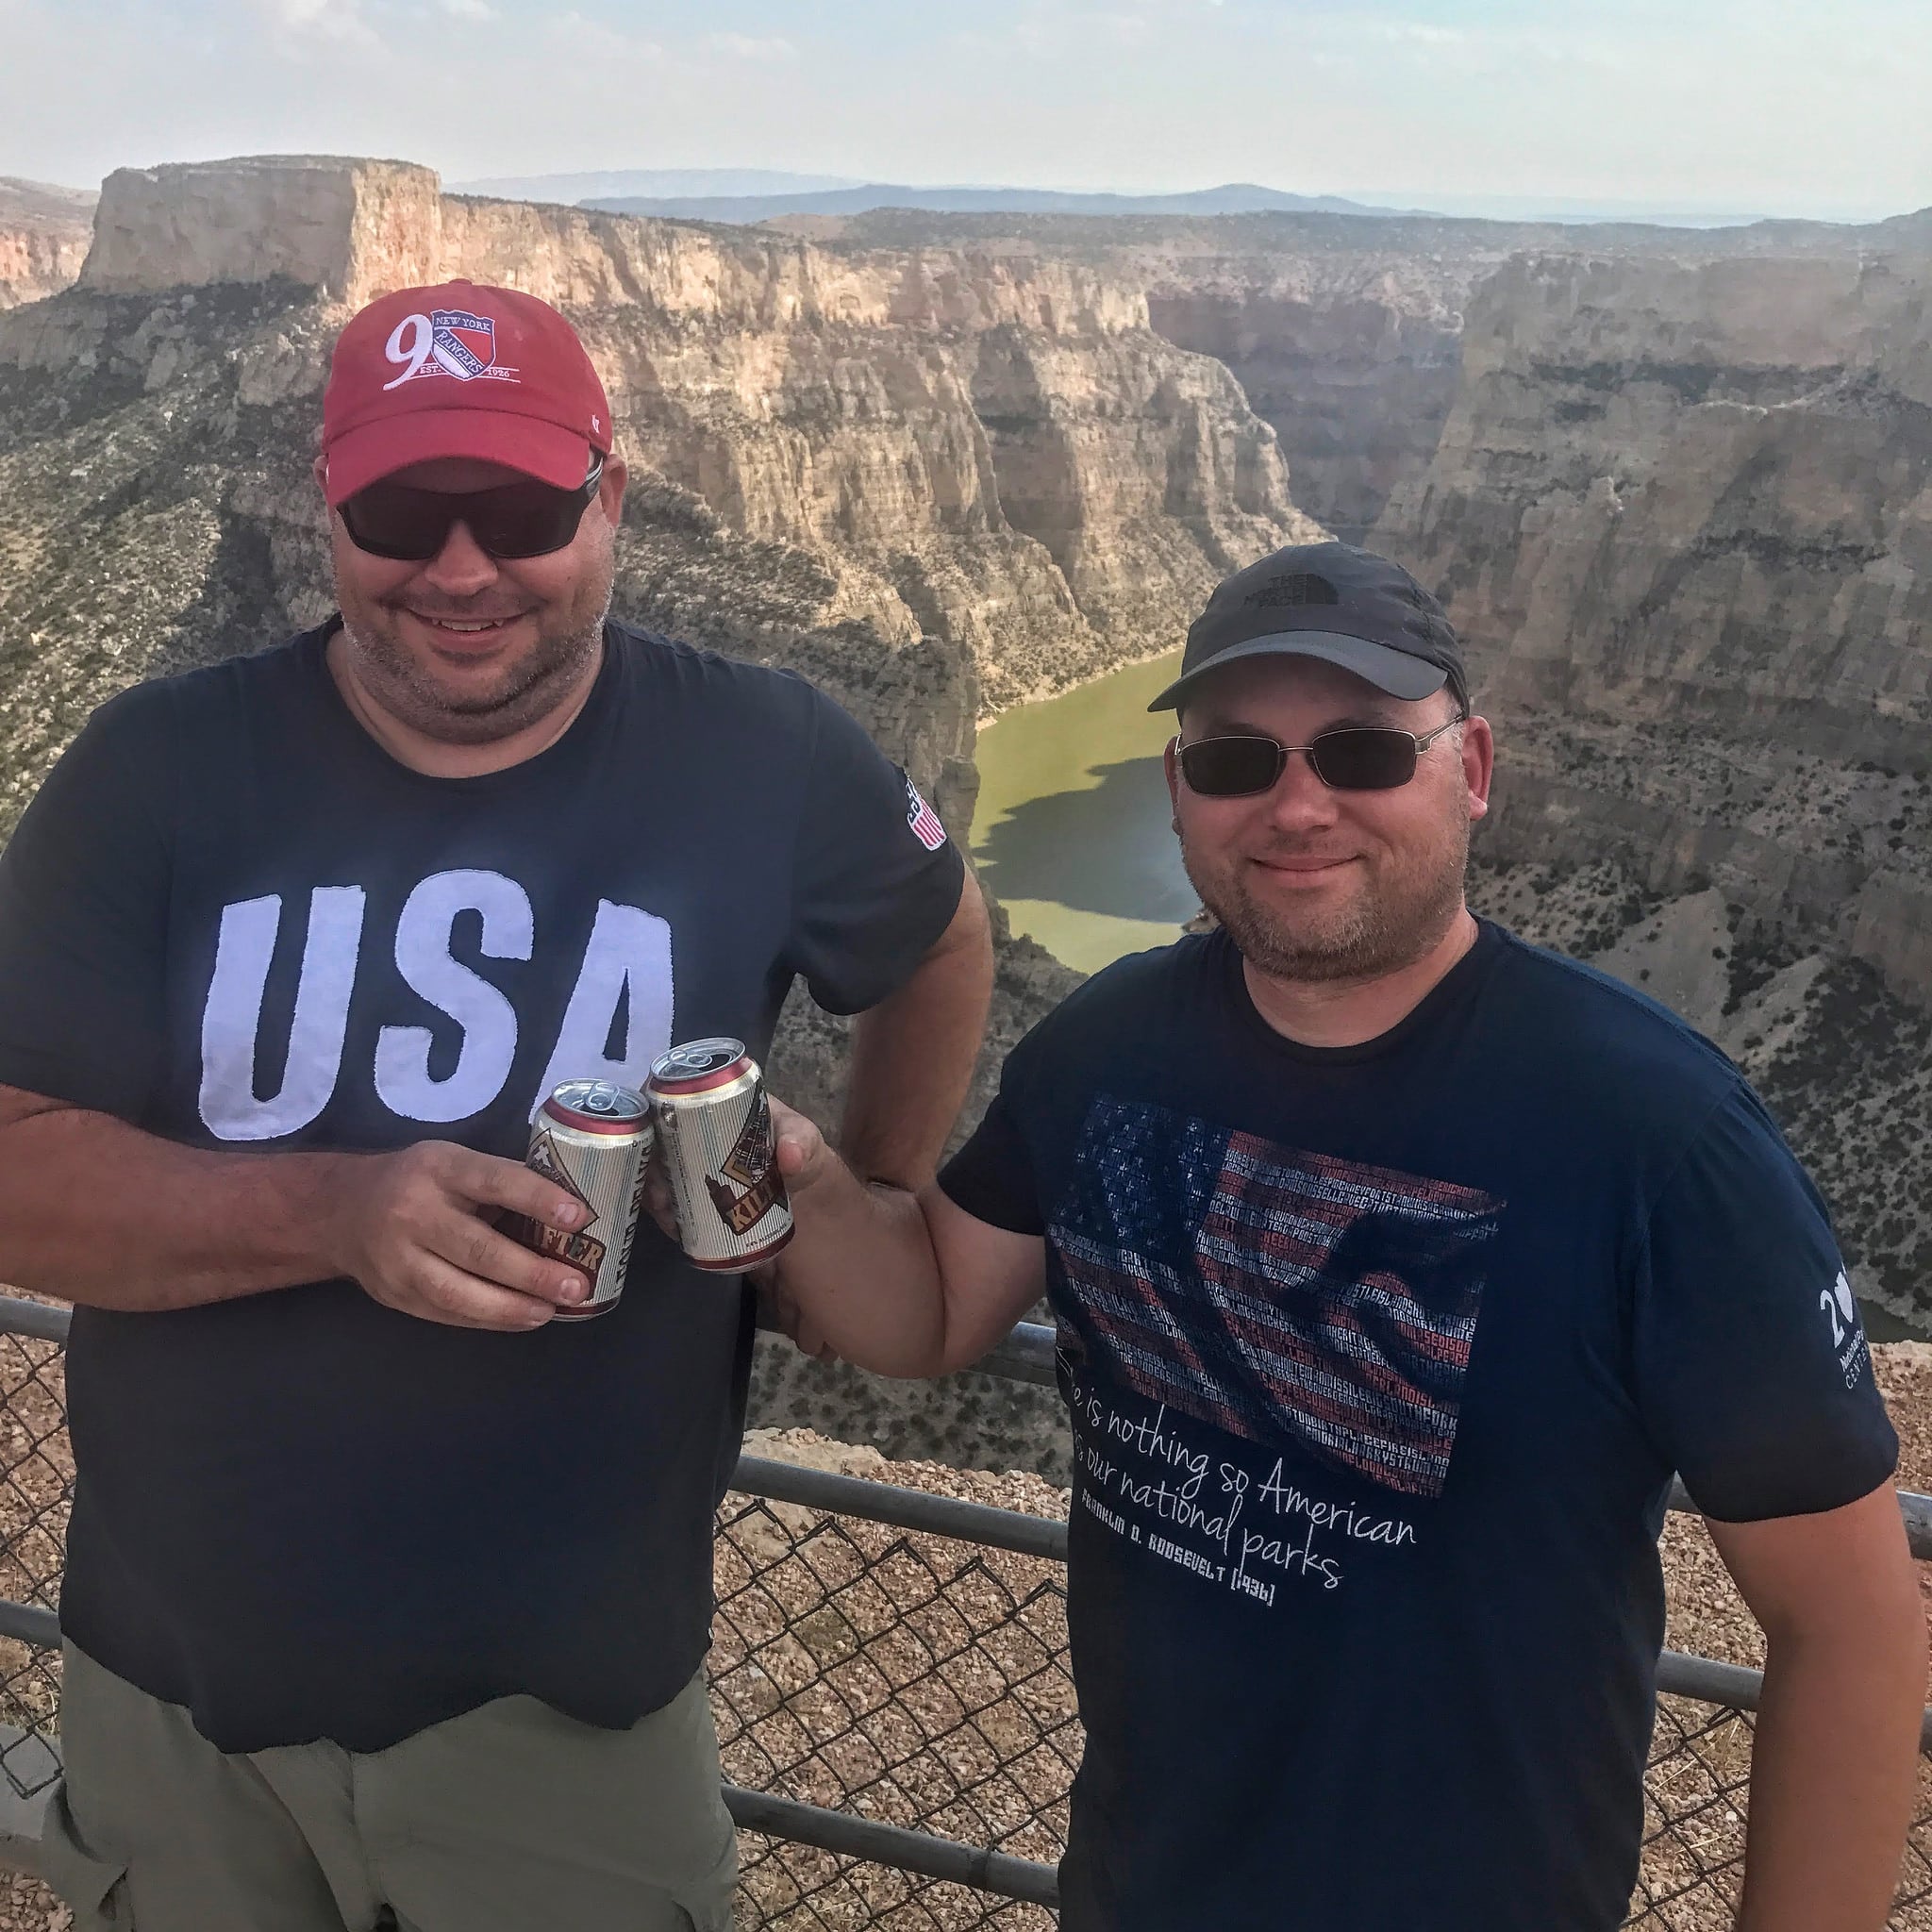
Think ahead and don't "orphan" any units
The park unit in Montana that I had bypassed was named Bighorn Canyon National Recreation Area. And it's a 17 hour and 48 minute drive from my home in Phoenix. That's a long drive for a park unit I should have marked off thirteen years earlier when I drove right past it. And so, of course, I eventually had to drive that entire way just to mark off this one lonely park.
My advice is to avoid ending up with a Bighorn Canyon of your own—an orphaned unit far away that you can't easily complete with other units as part of a larger trip.
That means when you're planning your national park trips, you should strategize about how you'll mark off the other units in the area you're traveling to. Sometimes you'll realize that it makes sense to alter the trip to favor a further-flung park unit over a closer one, simply because it will be easier to get it done now than to orphan it later. Some of this is guesswork, and your plans may change in the future, but it's important to have a strategy nonetheless.
Leave enough time to be amazed
Sometimes, you won't expect much from a park unit, but after arriving, you just fall in love with it. Sometimes, it's the unit itself—an incredibly moving visitor center, for instance. Other times, it might be an unexpected wildlife encounter. Or maybe even some weather, like a low cloud that poured into the battlefield, totally changing the character of your experience.
If you're on a quest, you'll likely be traveling fast. But that doesn't mean you shouldn't plan some flexibility into the trip to allow you to enjoy these pleasant surprises. I tend to purposefully overestimate how long I'll need for smaller sites, which means that I'm routinely "ahead of schedule" during my trips. This helps offer a bit of a buffer for those times when I end up spending much more time at a place than I had anticipated.
Start a tradition—or several
One of the most fun aspects of a large quest is having a tradition. Or rather, several traditions. It's particularly gratifying when you're far into your quest and you have a consistent collection of photos or souvenirs from each of your destinations.
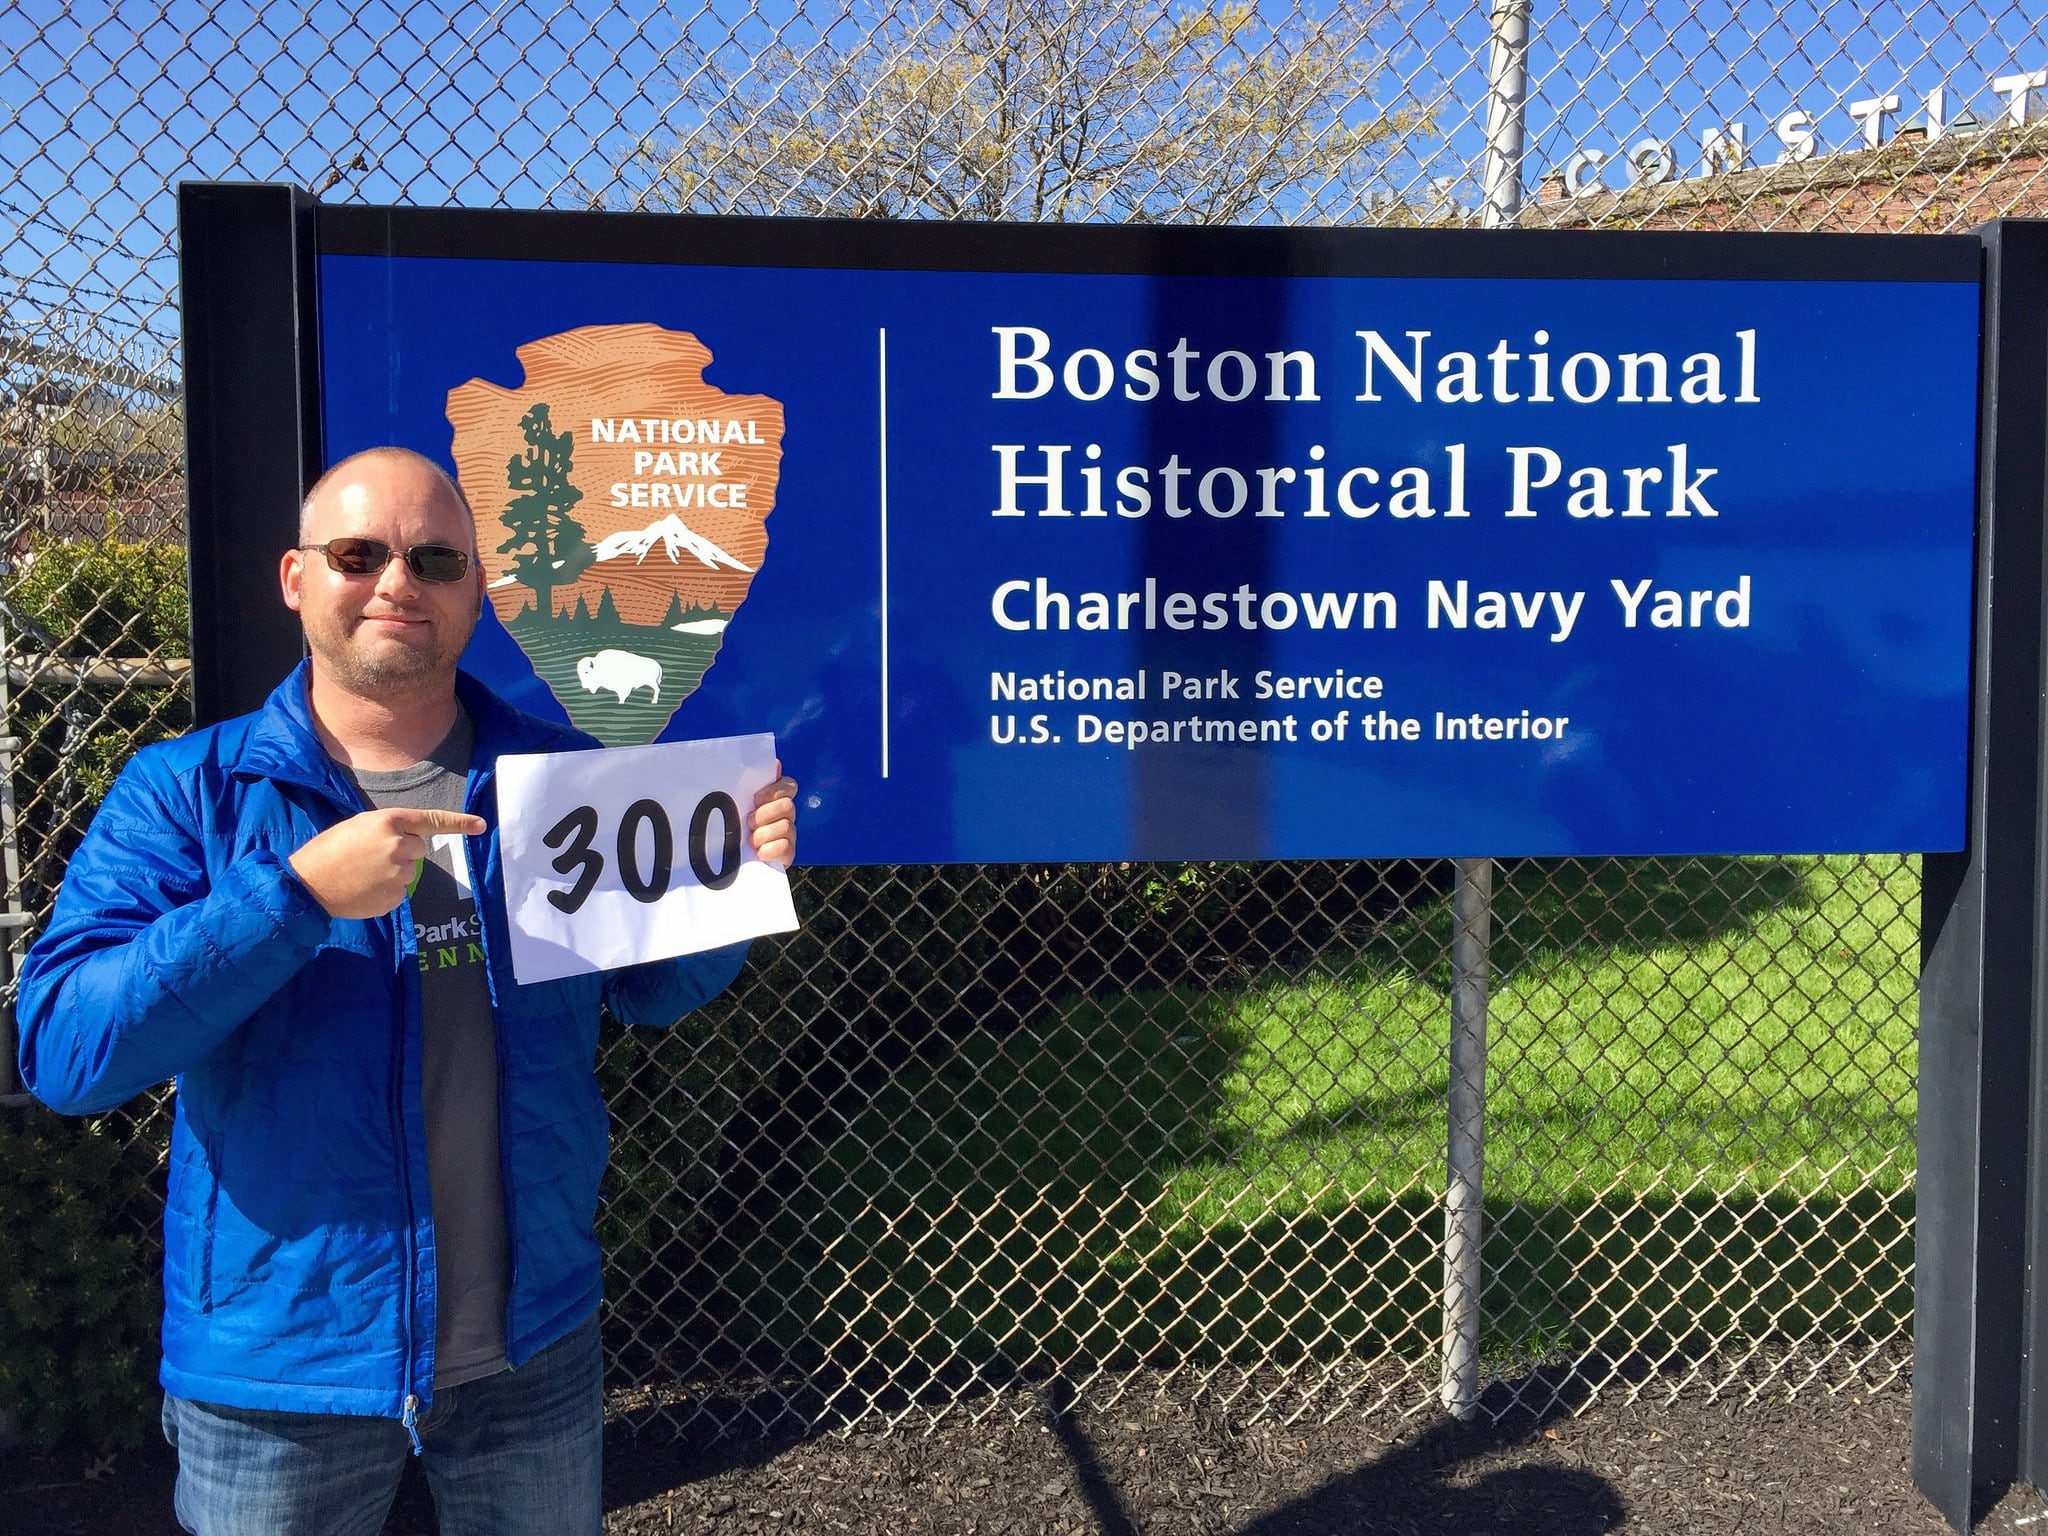
One of my favorite traditions is holding up a number indicating how many parks I've been to at each new park unit I visit. Unfortunately, I didn't consider doing this until I had already been to 267 of them. So while I'm nearly up to unit 400 by now, I'm still missing 2/3rds of the shots I would have had—had I simply considered what type of traditions I should create when I first started the quest. Now maybe the idea wouldn't have come to me at the time, but I really wish I had at least spent 10 minutes proactively thinking about it before I got started.
Here are some common national park traditions:
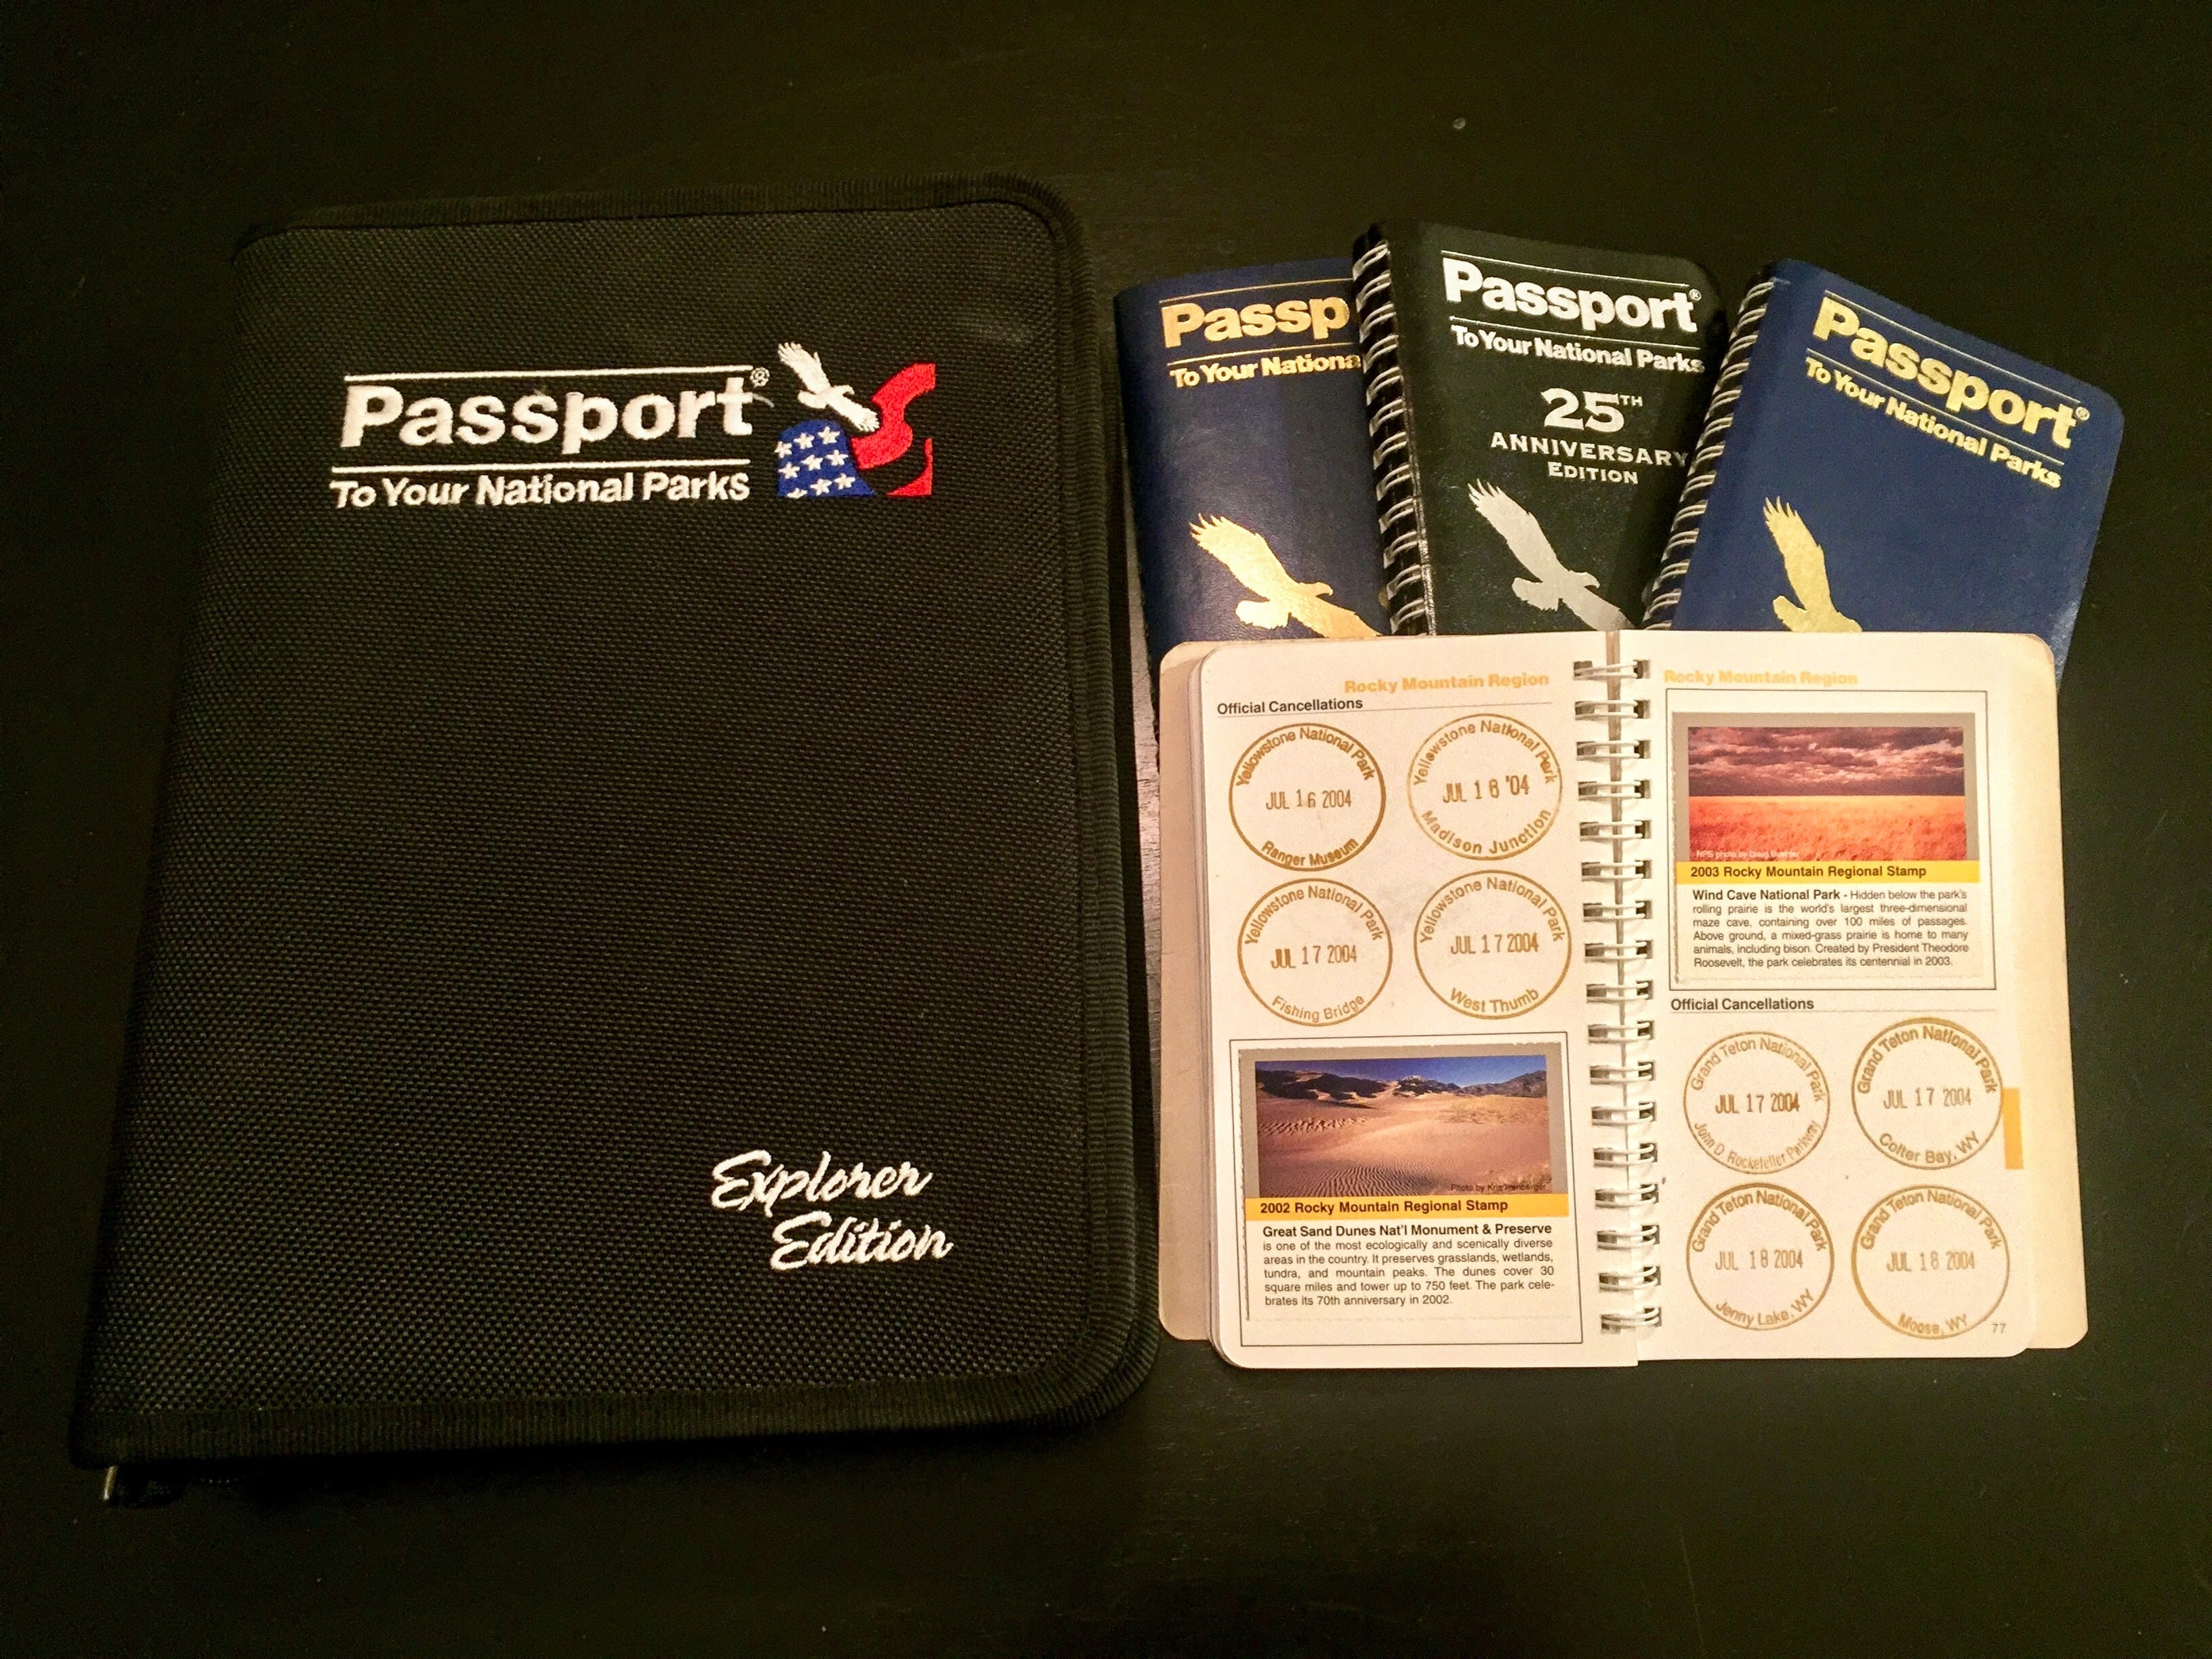
- Photo of the park entrance sign
- Getting a park passport stamp
- Watching the park movie
- Completing a Junior Ranger program
- Photo of a park's Mather plaque
- Attending a ranger program
- Photo of a traveling "tchotchke"
- Taking a selfie with a park ranger
- Mailing themselves a postcard from the park
Collect something from each park
Similar to creating special park traditions, many park questers begin collecting certain items from each park. Maybe it's a magnet, or a pin, or a patch. Or maybe it's a postcard with a park passport stamp on the back. Others might pick out a book, or a little trinket. And just about everyone takes home an iconic "unigrid" park brochure.

These can make for great displays memorializing your adventures in the parks. But again, my advice is to think carefully about what you want to collect before you start off on your national parks quest. When I first started out, I thought it'd be great to collect patches. And so I collected scores upon scores of them. Until, that is, I realized that it was going to be hard to ever display them in a useful way. Was I going to spend $5 on a parks patch, and do so hundreds of times over, just to have them sit in a shoebox? Because I have more than hundred that have been just sitting there ever since. Had I thought it through a bit more, I likely would have opted for something else to collect. In the end, I switched over to pins, which I have in two large display cases on my hallway wall.
I shouldn't have to say this, but your collection shouldn't include any park resources—leave those at the park. Yes, that includes things like pine cones, small rocks, or any other items you didn't buy at the park bookstore or receive from a park ranger.
Keep track of the personal stories, not the park facts
Lastly, I'd recommend that if you do end up documenting your national park adventures—whether that's in a journal entry, a blog post, or even a video—that you don't just focus on park facts. A decade into your quest, you won't care about that stuff, which is just a quick google search away if you need it. You probably don't need to transcribe what type of sandstone that arch is made of. You don't need to remember how old John F. Kennedy was when he moved away from his childhood home. The number of Japanese Americans interned at Manzanar NHS isn't what you'll wish you recorded in your journal, or had committed to memory.
Instead, focus on how you felt while you were in the park. What had you been most excited about before arriving, and what surprised you about the place once you got there? Did something you learn change the way you think about something else? What was it like to emerge from that dense forest onto the shore of that backcountry lake? How did it feel to stare at John Muir's personal desk? What did you imagine when you read the stories of immigrants at Ellis Island? Who did you wish was with you to experience that sunrise on Cadillac Mountain? What memory did the smell of the creosote in Saguaro National Park immediately conjure up? How did you feel when you arrived home after the trip?
Those are the types of items to journal or blog about when you reflect on your latest national park visit. Trust me—those are the details that you'll most appreciate looking back on decades from now.
Don't have a travel quest yet?
You should. You'll love it. And I promise you that it'll be worthwhile. Read my guide to questing to get started.
If you love quests, or are thinking of getting started, check out #GoQuesting.
Why you should adopt a personal travel quest
I believe that travel quests are one of the best ways to inspire more travel. In fact, the original name of this blog was originally going to be VisitEveryPark.com—an ode to the quest that inspired so much of my own travel. That's how powerful I think quests can be to getting out and adventuring more.
Virtually everyone I know that travels frequently for pleasure is pursuing at least one personal travel quest. But that doesn't mean that their travel is always focused on those quests. Quests just tend to inspire you get out and adventure more.
So if you want to travel more, try adopting a travel quest of your own. Here's everything you need to know to get started.
The two types of quests
Personal quests are divided into two main types: ones that "count down" and ones that "count up." Some quests work better for counting down while others are better for counting up.
Quests that count down
Quests that count down usually take the form of "Visit all of the ________." As in, visit all 50 states, visit every National Park unit, or visit every craft brewery in the state. There are a finite number of stops baked into the goal, and you're usually trying to visit all of them. So you're counting down how many you have left. Now, that doesn't mean that the quest number stays static—it may not. For instance, when I started my National Parks quest, there were 379 units, whereas today, there are 417. But while the number may change, my personal goal really does stay the same: to visit all of the National Park units (however many that may be right now).
These types of quests are my favorite, but they're a bit harder, as you don't have any flexibility of which places are included. That's a big part of the challenge, and often requires a little strategy and foreplanning to pull off so that you don't "orphan" something off by itself that would require an additional trip.
Quests that count up
Quests that count up (e.g., "visit 100 countries before I turn 50") are still focused on a goal, but usually involve just a subset of the available destinations. For instance, visiting 100 countries is a big task, but it's quite a bit easier than visiting every country. These quests usually have a more specific deadline than "visit them all" style quests, often related to one's age. In addition, this type of quest is regularly expanded once the initial goal is reached. To continue the example, if you successfully visit 100 countries, you might extend the goal to 150 countries—or possibly even shift to a "counting down" quest and try for all the countries.
What about bucket lists?
I don't consider bucket lists, at least as they're traditionally defined, to be travel quests. Bucket lists are usually a rather random collection of destinations to visit, activities to complete, experiences to have, and accomplishments to achieve. They're a personal list of things to do before you die, where the items have no direct relationship to one another. Bungee-jumping, visiting the Taj Mahal, and earning a master's degree are too different of things to be considered a quest. Don't get me wrong, I think a bucket list is a worthwhile goal to pursue. It's just something different than a travel quest, so I won't cover them in this post.
Do challenges count?
Similarly, I usually don't consider personal challenges—like the popular 52 Hike Challenge—as quests, mostly because they tend not to be tied to specific destinations. Depending on the details of the challenge, however, they might be closely related and therefore share some of the traits I mention below. I'll address these personal challenges in a future post.
Travel quests help you travel more
Several qualities of travel quests help inspire travel. Here are some of the ways that quests have helped to inspire me to travel or adventure more often.
Quests ensure that you experience new places
It's easy to go back to the same ol' places when you travel. You know what to expect. You know how to get there. You know, generally, how the trip will go. It's comfortable and easy. It doesn't need as much planning, or require new gear purchases, or create any anxiety or angst. It's safe and familiar.
But it also doesn't expand your horizons, or teach you anything new, or provide you with an exciting new experience. In some ways, you lose out on quite a few of the inherent benefits of travel. Quests, on the other hand, help inspire you to visit different places, attempt new activities, adopt new perspectives, and expand both your skills and your comfort zone. That, in turn, helps expand your confidence to travel to even more places. The more you travel, the easier it gets.

Quests force you to go to places you might not otherwise go
A related benefit of quests is that they force you to go to places you might not otherwise visit. Not everyone would see that as a benefit, but you might be pleasantly surprised with places you had no intention of visiting. For instance, I had zero interest in visiting Topeka, Kansas—zero—but had to visit Brown vs Board of Education National Historic Site for my national parks quest. As a white male, I had never really understood what racism felt like, nor had I really sought out any experiences to learn. However, that visitor center had an amazing video display in a hallway that made you feel like you were one of the Little Rock Nine. It was one of the most enlightening experiences of my life. That's just one of several examples I could point to.
Quests impose some structure to your travels
Another benefit of quests is that you always have something on your "To Visit" list. It's easier to plan trips because you always have something on the agenda. Some people end up not traveling as often as they'd like simply because it's hard to narrow down the glut of available options—a sort of paradox of choice. Quests, however, can help impose some sidebars to your travels. You know that you want to make progress on your quest, so you've already limited available destination options to a more manageable number.
Quests serve as a goal
Quests provide an inherent incentive to travel more—a motivation to complete the quest by the deadline. As a result, you're more likely to pursue travel when opportunities arise. Let's face it, there are always plenty of barriers to travel; staying home is far easier than planning and completing a trip. Having a running goal helps ensure that there's a bit more impetus for making that trip idea come to fruition.
In a similar fashion, quests tend to inspire you to add more to your trip itinerary. "Hmm, what else could I mark off while I'm in the area?" is a common thought to someone with a quest. When you develop that attitude, you tend to bypass the barriers to travel that keep others at home.

Quests often contain some social pressure
Once you start to make some progress on your quest, especially if you do so publicly on a blog or on social media, you begin to generate a bit of public pressure to continue. This social reinforcement helps keep you on track and making progress. The more "public" your quest, the more reinforcement you get. Once friends and acquaintances learn of your quest, you'll likely get future inquiries on your recent progress—which helps to motivate you to keep marking off destinations.
Quests make unfun travel "worth it"
If you've done any amount of travel, you know that it's not all fun. Sometimes, it can be an absolute slog. The weather doesn't cooperate, you get stuck in traffic during your drive, you have to endure extended flight delays, and so forth. These delays and annoyances are a bit more tolerable if your trip involves making progress on a quest; after all, you're still completing something important to you.
Conversely, having a subpar experience while marking off a quest objective also makes you better appreciate the places that were great experiences.
Quests inspire more quests
Just as travel tends to inspire more travel, adopting travel quests tends to lead to even more quests. It's an interesting phenomenon—the more success you have completing your own personal quest, the more interested you get in adopting new quests or expanding your current quests. Travel inspires travel. The more places you check off your list, the more you add back onto it.
Quests make you feel accomplished
Completing one's goals usually leads to feelings of personal satisfaction. And finishing a big travel quest? Well, "feeling accomplished" might be an understatement. Now, it's a great feeling to finally complete a quest, even if it's not the most challenging one on your list. But it's absolutely true that the harder the quest, the greater the satisfaction. Either way, you'll routinely smile with pride whenever you recount the accomplishment in the future.
In addition, I tend to get regular praise from both friends and acquaintances, who often introduce me to others as "the guy I told you about that's trying to visit all the national parks." Sure, some people will occasionally be jealous, but most come away impressed and supportive. As an excellent side bonus, those that hear your goals will be encouraged to travel more. Truth be told, it's one of the main things that drives me to publish this site—I love the feeling of inspiring others to just get out more!
How to choose a travel quest
What's your hobby?
Do you love old cathedrals? Maybe you should go see a bunch of them. Maybe you feel most alive when you've conquered a tall mountain peak? Sounds like you need to do some peak bagging. Do you enjoy eating at windowless Chinese restaurants located in sketchy Phoenix neighborhoods? Ehh, on second thought, maybe you should skip that one—that would be a ridiculous quest, right? Anyway, the point here is to choose whatever sounds like it could be fun for you.
Or you can simply be open to the idea when you accidentally stumbled onto something interesting, as I often have. Sure, my early national park road trips quickly evolved into a broader quest to visit them all, and I've purposefully selected other quests for a specific reason. But my High Points of Otherwise Flat States quest arose from a friend's simple tongue-in-cheek comment that I should climb Mount Sunflower while I was driving through Kansas. I thought to myself, "Sure, why not?" and proceeded to have a good chuckle when I made it to the so-called summit. And a quest was born.
Similarly, I thought it'd be funny to visit the World's Largest Ball of Twine in Cawker City, Kansas on that same trip. I had a blast, and even ended up going to door-to-door in the town to find some twine so I could add to the ball. When I learned that two other twine balls also considered themselves to be the "World's Largest?" Well, I obviously had to go and judge for myself. Bam! Another quest.


Sharing a quest with someone
Sharing a travel quest with a close friend or significant other is an excellent bonding experience. It's fun to travel with people you enjoy spending time with, especially when you're chasing the same goal. Sharing expenses, driving duties, and trip planning often makes it all a bit easier, too. But, just like sharing a popular tv show like Game of Thrones with someone, it's also fraught with some potential downsides. Two people means that there can be twice as many barriers to travel, for instance—be it schedule conflicts, money woes, or a lack of motivation. It can be frustrating when you're excited to mark off the next items on your quest only to have your friend bail due to last minute work demands. Are you even allowed to mark off a destination without the other person? And if your quest was a "special thing" in your relationship that just ended in heartbreaking fashion, well...do you keep pursuing it? Spending a few minutes thinking these things over before you commit to a joint quest is probably a good idea.
Can you have more than one quest?
Of course! I have quite a few quests I'm currently working on. Some of them are long-term and difficult to complete, such as visiting 50 countries before I'm 50, or visiting all 419 National Parks units. Others, like visiting all of Arizona's State Parks, are far easier and can be accomplished on the weekends over the course of a year. I even have some "back burner" quests that I've adopted but aren't actively pursuing at the moment (primarily because of other, higher priority quests).
Micro-adventuring using mini quests
Not all quests need to be difficult or require substantial travel to complete. Some can be local and easy to accomplish, like picnicking in every public park in your town. These type of mini quests can help lead to small, everyday adventures that can be surprisingly fun.
For instance, my friend Wayne and I actually did complete that local quest to visit every sketchy Chinese restaurant in downtown Phoenix, complete with our own hybrid rating system. It wasn't hard to schedule several lunch visits over the course of a few months, but we had an absolute blast doing it. We even ran across a couple of legitimate gems...though the majority were definitely places to avoid. Our friends found the whole thing hilarious, so they'd often send us tips on possible restaurants to add to our quest list or check in to see when our next lunch was. The point here is that, no matter where you live, there are quests to be pursued.


Setting some rules
Exactly what is included in the list?
The first thing you'll need to decide is what exactly is on the list you're trying to complete. On the surface, this sounds rather elementary, but it can be more complicated than you might think. Let's use the example of a quest to visit every brewery in your state. First, which breweries count? Is it only locally-owned craft breweries, or are chain breweries included too? What about places that white label their brews, or ones that brew off-site? And keep in mind that these numbers might change as new breweries open and others close. Do you lose your "completed" status if another one opens the week after you finish them all? Or is your quest only focusing on the breweries that were in existence when you started the quest? A bit of thought will help sort this all out before you get started.
Exactly what counts as a visit?
Another important rule you'll need to decide on is "what counts as a visit." For instance, does a country visit count if you simply pass through its borders on a train and never deboard? Does it count if you drive across town to visit a craft brewery but they've inexplicably run out of their own beer? Are you allowed to count visits that occurred before you started the quest? These questions are best decided before you begin your quest—and trust me, they're bound to come up along the way.
Here's an important thing to remember: it's entirely up to you to decide what rules you follow. If you want to count airport layovers as visiting a particular state, then by all means go right ahead. Your quest = your rules. Quests are for you, after all, not for anyone else.
Starting a tradition
I think traditions are particularly important components of quests. Some people dance, while others collect passport stamps, or repeat the same selfie in front of an entrance sign. Some bring a trinket or figurine that they photograph at each destination. It doesn't matter exactly what you decide to do, but I'd recommend adopting at least one tradition for your quest. I tend to have several traditions for each quest I undertake. Some demonstrate my quest progress, such as holding up a sign of what park number I'm on. Others, like a selfie of me in front of the park sign, will be part of a fun slideshow when I'm finally done. Whatever you decide to do, the earlier you start these traditions the better.
Generating some evidence
Most travelers end up with some form of evidence of their various quest visits. For some, it's a photograph of themselves at a famous landmark, or it might be a passport cancellation, or a national park passport stamp. Whatever tradition(s) you adopt, make sure that at least one of them produces some tangible evidence of your visit. While quests are for your own benefit—not for others—you'll still appreciate this evidence by the time you approach your quest goal. Just trust me on this.
Keeping track of your progress
Bust out the spreadsheet
You'll definitely want to keep track of your quest progress, and spreadsheets tend to be the easiest way to do that. If you don't own a copy of Excel or Numbers, there are free online versions such as Google Sheets or Excel Online. Spreadsheets are great for keeping track of more than just which destinations you've visited and which ones you have remaining. You can also keep track of a wide variety of other useful information, such as the date of your visit, links to any photos or videos you posted from the visit, or other details that'll inform a future visit. Believe me, it's a whole lot easier to create and use a system to keep track of your progress than having to go back and researching it each time.
Note: if you're adopted a quest to visit all of the national parks, I've made a spreadsheet counting tool available at rscottjones.com/countparks. Download a copy or add it your Google Drive to edit it.
Know your number
You'll always want to know what your current "number" is, meaning how far along your quest you are. When someone asks you for an update, you should be able to easily answer ("I've been to 88 countries, just 12 more to complete my quest!"). And when you mention your quest to someone, expect their first question to be how close you are to finishing. Also, by keeping track of where you stand on your quest, you'll help stay motivated to continue increasing that number.
Establish and celebrate milestones
If you've adopted a long quest that'll take a number of years (or even decades) to complete, then it's worthwhile to add some intervening milestones to shoot for. I like attaching some deadline goals for some of these to help ensure that you remain on track for completing the larger quest. Be sure to celebrate completing each of these milestones, too—you deserve it.
Visualizing your progress
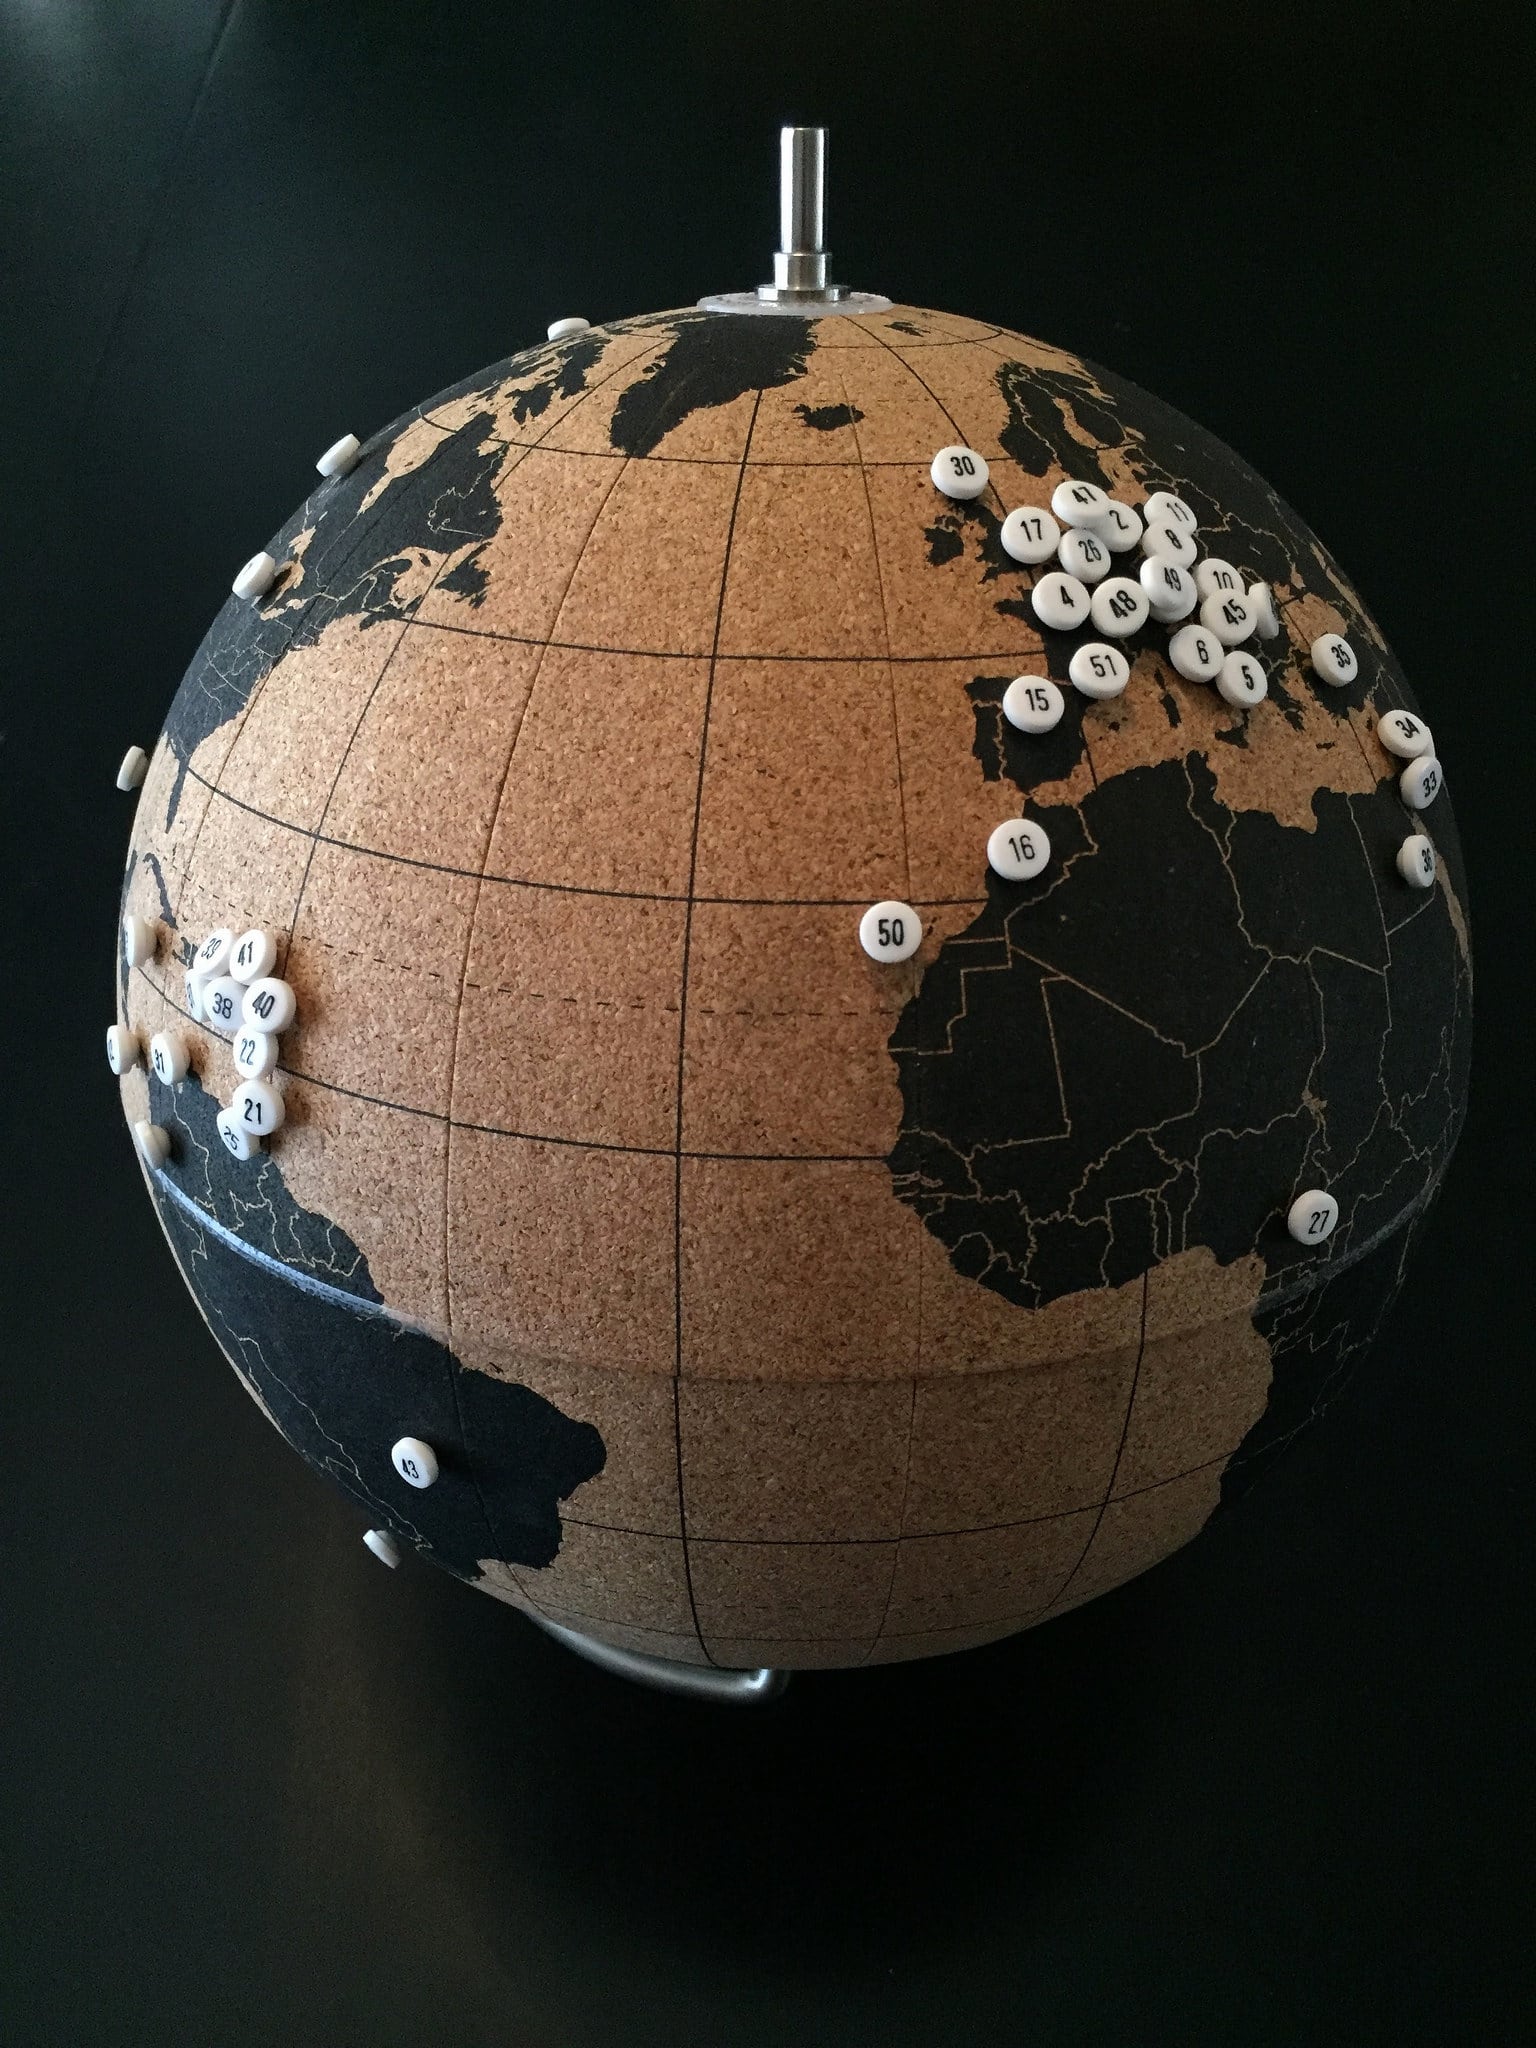
Visualizing your progress is an especially fun part of quests. If you've adopted a common quest, like visiting all of the national parks, visiting all 50 states, or marking off countries, you'll have quite a few options at your disposal. There are a variety of products, from cork-backed wall maps to scratch off wall maps, and cork globes to image-generating apps—and quite a few other options, too. You can personalize your own paper map by taking a highlighter to the places you've been, or photoshopping a digital map, or by simply hanging postcards on the wall.
No matter which approach you choose, I recommend doing something to show the progress you've made. Not only is it a great reminder and motivator to keep at it, but it's also a celebration of your efforts to date.
Documenting your journey
Depending on how you go about doing it, documenting your quest travels can seem nearly as time consuming as actually doing it. But that's a big part of the experience, too. Most everyone takes photos and/or videos of their travels, and you should too. However, don't rely solely on capturing everything via social media—and especially not in nondurable formats that disappear after 24 hours. These are memories you want to keep, after all.
I also strongly recommend blogging or journaling about your quest, too. Don't worry if you're not especially disciplined in doing it, or if you end up with big gaps. Something is better than nothing. Just the act of reflecting on your trip can make it more meaningful and tease out some unexpected insights. You may also come to appreciate the time you took to record a bit about your trips in subsequent years. Failing to do a better job of that and relying on memory recall alone is a common regret among longtime travelers.
Examples of popular quests
Probably the most popular quest of Americans is to visit all 50 states. Quite a few are also counting countries or national parks. Others are trying to catch a game in every MLB ballpark or NFL stadium. There really are a countless number of quests that you could adopt. I've included some sample ideas in the sections below to get your imagination primed.
[powerkit_tabs type=“tabs” nav=“horizontal”] [powerkit_tab title=“Local”]
Local quests are excellent ways to explore beyond your own neighborhood. Many of these amount to “mini quests” that are easily accomplished over the course of a few weeks or months. Obviously, these quests vary substantially depending on where you live. If you live on Maui, then a quest might be to snorkel off every beach on the island; whereas if you live in Kansas City, it might be to eat at every BBQ restaurant.
Here are some ideas to get you thinking:
- Picnic in every city park
- Hike every official trail
- See a movie in every theater
- Play every golf course
- Swim in every public pool
- Enjoy a staycation at every resort
- Eat at every sketchy Chinese or Mexican restaurant *
- Sip coffee at every coffeeshop
[/powerkit_tab] [powerkit_tab title=“State/Regional”]
Quests that cover your own state or province are probably the best ones to start with. They offer a bit more of a challenge than local quests, and there tend to be a sufficient number of destinations—such as counties or state parks—to make the quest both challenging yet accomplishable.
- visit every county
- enjoy a pint at every brewery or a glass at every winery
- tour each history or historical society museum
- hike in every designated Wilderness Area
- play a round at every golf course
- visit every state or provincial park
- cruise every scenic drive or backcountry byway
- explore every accessible National Natural Landmark
- summit every county high point
- stay in each historical hotel
- enjoy every zoo
- conquer all the Colorado 14ers
- climb each of the New England 4000 footers
- summit the closest 50 peaks to your house
Quests start to get quite a bit more challenging when they span the entire country. For many, this is the sweet spot for lifetime quests. You’ll end up doing a lot of domestic travel, but much of it can be done by car and you don’t have to worry about visas, currencies, or foreign languages.
- visit every state or province
- hell, visit every territory, too
- tour every National Park
- catch a game in each stadium or arena of your favorite sports league
- mark off every county
- drive every interstate highway segment
- tour every State Capitol building
- recreate in each National Forest
- visit all the sites associated with the Manhattan Project
- swim in all 5 Great Lakes
- take a selfie on every State High Point
- section hike a long distance trail
- marvel at all three World's Largest Balls of Twine
- summit 500 total peaks
- Presidential birthplaces, gravesites, or libraries
Obviously, these quests tend to be the most difficult, as they require the most travel to complete. But, wow, what adventures you’d have!
- stay overnight in 100 countries (or all of them)
- snap a selfie in each of the Seven Wonders of the World
- pay your respects at the holy site of every major religion
- step foot on all 7 continents
- stand in line at every Disney theme park
- visit 100 UNESCO world heritage sites
- complete the Seven Summits
- call your mom from every country in Europe
- sail on every ocean
- visit a town in every timezone
Have you adopted a quest?
If so, let me know what you quest is in the comments below—and be sure to tell me how far along you are.