
Places
The Largest City Parks in the United States
Below is a list of the 15 largest city parks and preserves in the United States.
Four out of five
When most people think of Phoenix, they think of endless suburban sprawl. And, certainly, that's part of the story. But here's something that many are surprised to learn:
Four of the five largest city parks are located in metro Phoenix.
As in, municipal parks that are located entirely within city boundaries and are managed by city parks department staff1.
But that's not all...
The Phoenix metro area is also encircled by the nation's largest county park system2, which includes 12 regional county parks comprising about 120,000 acres. The 315-mile Maricopa Trail (and its sister 120-mile Sun Circle Trail) also encircles the metro area by connecting many of these county parks.
And of course, metro Phoenix also borders the famed Tonto National Forest (the ninth largest in the country at over 2.9 million acres), the nearly 500,000-acre Sonoran Desert National Monument, and several million acres of BLM public lands.
You may only think sprawl when you think of Phoenix, but you should probably also think parks, public lands, and preserves, too.
| Park Name | Acres | City, ST | Est3 |
|---|---|---|---|
| McDowell Sonoran Preserve | 30,580 | Scottsdale, AZ | 1994 |
| South Mountain Park/Preserve | 16,281.8 | Phoenix, AZ | 1924 |
| Phoenix Sonoran Preserve | 9,612.4 | Phoenix, AZ | 1998 |
| Cullen Park4 | 9,269.8 | Houston, TX | 1984 |
| Skyline Regional Park | 8,700 | Buckeye, AZ | 2016 |
| George Bush Park | 7,800 | Houston, TX | 19455 |
| North Mountain/Shaw Butte Preserve | 7,500 | Phoenix, AZ | 1972 |
| Mission Trails Regional Park6 | 7,220 | San Diego, CA | 1974 |
| Jefferson Memorial Forest | 6,218 | Louisville, KY | 1945 |
| Forest Park | 5,157 | Portland, OR | 1948 |
| Piestewa Peak/Dreamy Draw Preserve | 4,857 | Phoenix, AZ | 19557 |
| Lake Houston Wilderness Park | 4,786.6 | Houston, TX | 2006 |
| Eagle Creek Park | 4,766 | Indianapolis, IN | 1972 |
| Far North Bicentennial Park | 4,500 | Anchorage, AK | 1976 |
| Griffith Park | 4,282 | Los Angeles, CA | 1896 |
Sprawling cities = sprawling parks and preserves?
As you can see, the Phoenix and Houston areas absolutely dominate the listings.
That's interesting, as those two cities (along with Los Angeles) are probably the poster children for "urban sprawl" in the US. But the ability to expand outward also provides an interesting opportunity to protect undeveloped land in a way that more dense and established cities like New York, Boston, or even Chicago, would struggle to do.
At the same time, Phoenix was a bit of an outlier. It purchased South Mountain Park from the federal government way back in 1924, just a dozen years after statehood and while the city was still quite small—about 5.1 square miles with a population of 38,500, though growing as fast as ever. Even with the property still 7.5 miles away from city limits, city leaders feared that this was their only opportunity to preserve the best nearby recreational areas. They ended up purchasing an area about 5 times larger than the city itself.
Houston's largest parks, on the other hand, are derived from lands enclosed by federal reservoirs, presumably for flood control and drainage, as the city is located in bayou country. I don't know the specific history at play, but surmise that its large parks were created because the reservoir land would otherwise be "unused" for commercial purposes; whereas in Phoenix's case, it was a very concerted effort to proactively protect prime locations from development.
Note: while I've done my best to be accurate in this post (I've even contacted several cities above for accurate numbers, though I never seem to get a reply), it's surprisingly difficult to find simple, accurate answers. Part of that is because land acquisitions continue (yay!), and older information isn't always updated. But my main purpose in this post is pointing out how many large parks and preserves metro Phoenix has, so even if a few numbers have changed, you still get the picture. If you find an error, please send it to me so I can update this!
Last updated: May 23, 2024
Visiting America's most obscure National Monument
Yesterday I visited one of the most obscure national monuments in the nation: the Military Working Dog Teams National Monument, located on the grounds of Lackland Air Force Base in San Antonio, Texas.
The national monument—which is best described as a national memorial—is the only one managed by the Department of Defense (in conjunction with the Airmen Heritage Foundation) and one of only two Treasured Places that are located on an active military installation (the other is Port Chicago Naval Magazine National Memorial).
While the national monument was designated as a rider in the FY2008 Defense appropriations bill, it wasn't opened to the public until late 2013. Well, open to the members of the public that can pass a background check and obtain a visitor pass from the military base, at least. Luckily, there's a law that allows for reasonable public access for visitors—and their dogs—to the national monument. That said, you'll want to give yourself some extra time to wait for the required background check before you can gain access to the site.
A "daytrip" to San Antonio
As one of the most obscure national monuments in the country—and with my travel focused on completing my National Parks quest—I didn't have it on my radar until I decided to tackle the Treasured Places list. So I really kicked myself for not having included it the last three times we were recently in the San Antonio area.

As the second-from-last Treasured Place I needed to visit to finish, and with a deadline to finish approaching, I needed to get there soon. After weighing the options of driving versus flying, it become obvious that it would be a lot cheaper, and much quicker, to fly. So I booked the cheapest ticket I could find to fly from Phoenix to San Antonio, along with the cheapest return ticket I could find for later the same day. I would be taking a "daytrip" to San Antonio, just to finish this one weird little national monument.
Visiting the National Monument
This is definitely one of the more unusual national monuments you'll visit. While it's less than a mile to the memorial site from the Valley Hi entrance to Lackland AFB, you'll need to spend some time in the "Visitor Center" to receive your visitor pass. Make sure you bring your drivers license and don't have any warrants. Once through the front gate, it's a quick drive to the parking area and an equally short walk to the site itself. And, truth be told, it's also a relatively quick site to visit. You'll need just a few minutes to experience everything this national monument has to offer.
The main bronze sculptures are on a granite platform showcasing a soldier flanked by four different breeds of military dogs, which is shadowed by a large granite wall. On one side of the wall is some descriptive text, while the backside features photos of military dogs in combat action. But the highlight of the site is tucked into a corner of the 3000-square foot plaza. Named the Not Forgotten Fountain, it depicts a Vietnam soldier pouring water from his canteen into his helmet to create a water dish for his dog—a moving tribute.


While the Military Working Dog Teams National Monument isn't likely to top anyone's "Must Visit" list, it's still a simple but well done memorial to an interesting subject. I hadn't really considered the role that dogs had played in military actions. And if you love dogs, you'll have a hard time not spending a few contemplative moments at the fountain.
A quick video tour
A few final thoughts
First, it's a bit weird to fly to another city only to return a few hours later. I'm used to only having carry-ons for most of my trips, but it's weird when you bring the smallest backpack you own and it's still essentially empty. I could have literally just carried everything I brought with me in my hands.
Similarly, I was asked several times by random strangers what brought me to San Antonio. I can't imagine what went through their heads when I answered that I had flown in specifically to see the Military Working Dog Teams National Monument. I am 100% certain that no one besides the guards at Lackland had ever heard of it before, but I got absolutely zero follow up questions. Answering that question was a total conversation killer.
I would have been pretty disappointed had this been the last site I needed to visit to complete the Treasured Places list. No offense, but yeah...it's just a memorial. But luckily, I had saved one spot I had been wanting to visit for well over a decade—a place I'll visit next week!

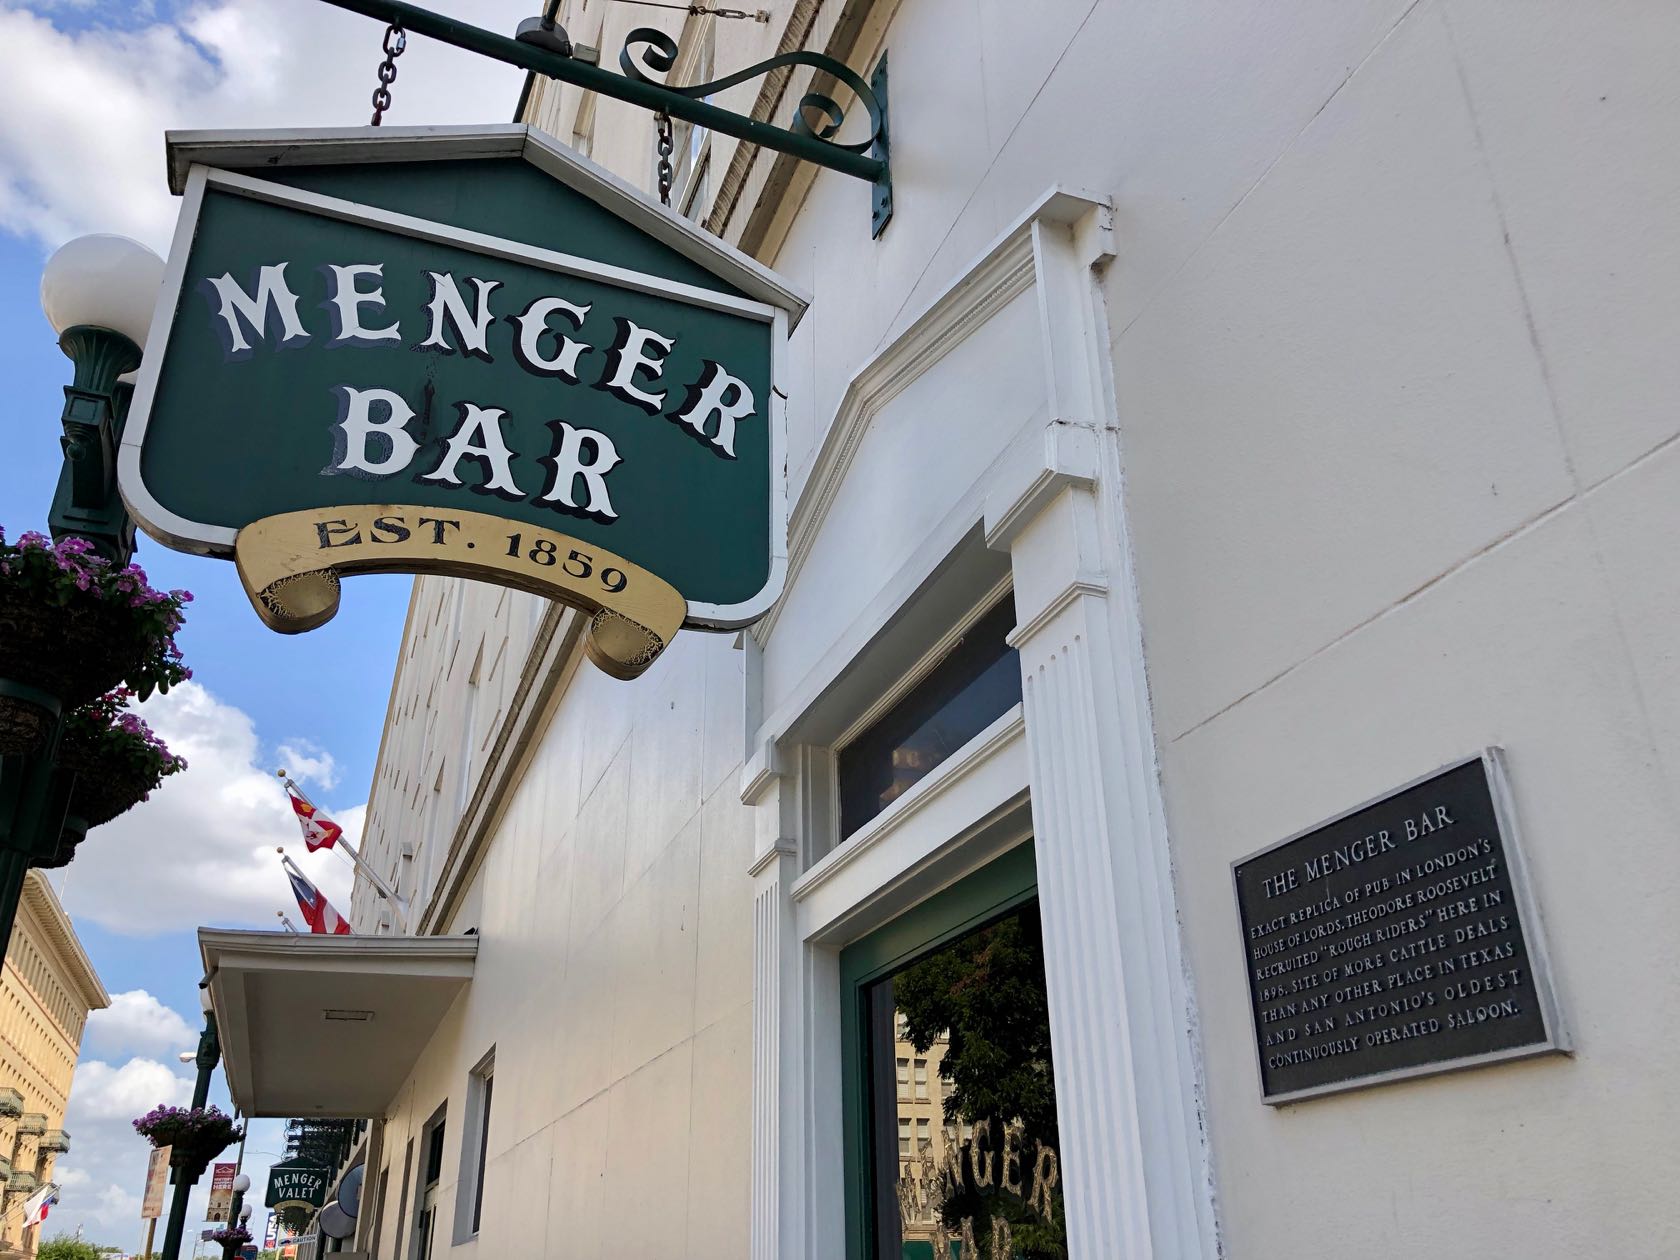
Having already visited San Antonio a number of times, and without much time to explore beyond the city, I made just a few stops. After lunch and beverages at Blue Star Brewing, I visited Menger Bar (one of the oldest bars in Texas—and where Teddy Roosevelt recruited Rough Riders). I then made a quick stop at San Pedro Springs Park, the second oldest park in the US and the origin site for the settlement that became San Antonio. From there it was back to the airport to fly home!
If you missed the short video of the National Monument above, scroll back up and check it out.
Exploring the Sears Point petroglyph site
“Hmm. Are you sure it’s out here?” she asked.
To be honest, it didn’t look very promising, at least not yet.
“Yep, it’s up ahead a few more miles,” I responded, in a tone that likely overstated my own confidence.
We had already driven an hour from Phoenix to Gila Bend, then another hour west along Interstate 8, then turned off at an exit to seemingly nowhere, jogged back east a mile along the access road, then turned north on an unremarkable dirt road impossibly named Avenue 76½ E. Along this rough-at-times road, we had passed two desert squatter communities, an out-of-place boat shipwrecked on the top of a small hill, and miles of seemingly barren desert.
Some skepticism was probably to be expected. After all, I hadn't exactly explained where we were going; I had just said that we'd find some rock art when we got there.
As it turns out, we were indeed on the correct road. A few miles further ahead was the Sears Point petroglyph site, an array of prehistoric and historic petroglyphs carved into a basalt ridge overlooking the floodplain of the once mighty Gila River. This is BLM land, a site well known by those who hunt rock art, but not a destination where you’ll find many tourists.
Finally, the road crested a small ridge, dipped towards the dry riverbed in the distance, and we could see our destination ahead. Ribbons of sandy driving routes spiderwebbed around tamarisk and mesquite clumps that dotted the lowland. I was glad to have my Subaru as we sloshed through deep pockets of sand and gravel, maintaining enough speed around the corners to avoid getting stuck. And just like that, we arrived at a patch of dirt sporting two informational kiosks and some carsonite signs indicating the road's end. We parked, stepped out of the subie, and immediately scanned the butte for the first sign of rock art.
"There's some over there," I said, nearly in code, and pointed towards a prominent panel gazing down upon us.
We grabbed some cold water from the cooler, donned our daypacks, and scrambled up towards the first panel with cameras in hand. And so began our rather impromptu visit to Sears Point.
The Sears Point petroglyph site
Archaeologists consider Sears Point to be one of the most significant rock art sites in the Southwest. In addition to more than 2,000 rock art panels incorporating nearly 10,000 petroglyph elements, the area contains a number of geoglyphs and other archaeological and historical features.
Simply put, there's a lot to see out here. And you'll need to do some exploring to see it.
Sears Point is just one of several other similar sites along the Gila River, including Quail Point, Hummingbird Point, and Oatman Point just a bit upstream. The only site signed from the interstate is Painted Rock, a now-defunct state park that's since reverted to BLM management. I won't get into what you'll find at each of these sites, how to get to them, or what makes them special, but a quick google search will answer most questions one would have.
It's important to note that while Sears Point is a named archaeological district, and is listed on the National Register of Historic Places, and is managed as an Area of Critical Environmental Concern by BLM, sadly none of these adds sufficient protection for this site or its neighboring ones.
The campaign to protect the Great Bend of the Gila
As a result, several organizations—led by Archaeology Southwest and the National Trust for Historic Preservation—have been campaigning to protect Sears Point and other important archaeological and historical sites upstream as the Great Bend of the Gila National Monument. It's a good idea and the cultural resources here are definitely worthy of such a designation.
The short video below explains a bit more about the cultural heritage this campaign seeks to protect.
Some tips if you plan on visiting
- You'll want an AWD or 4WD vehicle to drive to the parking area, though don't attempt it if it's rained recently. You could probably make the drive with a 2WD high clearance vehicle if you stopped short of the deepest sand, which starts around here, roughly a mile from the main petroglyph panels. Either way, be prepared to extricate yourself if you get stuck no matter what you're driving.
- Don't go in the summer heat, and be prepared with water and shade. You'll spend your entire visit scrambling over rocks while the sun beats relentlessly down on you, so please act accordingly. If it's warm out, you might want to consider gloves to protect your hands from hot rocks.
- If you don't have much time, check out the rock art panels near the top of the butte to the right. The largest panels and most easily accessible glyphs are found in that area, which will require some scrambling to get up to the faint trail that connects them. If you can, spend some time exploring the entire area, including the tops of the basalt mesas—there are thousands of petroglyphs, geoglyphs, rock alignments, and other artifacts in walking distance of your car. Stay alert to your surroundings and bring a gps to help you find your way back.
- Photographing sometimes faint petroglyphs on shiny basalt in the glaring sun can be a challenge, so keep this in mind as you plan your arrival and departure times. A circular polarizing filter can also be helpful in reducing shine and helping the rock art stand out better. An umbrella can both help keep you cool and shade smaller glyphs for better photographs. I wish I had considered these things before my visit.
- Practice Leave No Trace principles, and don't touch the petroglyphs or do anything else that might impact the site. Once damaged, we can never get these resources back.
- Want to learn more about lesser-known archaeological sites the public hasn't ever heard of? Here's the very best way to do that.
- Do some research before you go, especially on other nearby sites, if you'd like to make a longer day out of it. There are many accessible places to explore in the surrounding area and within the Great Bend of the Gila proposal area.

How to get there
From Gila Bend, Arizona, drive west on I-8 towards Yuma for roughly 30 mins to exit 78, Spot Road. At the end of the off ramp, turn north and then right on the frontage road. Head back east for about 1 mile to Avenue 76½E, then go north along the dirt road for about 7 miles. When you hit the sandy wash, stay on the most used route and aim for the low buttes to the west. You'll find a small dirt parking area and two kiosks; park here and explore the area on foot.
The Complete Guide to Kayaking the Salt River
Note: Stage 3 fire restrictions are now in effect, closing nearly all of Tonto National Forest to entry. However, the Lower Salt River is explicitly excluded from this closure order—you can still kayak!
BIG NEWS: This guide is currently being updated, expanded, and migrated to KayakingtheSaltRiver.com, which is the new home of the Alliance of Salt River Paddlers.
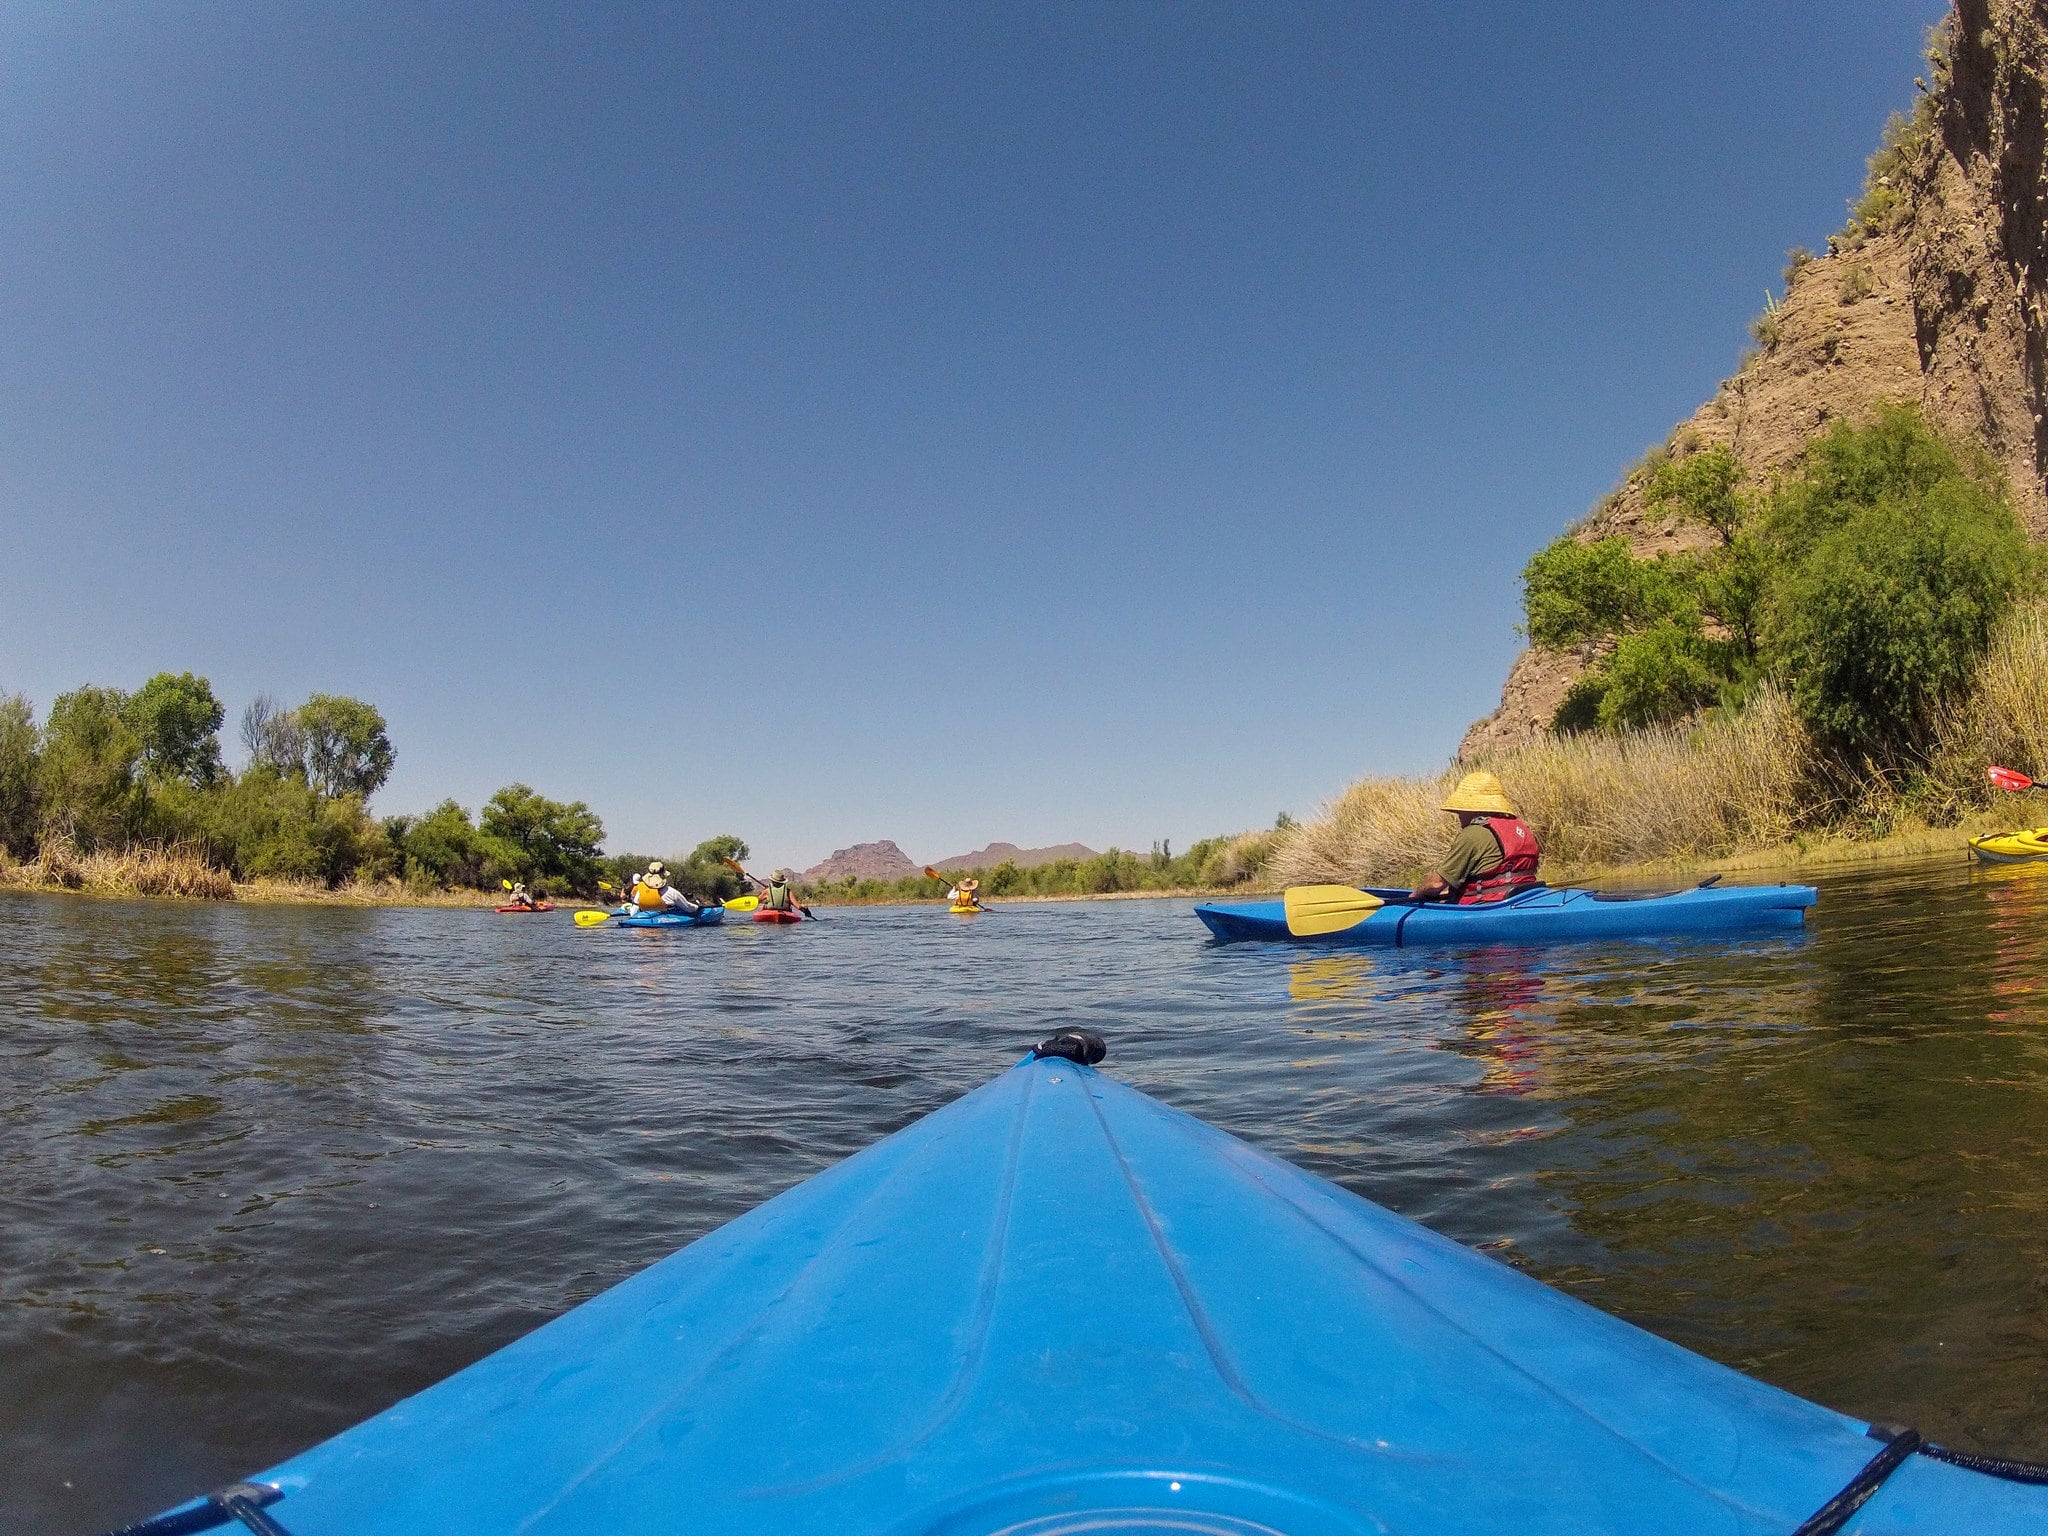
Kayaking the Salt River
On summer weekends, the Lower Salt River can resemble a drunken party scene. Hoards of inner-tubers converge on the river to cool off and have some summer fun. Beer cans, bikinis, loud music, and general shenanigans are easy to find, along with plenty of police officers and DUI checkpoints, too.
But that doesn't mean that the Salt River isn't a worthy kayaking destination. Indeed, it's a favorite of the metro Phoenix crowd.
→ This guide covers everything you need to know to kayak the Salt River.
Quick summary
Season: May-Oct
Ideal cfs: 500-1500
Experience level: Novice
Rapids: mostly Class I
River Miles: ~12
Vehicle shuttle required
Parking fee: $8 (Tonto Pass)
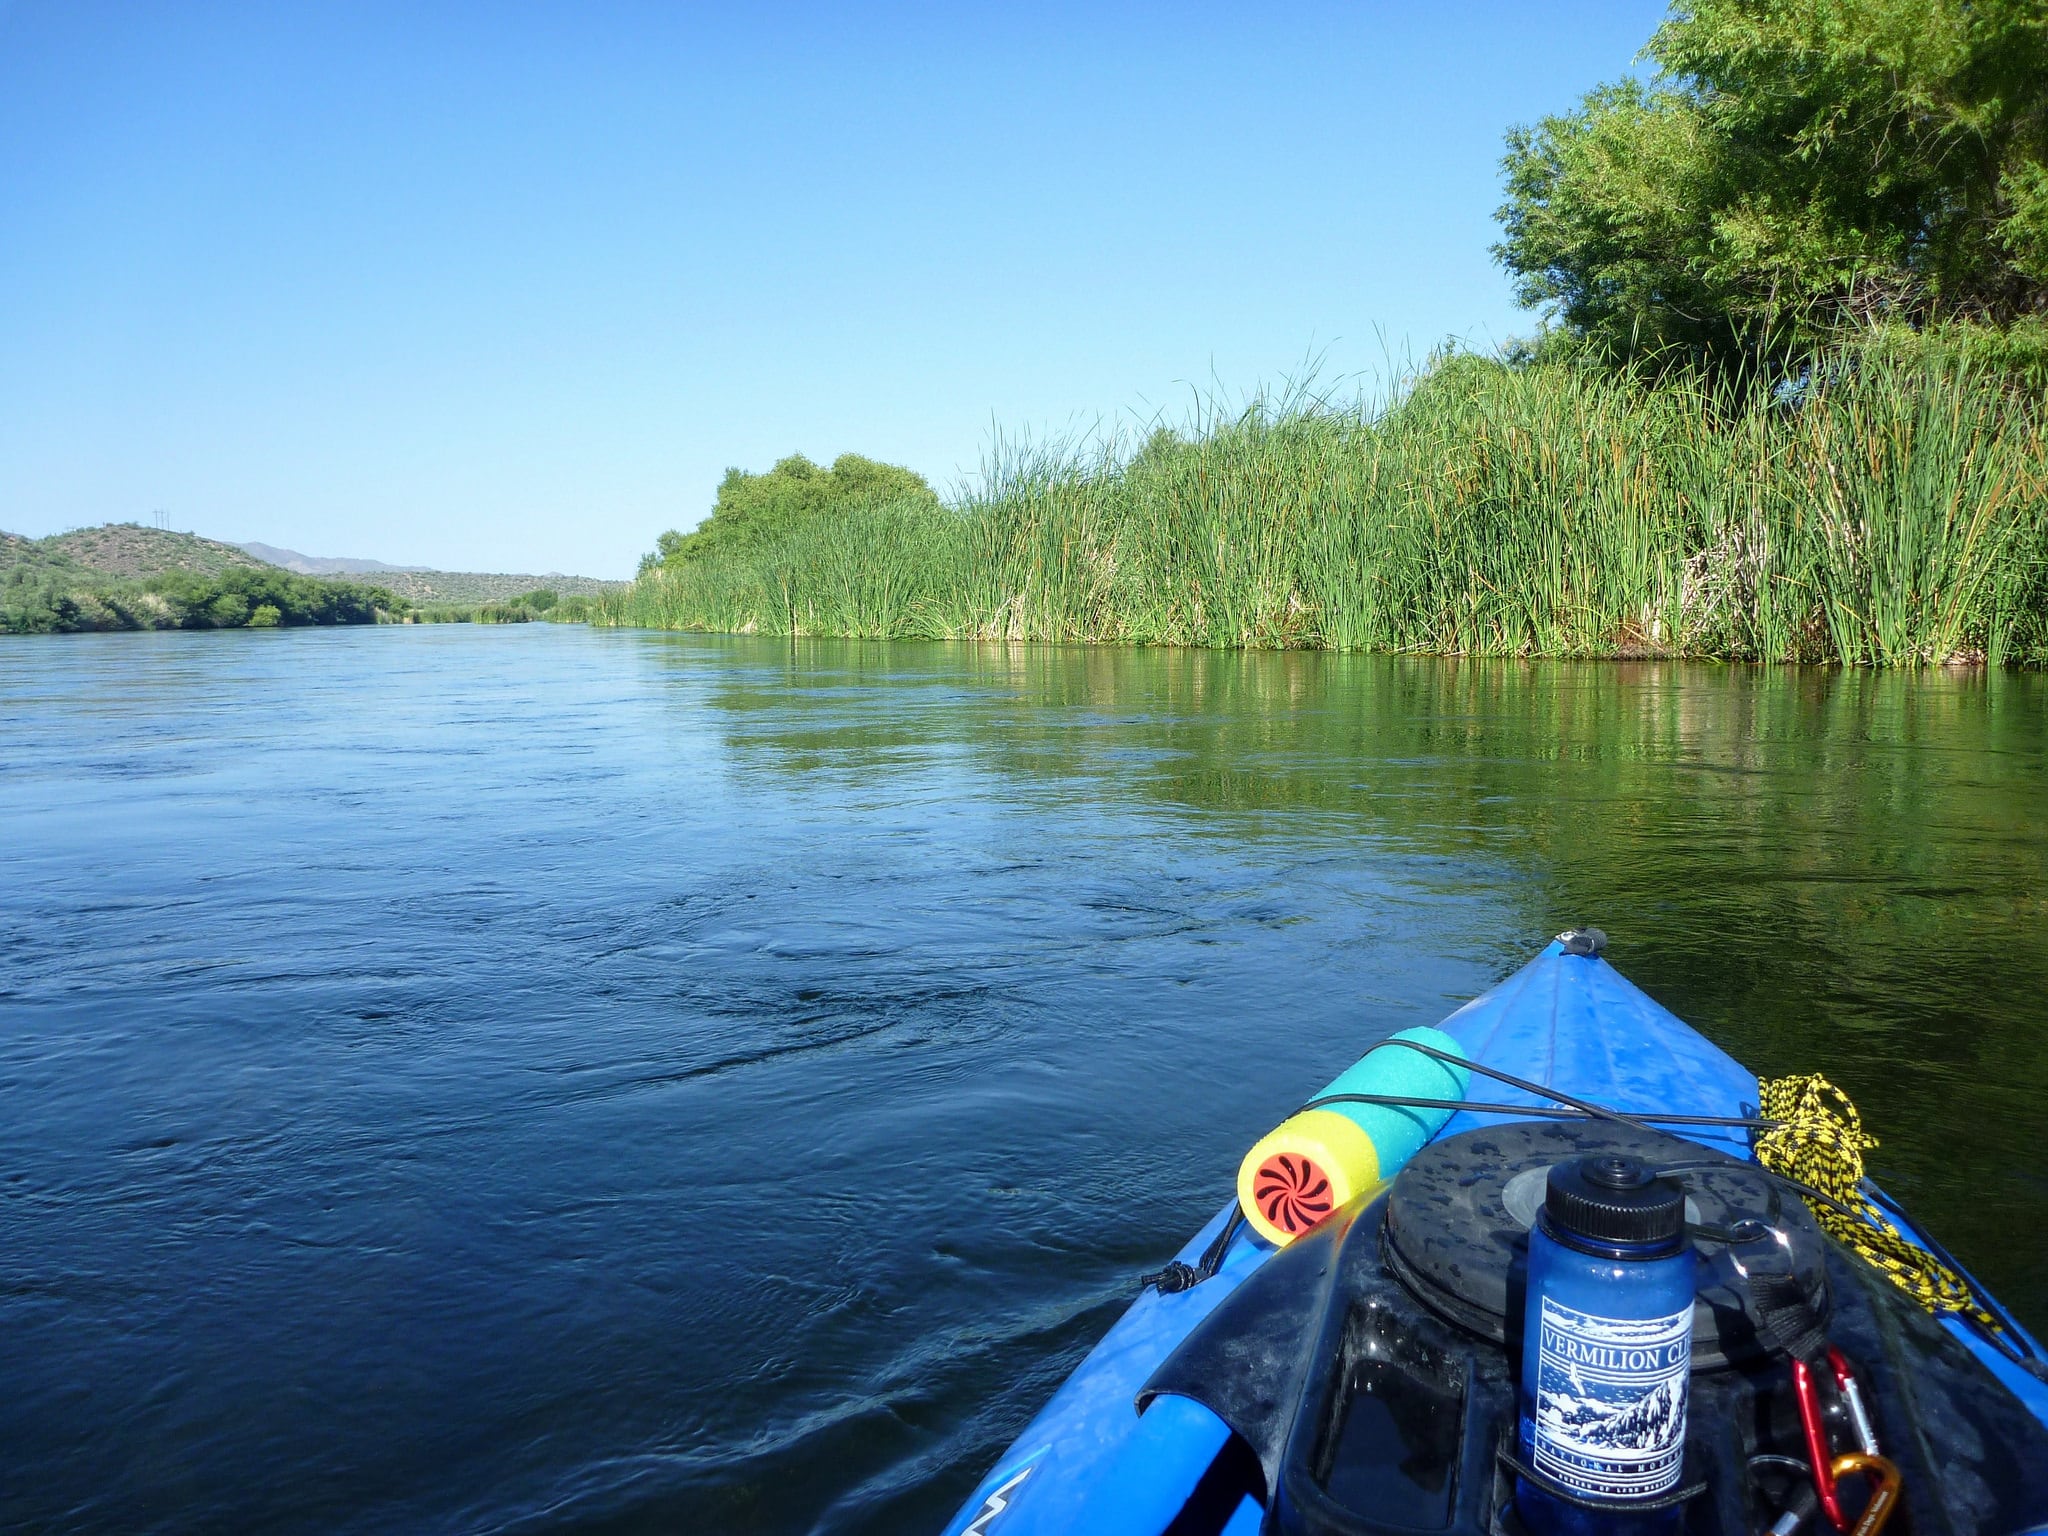
What time of year can you kayak the Salt River?
This stretch of the Salt River depends on periodic water releases from the Stewart Mountain Dam. The most consistent of these releases occur between mid-May and mid-October. Luckily, there's a river gauge just below the dam where you can check the streamflow. This is public data, so you check the official USGS source, SRP's website, or use something else like River app. The ideal flow for kayaking is between about 500-1500 cfs. The bare minimum flow you'd need is about 300cfs, though you'd probably have to get out and drag your kayak through some shallows at that level.
Here are the current river conditions:
Even when the gauge looks too low for a full run, you might be able to kayak further down the river. The Verde River joins the Salt River near the Phon D Sutton Recreation Area, often adding enough water to allow for a run downstream. The last mile or so of calm water approaching Granite Reef Diversion Dam features enough water to paddle year round, though it's more lake-like in that stretch. If you're desperate for a paddle but the Salt River isn't cooperating, you can just as easily continue up the road to Saguaro Lake.
What time of day should you kayak?
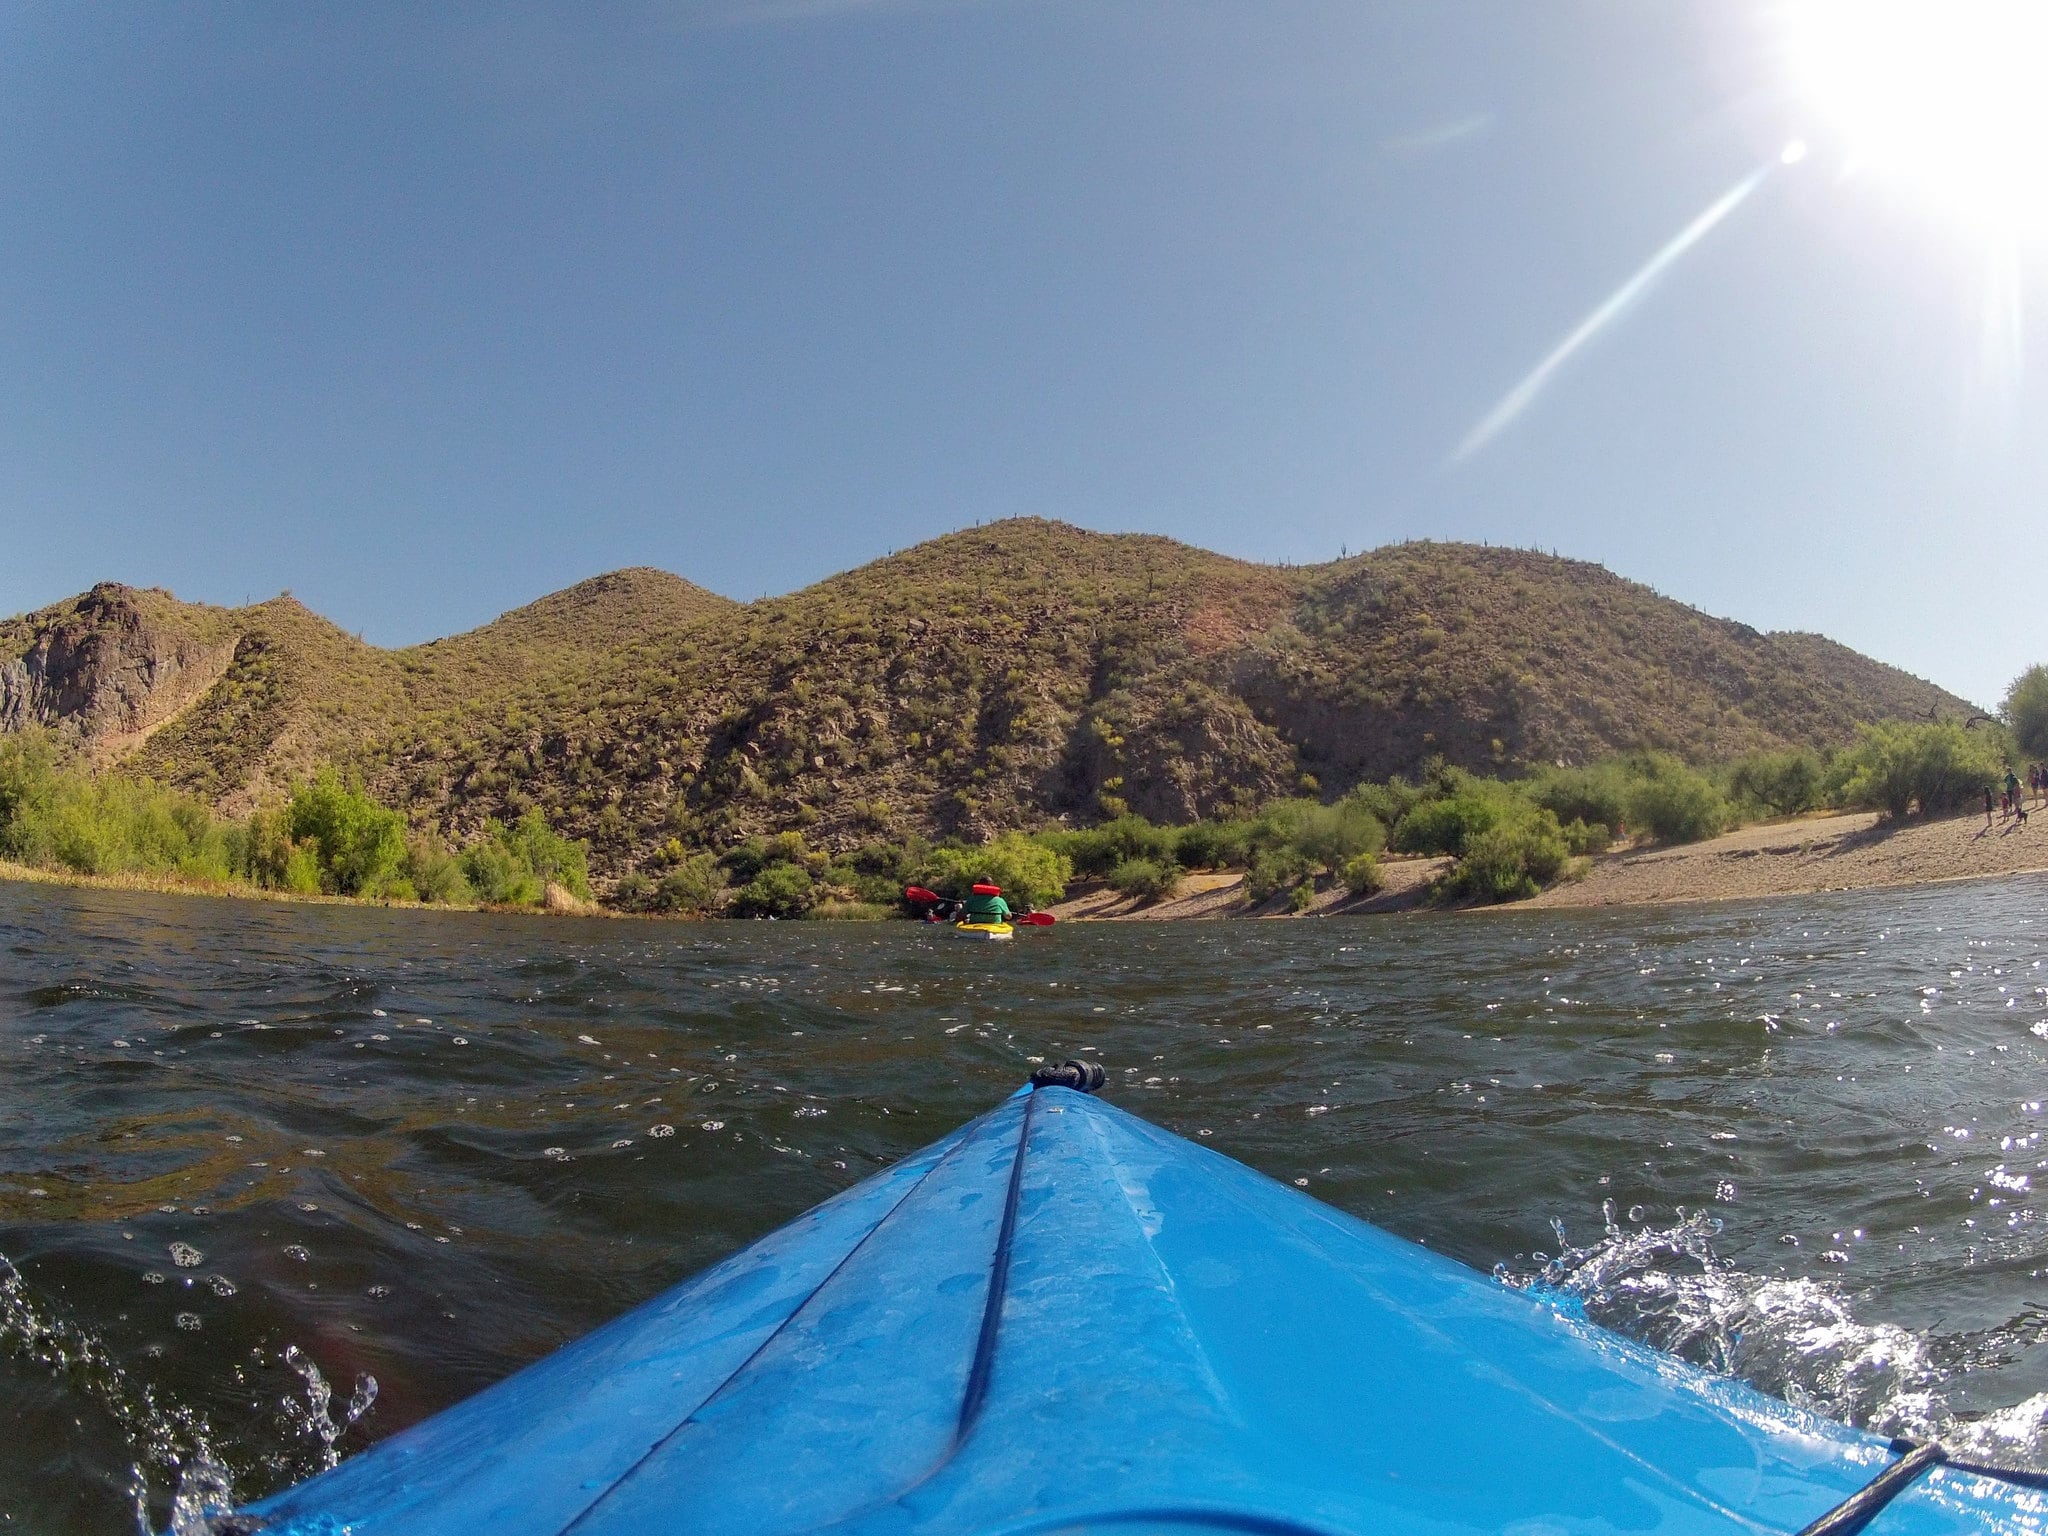
The key to enjoying your time on the river is to either start very early, or to arrive well after the party has dissipated, or to find yourself there mid-week. My favorite time of day to kayak the Salt River is early in the morning. You'll avoid both the worst of the summer heat and the worst of the tubers. It's remarkably peaceful first thing in the morning, and you'll also see more wildlife by paddling early. I recommend getting on the water no later than 7am, which means arriving closer to 6am to unload your boat and set up the car shuttle (more on that below). Salt River Recreation begins busing tubers to the river at 9am sharp, so you'll want to be downstream of the bridge well before then.
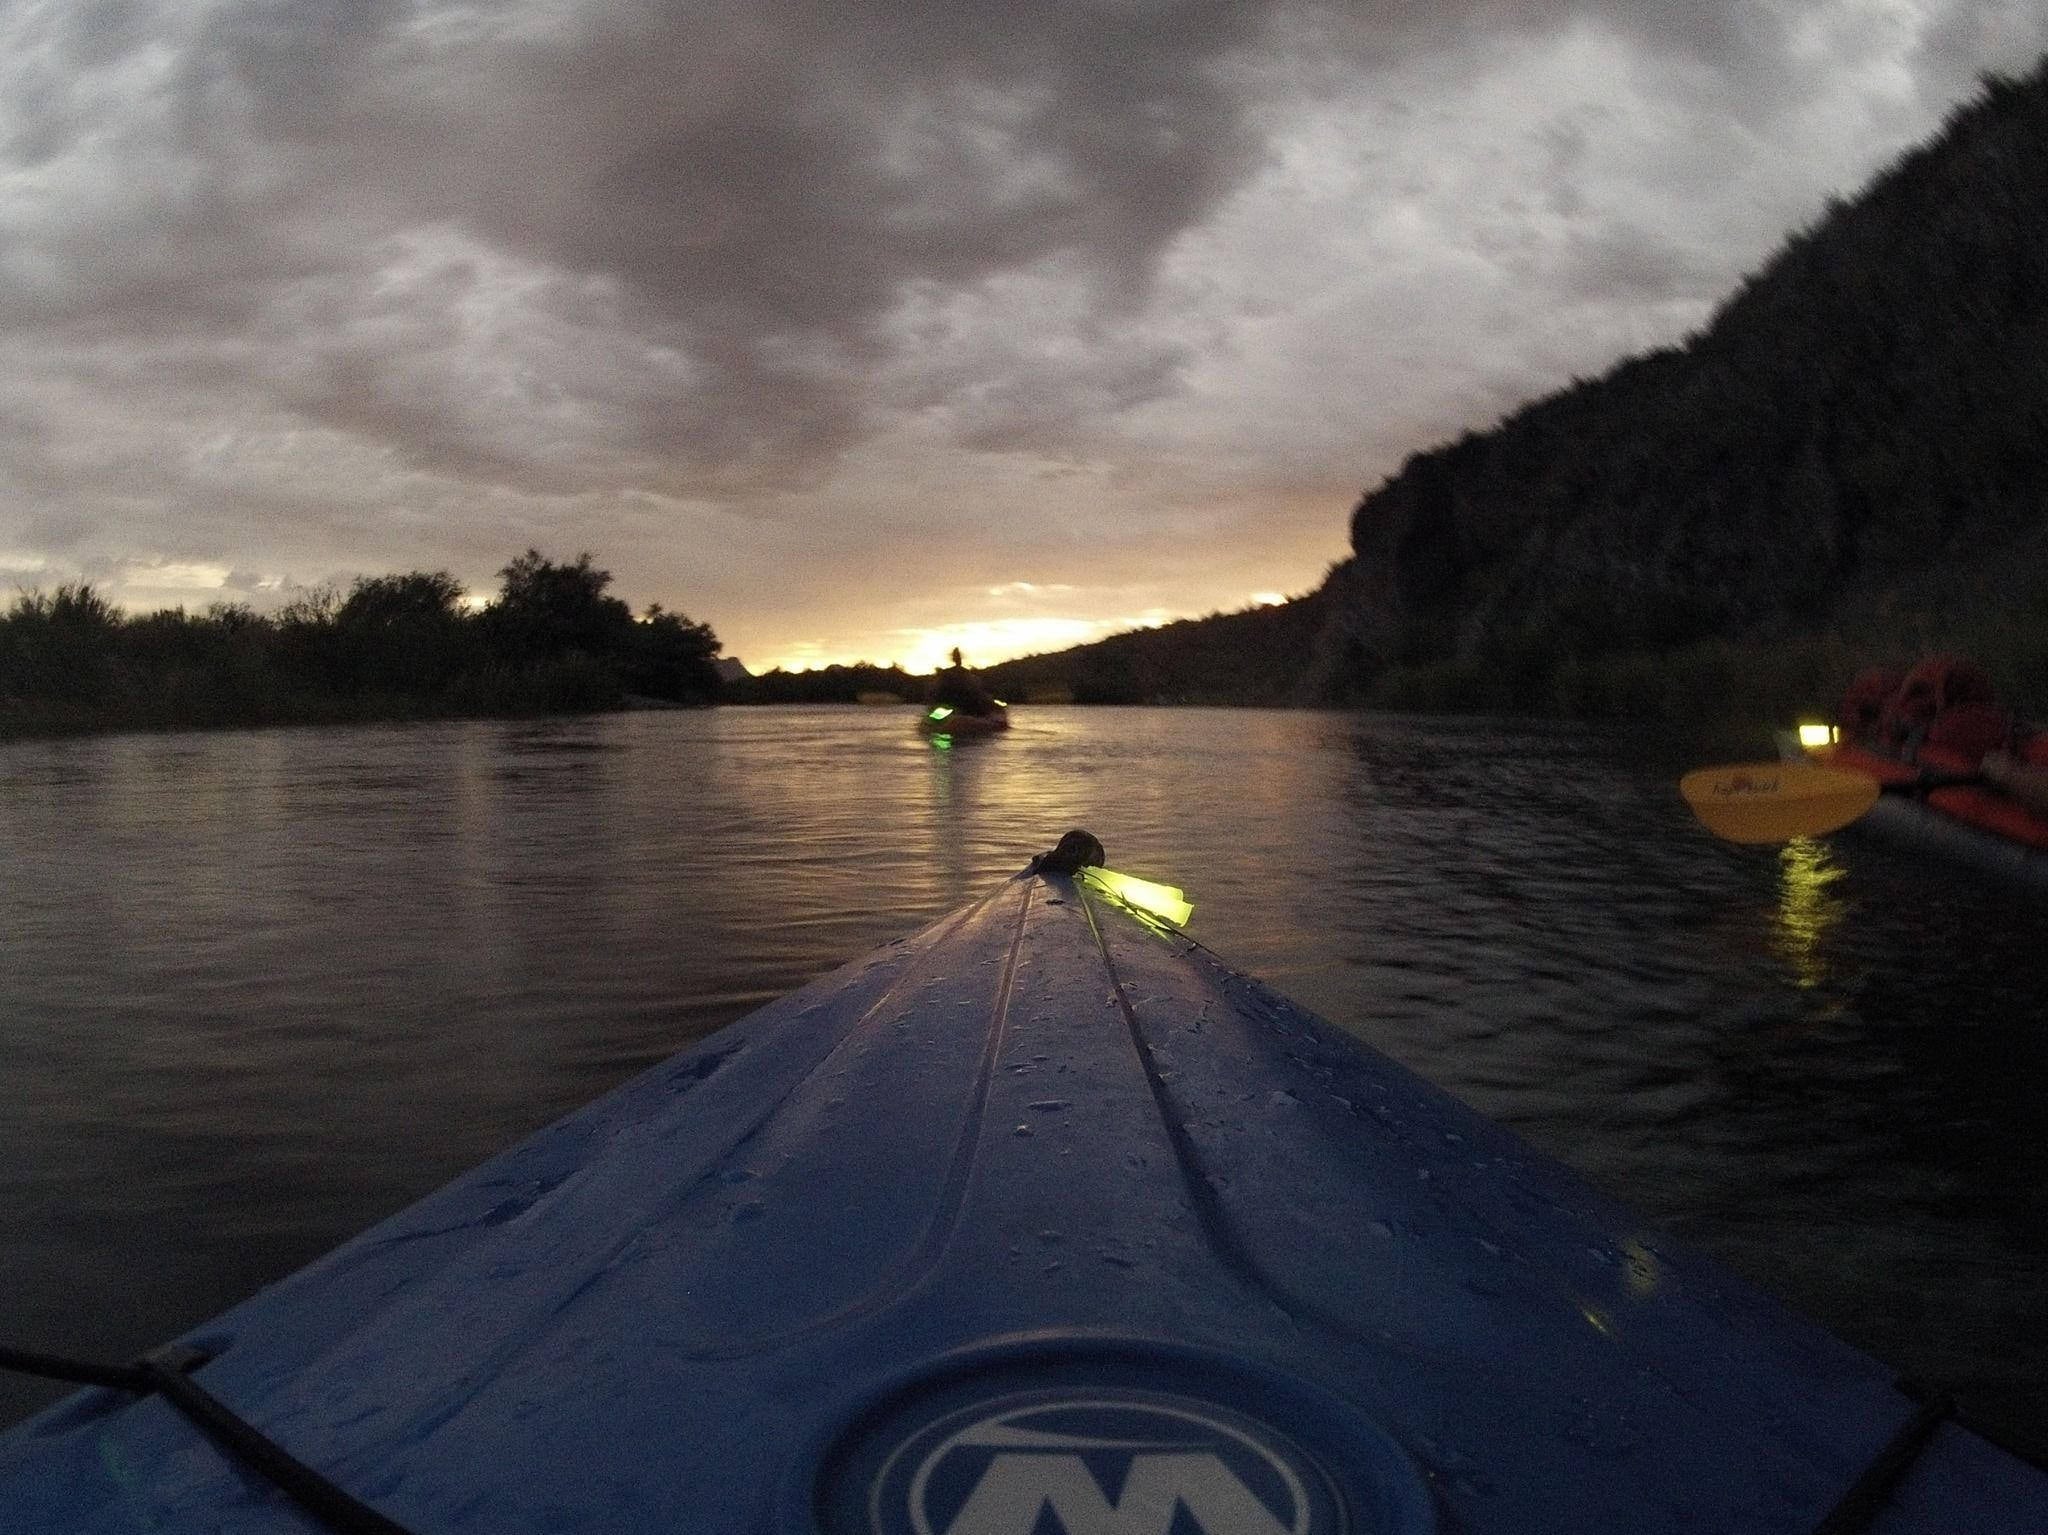
If mornings aren't your thing and you'd rather paddle at sunset, be sure to check out the sunset and moonrise times when you're planning your trip. Take note that it'll still be hot out even after the sun sets, and you still might encounter the tail end of the party-goers (while the shuttle buses end at 6pm, the party often lingers later). If it's July or August, you'll also want to keep your eye on any monsoon storms—it's a good idea to avoid the river during or immediately after one of these storms.
How long does it take to kayak the Salt River?
The main stretch from Water Users to Granite Reef Dam is about 12 river miles and requires a 7 mile car shuttle. On average, it takes roughly 4 hours to paddle the whole stretch, though that depends on how fast you paddle and how fast the river is running. Some groups get it done in 3 hours while others enjoy a more leisurely 5.5 hour paddle. My recommendation is to set aside plenty of time for your first trip and learn what your own style is.
How difficult or technical is it to paddle?
Generally this is a beginner/novice trip with only Class I rapids, two of which approach Class II during certain flow rates (and occasionally reaching Class II after some flash flood events). At the 0.5 mile mark from Water Users, you'll encounter Snaggletooth Rapid. Later, around mile 2.0, you'll encounter a rapid known as either Pinball Alley, Bulldog, Rattlesnake, or Rocky Road, depending on who you're paddling with. This is the fiercest of the entire Lower Salt River, but shouldn't give you much trouble. Under some flow rates, you'll also encounter another wave near Coon Bluff Rec Area around mile 7.0. Take note that the difficulties of each of these changes due to water levels, flooding, or other reasons, so take this just as a guide.
Most of the rapids and ripples on the Salt River are caused by a few large submerged rocks that sit higher than the surrounding river bottom—some of which are exposed above the waterline. It’s generally pretty easy to avoid these simply by paying close attention to the river ahead of you, identifying the areas of choppy water that might indicate an obstacle, and paddling around them.
Here are two basic—and entirely oversimplified—paddling tips for getting through what you’ll encounter on the Lower Salt River.
The most important aspect for beginners is to simply keep your boat pointed straight downstream. Where most paddlers get into trouble is by hitting an obstacle like submerged rock with the side of their boat, tipping them to one side, and thereby allowing the force of the flowing water to flood the cockpit or otherwise capsize the boat. In simplistic terms, the best way to keep your boat upright is keep the front of the boat pointed downstream as much as possible.
Another problem you may run into is bumping into lots of rocks in shallow areas of the river. Again, the primary key here is to simply keep paddling. When you stop paddling, the kayak slows down, often turns to one side, and then you run into the problem above. Remember, you can only steer and propel your kayak when the paddle is in the water.
If you do capsize...
If you do fall in, don't panic! Your pfd should keep you safe.
In many areas, the river is shallow enough to simply stand up in if you manage to tip over. If you're in one of those spots, the first thing to do is to alert others (a great reason to attach a waterproof whistle to your pfd). If you can safely hold on to your paddle and boat, then start making your way to shore with your items. If you can't hold on to them, let your friends downstream collect them for you.
If you can't easily stand up—either because the river is moving too swiftly, or because it's too deep, or because there are more obstacles coming up—then the very first thing you'll want to do is reposition your body to safely float down the river. Turn yourself around so that you are floating on your back with your feet aimed downstream and your knees bent. Try to keep your head tilted so you can see downriver, put your arms out to help balance and steer yourself, and hold your butt up a bit to avoid hitting any rocks. The goal here is to avoid any downstream obstacles and use your legs as shock absorbers for anything that you do run into. Once you've gained some control, alert others. When it's safe to do so, maneuver yourself to the shoreline.
It can be difficult to hold on to any objects after you've flipped, especially if you're still in rough water. If you can't easily hold on to an item, let go of it and have your friends paddle ahead to retrieve it for you. If you can safely hold on to an item, it's usually best to choose your paddle over the boat, since paddles can get damaged or lost far more easily. If you do manage to hold on to your boat, it's usually best to wait to flip it back over until you get to shore.
I always attach my gear—especially my phone case, cooler, and dry bag—to the boat using carabiners. That way if I flip over, I don't lose any items. If you've ever paddled the river, you'll see countless lost items on the shoreline or river bottom from people who did not do this. Not only do people lose many items, but each of these becomes trash in the river. So please—lash it down before you launch!
Once you're to the shoreline, take a moment to collect yourself and your gear, drain any water from your boat, and find a good spot to re-launch from.
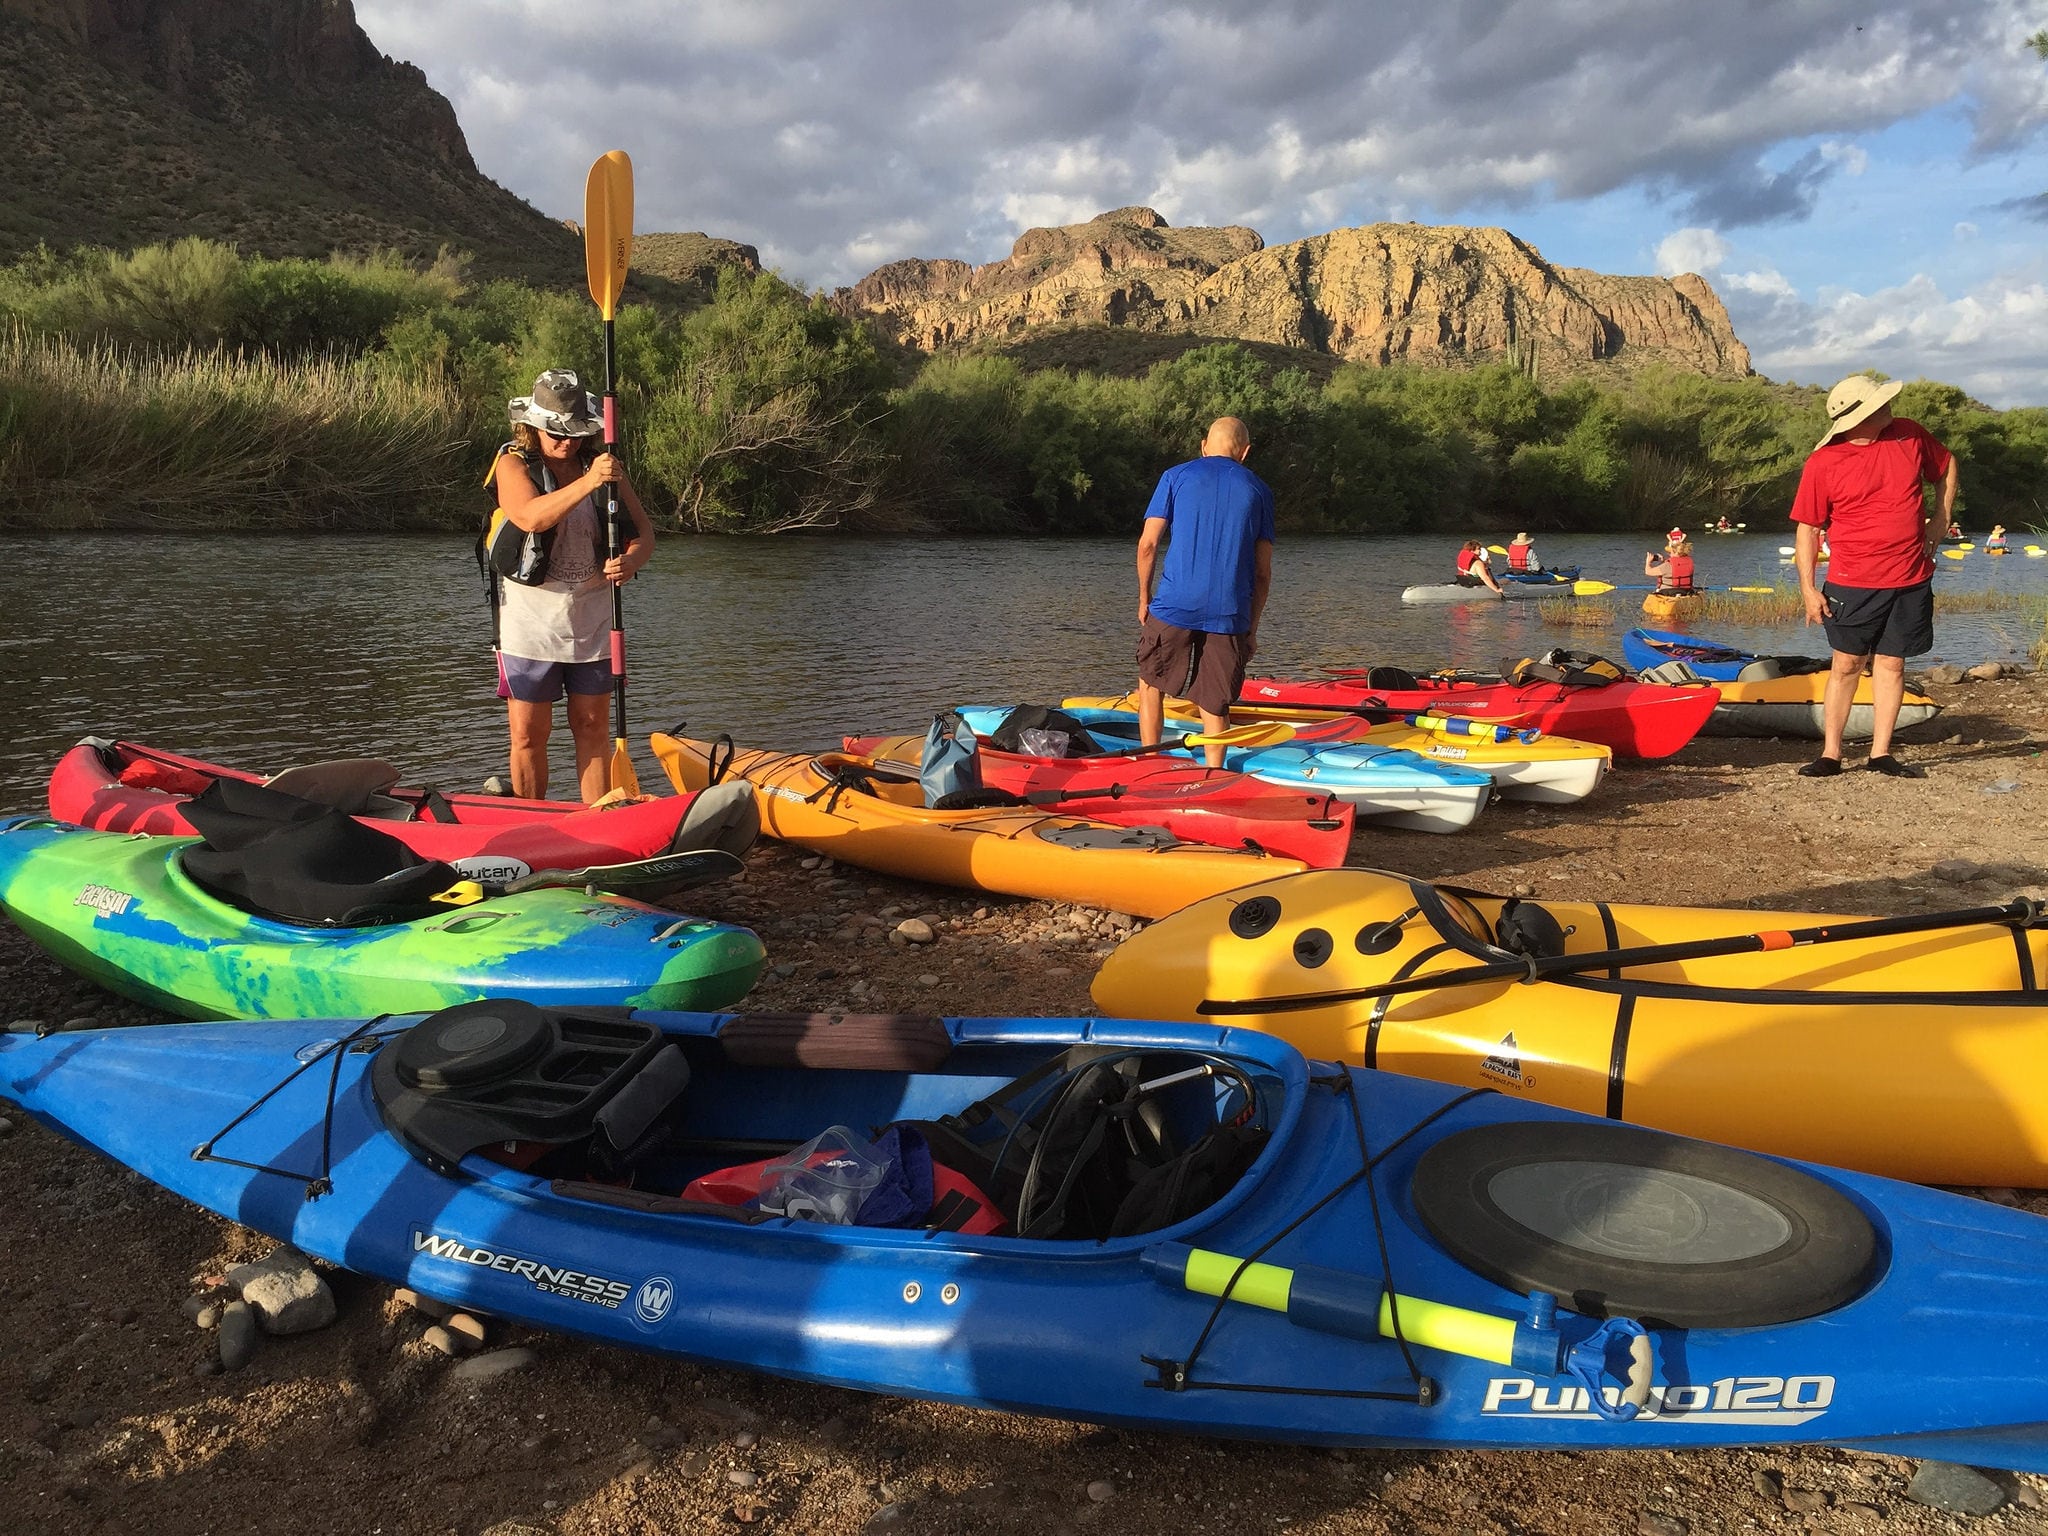
Renting a kayak for the Salt River
What kind of kayak should you rent?
Just about any kayak will do on this easy stretch of the Salt River. Sit-on-tops seem to be the most common, followed by sit-ins, followed by inflatables. Overall, I'd say that's in line with my personal preferences for this stretch of river. But don't get me wrong, if I only had an inflatable available, I wouldn't hesitate using it.
Sit-on-tops are great because they're very stable and they don't make some new paddlers as nervous as the enclosed cockpit of sit-ins. But sit-ins perform the best, even if they require a bit more skill to keep upright. Inflatables are the easiest to transport—no doubt about that—and are very stable but don't perform as well, especially when it comes to tracking a straight line at slower speeds. Luckily, performance isn't much of a concern on a river like this. You'll have fun whatever you paddle.
Where to rent kayaks?
I recommend renting kayaks from the Arizona Hiking Shack, which is near 32nd Street & Thomas in east Phoenix. They have both sit-on-top kayaks and inflatable kayaks available for rent as either single-person or doubles. Single-person kayaks run $35/day while doubles are $45/day. All of their kayaks come with paddle and personal floatation devices (pfd), and inflatables also come with a manual pump. They've always provided me the necessary river straps to transport rental boats on my vehicle. You can also rent a variety of other accessories, or purchase something new from their shop. They also sell Tonto Passes.
Redline also rents a number of boats these days and is a popular option, too. Previously known as East Valley Kayak Rentals, this outfit is located near Higley and McKellips in Mesa. Single kayaks rent for $45/day ($40 if paying in cash), while doubles cost $65/day ($60 if paying in cash).
REI Adventures is another rental option. REI rents inflatable kayaks for $35 (singles) and $50 (doubles) for “1 day” rentals, which means picking them up and returning them the same day between 8am and 5pm. For an extra $10, you can keep them for a full 24 hours. REI also offers river delivery and shuttle for only $15 per boat. That means that they meet you at the river with the kayak and help you set up the shuttle for your driver; the fee also includes one Tonto Pass for your vehicle. You’ll need advance reservations, and this service is only offered between 10am and 4pm, but otherwise this could be an excellent option.
There are a handful of other places you can rent from, including both individuals or other non-storefront locations; you can often find these advertising on craigslist and elsewhere. You can also rent kayaks from Saguaro Lake Guest Ranch by booking one of their unguided tours.
What to bring kayaking
The basic items you'll want to bring kayaking the Salt River
There are a number of basic items you’ll want to bring kayaking on the Lower Salt River. During kayaking season, I recommend keeping them all in one place, such as a plastic tote bin, so that it’s easy to grab before your trip without forgetting anything.
Kayak + paddle
Duh. You’ll never live it down if you arrive without either of these two items.
PFD
It’s federal law to have a PFD for each person onboard, and it just makes sense to wear it. After all, PFDs that you’re not wearing typically aren’t useful to you after you’ve fallen into the water. Buy one that’s comfy so you’re more inclined to use it.
Hat or visor
Unless you’re paddling at night, you’ll probably want a hat or visor. Luckily, if you’re launching in the early morning, you’ll be paddling with the sun at your back.
Sunglasses
Trust me, you’ll want to bring these. If you have prescription glasses or sunglasses, you might want to bring a croakies-style glasses strap to keep them secured to your head in case you end up in the water.
Sunscreen
Don’t forget to put on plenty of sunscreen before you launch. And keep in mind that you’ll need to reapply it when you stop for a break. Or better yet, wear long-sleeved UV protection shirts that will ensure you stay covered (it’s easy to keep these wet, which helps keep you cooler). Remember to add sunscreen to your legs, inner thighs, knees, and feet—all of which may be exposed during your paddle.
Appropriate clothes
You’ll want to wear clothes that are comfortable while wet (e.g., not your standard cotton t-shirt). I usually wear a swimsuit and a long-sleeved synthetic shirt with UV protection. Some people wear lightweight hiking or yoga pants to help protect their legs from the sun. Whatever you wear, make sure that you’ll enjoy wearing it even when it’s soaking wet.
Towel
You may want to dry off if you go for an unexpected swim, and it’s also useful to keep a dry one in your vehicle, too.
Dry bag
These are particularly important for keeping everything dry in case you tip over. Be sure to clip your bag to the boat with a carabiner so that it doesn’t float away if you capsize (this goes for all items on your boat, including coolers). I always bring several ziplock baggies, just in case I need them.
Sandals or water shoes
You’ll likely get your feet wet at some point during the trip, so I recommend wearing sandals with heel straps (like Chacos or Tevas—not flip flops that can easily fall off and float away if you capsize) or water shoes. Some people use neoprene booties, but I suggest sticking with something a bit more substantial. Good traction is useful, as submerged rocks can be quite slippery.
Water
Always bring (and drink) water, even if you’ve brought other beverages. This is the desert, after all.
Snacks
Most groups take a break halfway through the paddle, which makes for a perfect time for a quick snack.
Whistle
Federal regulations require every boat, including kayaks, to have a signaling device on board—and a whistle is your best option on the Lower Salt River. Even if it wasn’t required, I find it useful to have, especially to communicate with friends ahead or behind me on the river. Just be sure to let everyone know what the signal code is prior to hitting the water.
Optional items
Cooler
Most paddlers bring a cooler to keep their beverages cold. I strongly recommend a cooler with a zipper, as the others will usually dump all of their contents if you tip over. Not only are you then without your beverages, but you’ve also created more river trash. As with all gear, make sure to lash your cooler to your boat.
If you bring adult beverages, remember to leave the glass at home. Also keep in mind that the Bush Highway is heavily patrolled by sheriff deputies. Play it safe and find a designated driver.
Kayaking gloves
Most people on the Salt River don’t use kayaking gloves, but they can be nice if you often get blisters while paddling. If your paddle starts to get hot in the sun, it’s easy enough to quickly dunk it in the water to cool it off.
A change of clothes for the car
This is especially useful if you plan on grabbing a post-paddle beer or lunch with your paddling friends.
Cold drinks for the car
Trust me, it’s great to have a cold beverage on hand while you load your kayak and gear in the hot sun after a long paddle. I usually bring some extras in case a paddling partner needs one, too.
Headlamp
If you’re paddling near sunset or by moonlight, be sure to bring a headlamp. A white light is required by law, and it’s important to have if something goes wrong. Be sure to test the batteries before you leave home, and better yet, carry some extras in case you need them.
It’s also helpful to add a couple glow sticks or other small lights on the front and back of every boat so everyone can see where each boat is. You want these to be bright enough that others can see where your boat is, but not so bright as to impair your night vision. And, please tie them securely so they don’t fall off and become river trash.
Bug spray
Depending on the time of year, there can be swarms of tiny flying insects (including mosquitos) near where people launch and take-out and in a few other short stretches on the river. If you hate dealing with flying insects, you might want to bring some bug spray or even a cheap bug head net.
An extra trash bag (and gloves or a “picker-upper” tool)
It’s our collective responsibility to keep the river clean, but not everyone takes this responsibility to heart. While it’s frustrating to come across someone else’s trash, it’s even more frustrating to know that it’ll remain there unless we pick it up. Help do your part to make kayaking the river a more enjoyable experience by picking up any trash you see during your trip. I end each trip with numerous pieces of trash I’ve collected along the journey.
Bilge pump
If you don’t have a self-bailing boats, you may want to bring a bilge pump—a manual hand pump that can be used to get excess water out of your kayak’s cockpit. Alternatively, you can also bring something like a plastic drink cup that you can use to scoop out water. I generally don’t worry about this on the Salt River, where the cool water helps keep you refreshed and it’s easy to stop to drain your boat if needed.
Kayak cart
While it’s general paddler courtesy to help carry your group’s boats down to the launch point (or back to the vehicles at the take-out), some people prefer using a kayak cart—a two-wheeled contraption that you attach to one end of your boat.
Gloves for your vehicle
If you’re transporting your boat on top of your vehicle, you may want to bring some gloves to avoid burning your hands while loading—after all, your vehicle has been in the sun for hours and it’s likely very hot.
You'll need a Tonto Pass
In order to park at any of the recreation areas along the Lower Salt River, you'll need a Tonto Pass.
Quite a few kayakers carpool to the river in order to save on Tonto Passes. I highly encourage this, as it also reduces parking issues at the recreation sites (especially Granite Reef). Paddling groups routinely meet in shopping center parking lots near Power and McDowell and leave vehicles there during their kayaking trips. As long as you park at the edges of the parking lots, you shouldn't encounter any problems.
Which Tonto Pass do you need?
There are two primary options for Tonto Passes: a $8 Daily Pass and a $80 Discovery Pass, which is good for one year. If you're just starting out kayaking the Salt River, I'd recommend grabbing a daily pass. The daily pass requires you to scratch off the appropriate date and time before displaying it, so you can easily stock up on a few without "starting the clock," so to speak.
A quick side note: because these passes are only good for 24 hours from the time you validate it, you may need more than one to do an overnight trip on one of the lakes (no overnight dispersed camping is allowed along the Salt River itself).
If you recreate often along the Salt River, the annual Discovery Pass might be cheaper for you. If you're a senior or disabled, you qualify for a discounted $60 annual Senior or Access Discovery Pass.
Note that you do not need an additional Watercraft Pass if you are using a non-motorized boat, like a kayak, packraft, or canoe.
Where can you buy a Tonto Pass?

Tonto Daily Passes can be purchased from Tonto National Forest offices, online, by mail or by phone, or at a long list of local retailers (pdf). Here's slightly-outdated google map showing all of the vendor locations; I suspect that most all of these locations are still active resellers, but you might want to call first to be sure. I usually buy mine at one of the gas stations near Power & McDowell on my way to the river.
Some of the recreation sites also have a kiosk where you can buy them. I try to rely on these only as a last resort, however, since the machines aren't always working and there is a convenience fee added to the charge.
The annual Discovery, Senior, and Access Passes are only sold at Tonto National Forest offices, and you'll need to bring ID or proof of your disability. Each of these passes is issued to one individual who must sign the back of the pass. The pass then covers all occupants of a single, private noncommercial vehicle as along as long as the pass holder is present.
Does the America the Beautiful Pass/Interagency Pass work?
An America the Beautiful Annual Pass (also known as the National Parks and Federal Recreational Lands, or interagency pass) covers your vehicle when you park and kayak from the sites along the Lower Salt River. You can purchase an America the Beautiful Annual Pass online, in person at a number of federal recreation areas and offices, or at select retailers, such as REI. Please note that online orders are not fulfilled electronically and include an additional processing fee. I prefer to purchase my annual pass at my favorite local national park, which gets to retain a portion of the sale price for its local operations.
In previous years, there was substantial confusion, even among some Tonto National Forest rangers and staff, on whether the America the Beautiful pass covered kayakers on the Salt River. As a result, quite a few kayakers had been mis-told (and some even ticketed) for using an America the Beautiful pass in the past. However, that confusion was finally remedied and everyone now seems to be on the same page—the America the Beautiful annual pass is indeed accepted at all the Lower Salt River recreation sites.
Salt River kayaking map
Below you'll find a custom google map of some of the locations mentioned in this guide.
How to get to the Salt River
There are three ways to get to the Lower Salt River, which is accessible solely via the Bush Highway. The first is to drive north on Power Road from the Loop-101 freeway in northeast Mesa. Power Road heads north for a few miles before turns east and becomes Bush Highway, passing each of the river's main recreation areas and roughly paralleling the river until reaching Saguaro Lake.
Alternatively, further east you can drive north on Ellsworth Road, which becomes Usery Pass Road and connects with the Bush Highway a few miles later. When arriving at Bush Highway via this route, Blue Ridge, Pebble Beach, Water Users and Saguaro Lake Guest Ranch will be to your right, whereas Coon Bluff, Phon D Sutton, and Granite Reef will be to your left. If you went straight, you'd arrive at Salt River Recreation, the outfit that runs the busy tubing rental and shuttle service for the river.
The other way to find the Lower Salt River is via Exit 199 from "The Beeline," Hwy 87. This might be most convenient for those coming from the north valley via Shea Blvd and Fountain Hills. At the top of the off-ramp, turn south and follow the road past Saguaro Lake.
Where to launch from
There are a number of places you can launch from. I'll take them in order, starting at the furthest upstream put-in. You'll need a pass for each vehicle parked in each place mentioned below, except the privately-run Saguaro Lake Guest Ranch.
Saguaro Lake Guest Ranch
This is the furthest spot upstream to launch, just a bit down river from Stewart Mountain Dam. The longest trip you can do on the Lower Salt River starts here and ends about 13 river miles later at Granite Reef. The best part of launching from the ranch is the first 3 minutes: you almost immediately hit some fun rapids as the river turns hard right under some magnificent cliffs. After you clear the rapids, look up—you might see an eagle perched high above you. It's my favorite stretch of the entire river, even though it's just a few minutes upstream from the first public launching spot. The actual put-in here at the ranch is a bit more difficult than a sandy beach, but the views are worth it.
Because this launch starts at a private guest ranch, you'll need to pay for the privilege. One option is to book what the ranch calls a "self-guided tour." That basically covers your parking fee, boat and gear rental, and a shuttle back to the ranch. Roughly two-hour "tours" cost $50 while the longer 4.5 hour trips run $75. You'll need a reservation for both of the tours. If you're just looking to launch from the ranch, you can instead pay $15 per vehicle (includes one boat), plus $5 for each additional boat. You'll need to check in with the front desk to pay and obtain a parking pass before you launch, and the ranch requires you to remove your vehicle by 3pm.
Water Users
This large parking lot is where most tubers start, and it's also the most common put-in for longer kayaking trips down the Salt River. Water Users is located just a few minutes downstream of Saguaro Lake Guest Ranch and requires a Tonto or Interagency Pass to park at. This rec area is no frills—it's really just a place to park while you paddle or float the river. There are pit toilets here, but no drinkable water. If you fail to arrive long before (or long after) the summer tubers, you'll regret stopping here. This is also sometimes referred to as Stop 1 for the tubers.
"The Bridge"
There are two recreation areas on the immediate east side of the bridge over the Salt River. The downstream/north area is called Blue Point, while the more expansive area across the highway is called Pebble Beach. Both are popular areas to launch kayaks for shortened trips down the river.
This is also a great spot to launch for those who want to avoid the rapids of Bulldog Canyon (sometimes referred to as 'Pinball Alley'), the most extensive set of rapids on the Lower Salt River. In spite of its smaller parking lot, Blue Point is a bit preferable as the shoreline is closer to the parking lot so you won't have to carry your boat as far. Also, the river flattens out and is more shallow near the bridge, so it's easier to start on the other side of the ripples, especially in low water. The river around Pebble Beach can also get rather crowded with non-kayakers, so it can be easier to just avoid dodging kids swimming or fisherman stading in the river by launching downstream of the bridge.
There are pit toilets at both sites, but no running water. Don't forget that you'll need a Tonto or Interagency Pass to park at both Pebble Beach and Blue Point. Pebble Beach is also known as Stop 2 by the tubers.
Granite Reef
If you're looking for more of a workout, you can also put-in at the Granite Reef Recreation Area—traditionally, the last take-out of the Lower Salt River stretch before the Granite Reef Dam. From here, you can only paddle upstream, against the slow flow of the river. However, this area is nearly always flat, slow-moving water that more closely resembles a lake than a fast flowing river. It's also your best and easiest option for a quick paddle during low flow periods.
Where to take out
Phon D Sutton
Phon D Sutton is the most convenient and the most popular ending spot for Salt River kayaking trips. Finding the take-out is extremely easy; just aim for the small beachy area on the far left as you approach the large rock outcropping that sticks out into the river. This popular rock area will almost certainly be filled with various people fishing, sunbathing, or otherwise enjoying the river. Disembark here and carry your boat up the small hill to your left and you'll find yourself at the parking lot.
Phon D Sutton has pit toilets, picnic shelters, and both a large parking lot and a secondary lot further back. Be sure to park your vehicles in the back half of the first parking lot area. The path you'll later carry your boats up emerges between the two picnic shelters, so aim to park in a spot close by.
Granite Reef
Granite Reef is the end of the line for kayaking trips on the Lower Salt River. Unfortunately, it's also home to the fewest parking spaces of any of the main rec areas, so you may want to start a bit earlier than normal if you're planning on parking several vehicles here. Alternatively, you can set up a "reverse" car shuttle—more on that below. Granite Reef is also home to the smallest landing, so it make take a few moments to empty a crowd off the river. In fact, the take-out can be a bit hard to find from the river. There is a medium-sized palm tree on the north bank—river right—that you should keep an eye out for. The take-out is nearly directly across the river from the tree, tucked into a small nook. If you can't find a parking space at Granite Reef, there's a dirt pull-off about 4/10ths of a mile east.
How to set up a car shuttle
The great thing about kayaking a river is that the water does half the work for you—whether or not you paddle, you're heading downstream. The bad part of kayaking a river is that you're heading downstream, so you'll need to arrange a car shuttle.
The only exception for the Salt River is if you're launching from Granite Reef. The water is more lake-like down near the dam, so it's possible to paddle up river up a bit and then float back down to your car. Unfortunately, that's not really an option for the rest of the river. If you've paid for a tour from the Saguaro Lake Guest Ranch, then you'll be receiving a ride back courtesy of the ranch and you can skip this section.
You'll need at least two vehicles for the car shuttle, and each vehicle will require a Tonto Pass. It's a bit easier if you have more than 2 cars and more than 2 people, as it allows you to have someone you know keep an eye on your boats.
- Drive the boats to the launch site. Drop off your boats and any gear that you want for the trip. You'll probably want to leave at least one person here to watch your stuff.
- Drive all the vehicles to the take-out where you'll leave them for later. I like leaving a cold beverage and a towel in my vehicle so I have it when I finish the paddle.
- Using as few vehicles as possible, drive everyone back up to the take-out.
- Launch your boats and enjoy your paddle down the river.
- When you're done kayaking, someone will need to drive the owner(s) of the vehicle(s) used in step 3 back to their vehicles parked at the put-in while everyone else loads their boats into their own vehicles.
You can also reverse this scenario and drop off a sufficient number of vehicles at the take-out first, on your way to the put-in. This adds a bit of difficulty in that you'll need to transport all of the boats up to the put-in using fewer vehicles than they arrived in, but it's one way to deal with the lack of parking spaces at Granite Reef.
A third alternative to dealing with Granite Reef's limited parking is to follow the normal car shuttle routine but to leave one or more vehicles at Phon D Sutton or one of the pull-offs along the Bush Highway. At the end of the paddle, drivers can be shuttled back to their vehicles before heading back to the take-out to retrieve their boats. As you can imagine, I usually prefer to end at Phon D Sutton to avoid these logistical challenges.
Other things to consider
Salt River wild horses
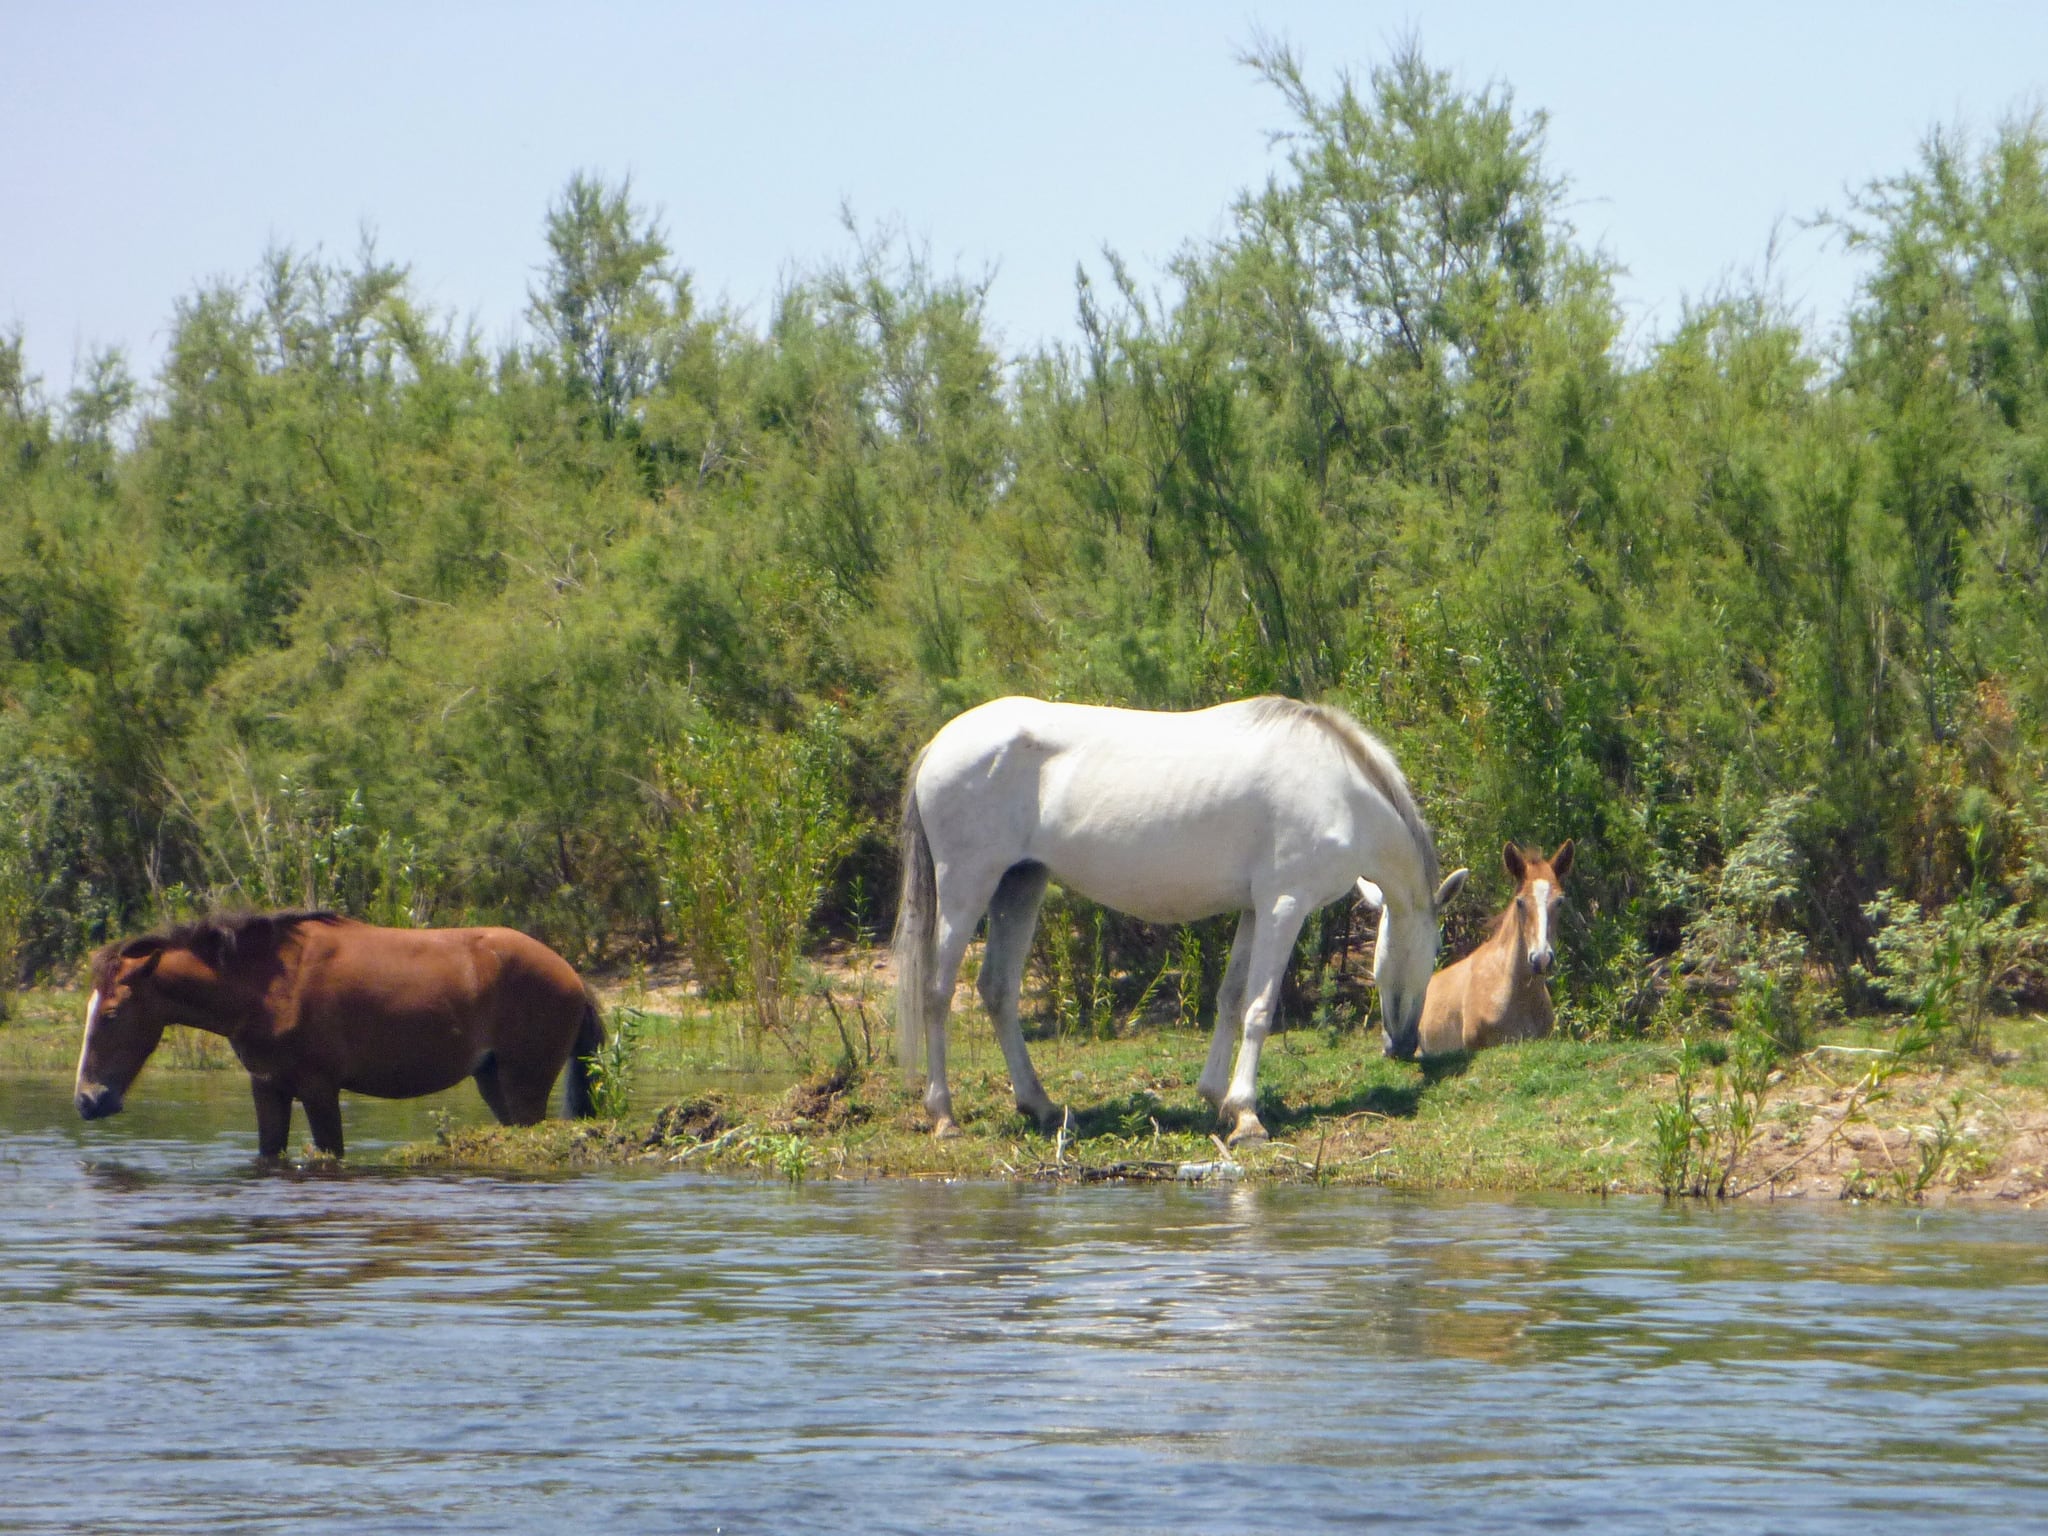
Yes, it's common to see "wild" horses during a paddle. No, they're not actually "wild," at least in the most accurate sense of the word. While recent legislation officially bestows the name “wild horses” upon the herd, they’re not exactly wild, at least in the truest sense of the word. Unlike other native wildlife, these horses did not evolve with the Salt River landscape, but are descendants of domesticated horses.
Nonetheless, many paddlers enjoy seeing them. You're most likely to see some if you paddle in the early morning. Feel free to take photos, but please don't disturb them. They also often cross the Bush Highway, so please be careful while driving. Originally stuck in a legal limbo, these horses are now protected under state law. There is a local nonprofit that helps to manage the herd, and you may encounter volunteers who try to keep people from harassing them.
Learning how to kayak
Arizona Hiking Shack, REI Paradise Valley, and REI Chandler locations offer short classes on kayaking and can help you choose the proper gear. Arizona Game and Fish Department also offers some education courses, as do a number of other groups.
Finding other people to kayak the Salt River with
The easiest way to find people to paddle with is by joining a Phoenix-area Meetup group. There are a few kayaking-focused groups, including Paddle Arizona, Phoenix Kayak Club, and Just Add Water Paddlers, among others. Each of these groups offers nearly-weekly kayaking trips down the Salt River. A number of other meetup groups offer Salt River kayaking events, even if they aren't primarily a paddling group. A quick search will likely yield several scheduled trips. There's also a Facebook group for Lower Salt River Kayakers where people more informally meet up for trips together, as well as one focused on organizing shuttles called Lower Salt River Shuttle Connection. And if you're still striking out, check out this post about ways to make more outdoor recreation friends.
Where to go for a post-paddle food or beverage
Red, White and Brew at Power/McDowell is a common post-paddle get together spot. I also recommend Desert Eagle Brewing's Falcon Field location near McDowell and Higley. Both offer a selection of craft beers and decent food.
What other questions do you have?
I've tried to put together a comprehensive guide for kayaking the Salt River, but I may have missed something. Let me know what else you want to know about in the comments.
Campsite 12 at Kodachrome Basin State Park
Sometimes, you find yourself in a really great campsite. Last weekend was one of those instances.
While we often disperse camp on BLM or National Forest lands, we had decided to reserve campsites last weekend, given our rather aggressive itinerary. Kodachrome Basin State Park seemed like the natural first night's stop, since we'd be driving Cottonwood Canyon north through the middle of famed Grand Staircase-Escalante National Monument. We selected site 12 from the available options, and it did not disappoint.
What makes a good campsite?
For me, there are a few things that I tend to prefer in campsites. Please note that I'm referring to developed campgrounds here—not dispersed or backcountry sites, which I'd evaluate using much different criteria.
First, I prefer small to medium-sized campgrounds, usually between about 15-40 sites. Larger campgrounds tend to have very small sites that feel nearly on top of each other, and tend to be more crowded to begin with (hence, their large capacity). Extremely small ones often lack useful amenities, like flush toilets and sinks. Don't get me wrong, I'm fine using vault toilets and otherwise roughing it. But if I'm paying $15-30 for a place to sleep for the night, I expect a few additional conveniences. It's often nice to have showers too, especially if you've been outside all day. I tend to sleep better when I feel clean. I don't rely on firewood being available for purchase at the campground, but it's always nice to have as a backup or supplemental option.
While campgrounds can sometimes be a fun social experience, I usually prefer more privacy. So I look for sites along the outer loops and especially those that have a visual barrier between my site and neighboring ones. Shade can be an important factor too, especially here in the desert southwest, so some tree cover or a shade structure is often appreciated.
I usually don't care much about distance to the restrooms or water spigots; neither is usually too far way to cause much hassle. However, the inverse isn't true—proximity to the restrooms or water can mean a constant stream of visitors passing by your tent. Worse, occasional whiffs of an overly ripe vault toilet can really ruin the camping mood.
If you're tenting it as I often am, a flat tent pad that's not too rocky is key. After that, it's all bonus. Being a westerner, I have a relatively high expectation that really good campsites should offer some sort of expansive or scenic views, too. Proximity to streams or lakes is usually nice as well, though sometimes that means more bugs or higher winds.
Evaluating campsite 12 at Basin Campground
On par, campsite 12 was nearly perfect for our needs last weekend. The campground is the perfect size, and offered just the right amenities. The restrooms were clean and modern, and the shower stalls were spacious. While there wasn't any way to adjust the shower temperature, it was exactly the right temp for me. In addition, a sink for washing dishes and a self-serve supply of firewood—a handy to carry bundle for just $5, with proceeds benefitting the Boy Scouts—were appreciated conveniences.
The site is well isolated from neighbors with its own mini loop, making it feel like you were alone. Due to the configuration of the campsites, all RVs were on the other side of the campground. Best of all, it was at the far end of the campground near the head of the basin, making for some excellent panoramic views. We'll be back the next time we find ourselves looking for a campground in the area.
If you go
There are multiple campgrounds atat Kodachrome Basin State Park, but the one you're looking for is the largest one, Basin Campground. Campsites are $20 per night, plus an $8 registration fee. Check availability on site 12; if it's already taken, there seemed to be several other sites that looked like quality backup choices. Not all sites are reservable online, so you might be able to snag one on a first come, first served basis, too.
Meet Pando, the world's oldest living organism
Just outside of Fish Lake, Utah lies a beautiful stand of quaking aspen. But this isn't just your average aspen forest.
Meet Pando
It's been named Pando, or alternatively, The Trembling Giant. Scientists believe that this stand of aspen is actually just a single living organism. Each of the approximately 47,000 ordinary looking aspens growing over 106 acres is genetically identical to one another and shares the same root system. It's estimated to be an astounding 80,000 years old, making it the oldest known organism on Earth. Pando is also believed to be the most massive living thing, too.
A single organism
Like creosote, aspens are clonal plants that can reproduce vegetatively (as well as sexually) from a single individual. What appear to be separate trees are actually stems growing from the lateral roots of a single individual tree. Each new tree shares the same dna and remains connected via the root system, even sharing nutrients and possibly disease. Over time, this single organism can continue to spread and grow, even as particular stems die off. In this way, the organism seems to repeatedly cheat death.
Is Pando dying?
Unfortunately, Pando doesn't seem to be regenerating new trees to replace the ones that die off. Efforts are underway to study the problem, which includes fencing off several monitoring plots as well as treating plots with understory fire and canopy thinning.
Visiting Pando
Unlike other famously-old trees, Pando's location is well known and easy to access. The grove is located in the Fishlake National Forest in Utah about one mile south of Fish Lake and is bisected by Highway 25. You can easily find it on google maps. As mentioned above, parts of the forest have been fenced off and aren't accessible. But there's plenty of Pando otherwise accessible to visitors, including a section of it containing a campground.
Your Pando "moment of zen"
Kayaking the Blue Ridge Reservoir
FR751 from Red Rock Crossing campground to Blue Ridge Reservoir (aka C.C. Cragin) will be closed from September 10, 2018 until April 2019. For more info, call Mogollon Rim Ranger District at 928-477-2255.
Look on most maps of the Mogollon Rim region of Arizona and you'll have trouble finding a label for Blue Ridge Reservoir, one of the nicer lakes in Arizona to kayak. Instead, you'll run across a far less glamorous name, the C.C. Cragin Reservoir. This gorgeous narrow lake is located about 25 miles north of Payson, but only came into being because of water needs 200 miles away.
The lake that copper built
In the early 1960s, Phelps Dodge was looking for water to service its huge mining operation in Morenci. The most obvious source was the nearby Black River, but its water rights were tied up by the Salt River Project, better known as SRP. Phelps Dodge and SRP found a solution in a water trade. SRP would allow Phelps Dodge to use water from the Black River if the mining company delivered the same amount of water from outside SRP's existing service area. A site on the Mogollon Rim was selected to complete the deal.
By 1965, Phelps Dodge had constructed a dam on East Clear Creek an hour's drive north of Payson. The resulting reservoir—originally named Blue Ridge—held only 15,000 acre feet of water, but was surprising reliable given its location atop the Mogollon Rim. The project included an 11-mile long pipeline to deliver the water down the rim to the East Verde River, which eventually flows into SRP's reservoir system. It was an exchange that served both parties well for decades to come.

How 'Blue Ridge Reservoir' became 'CC Cragin Reservoir'
More than 40 years later, the Arizona Water Settlement Act of 2004 changed the name of the dam and reservoir to honor C. C. Cragin, a former SRP superintendent that helped greatly expand the system of dams along the Salt River east of metro Phoenix. The following year, Phelps Dodge handed over the reservoir to SRP, who now provides water to Payson and surrounding communities.
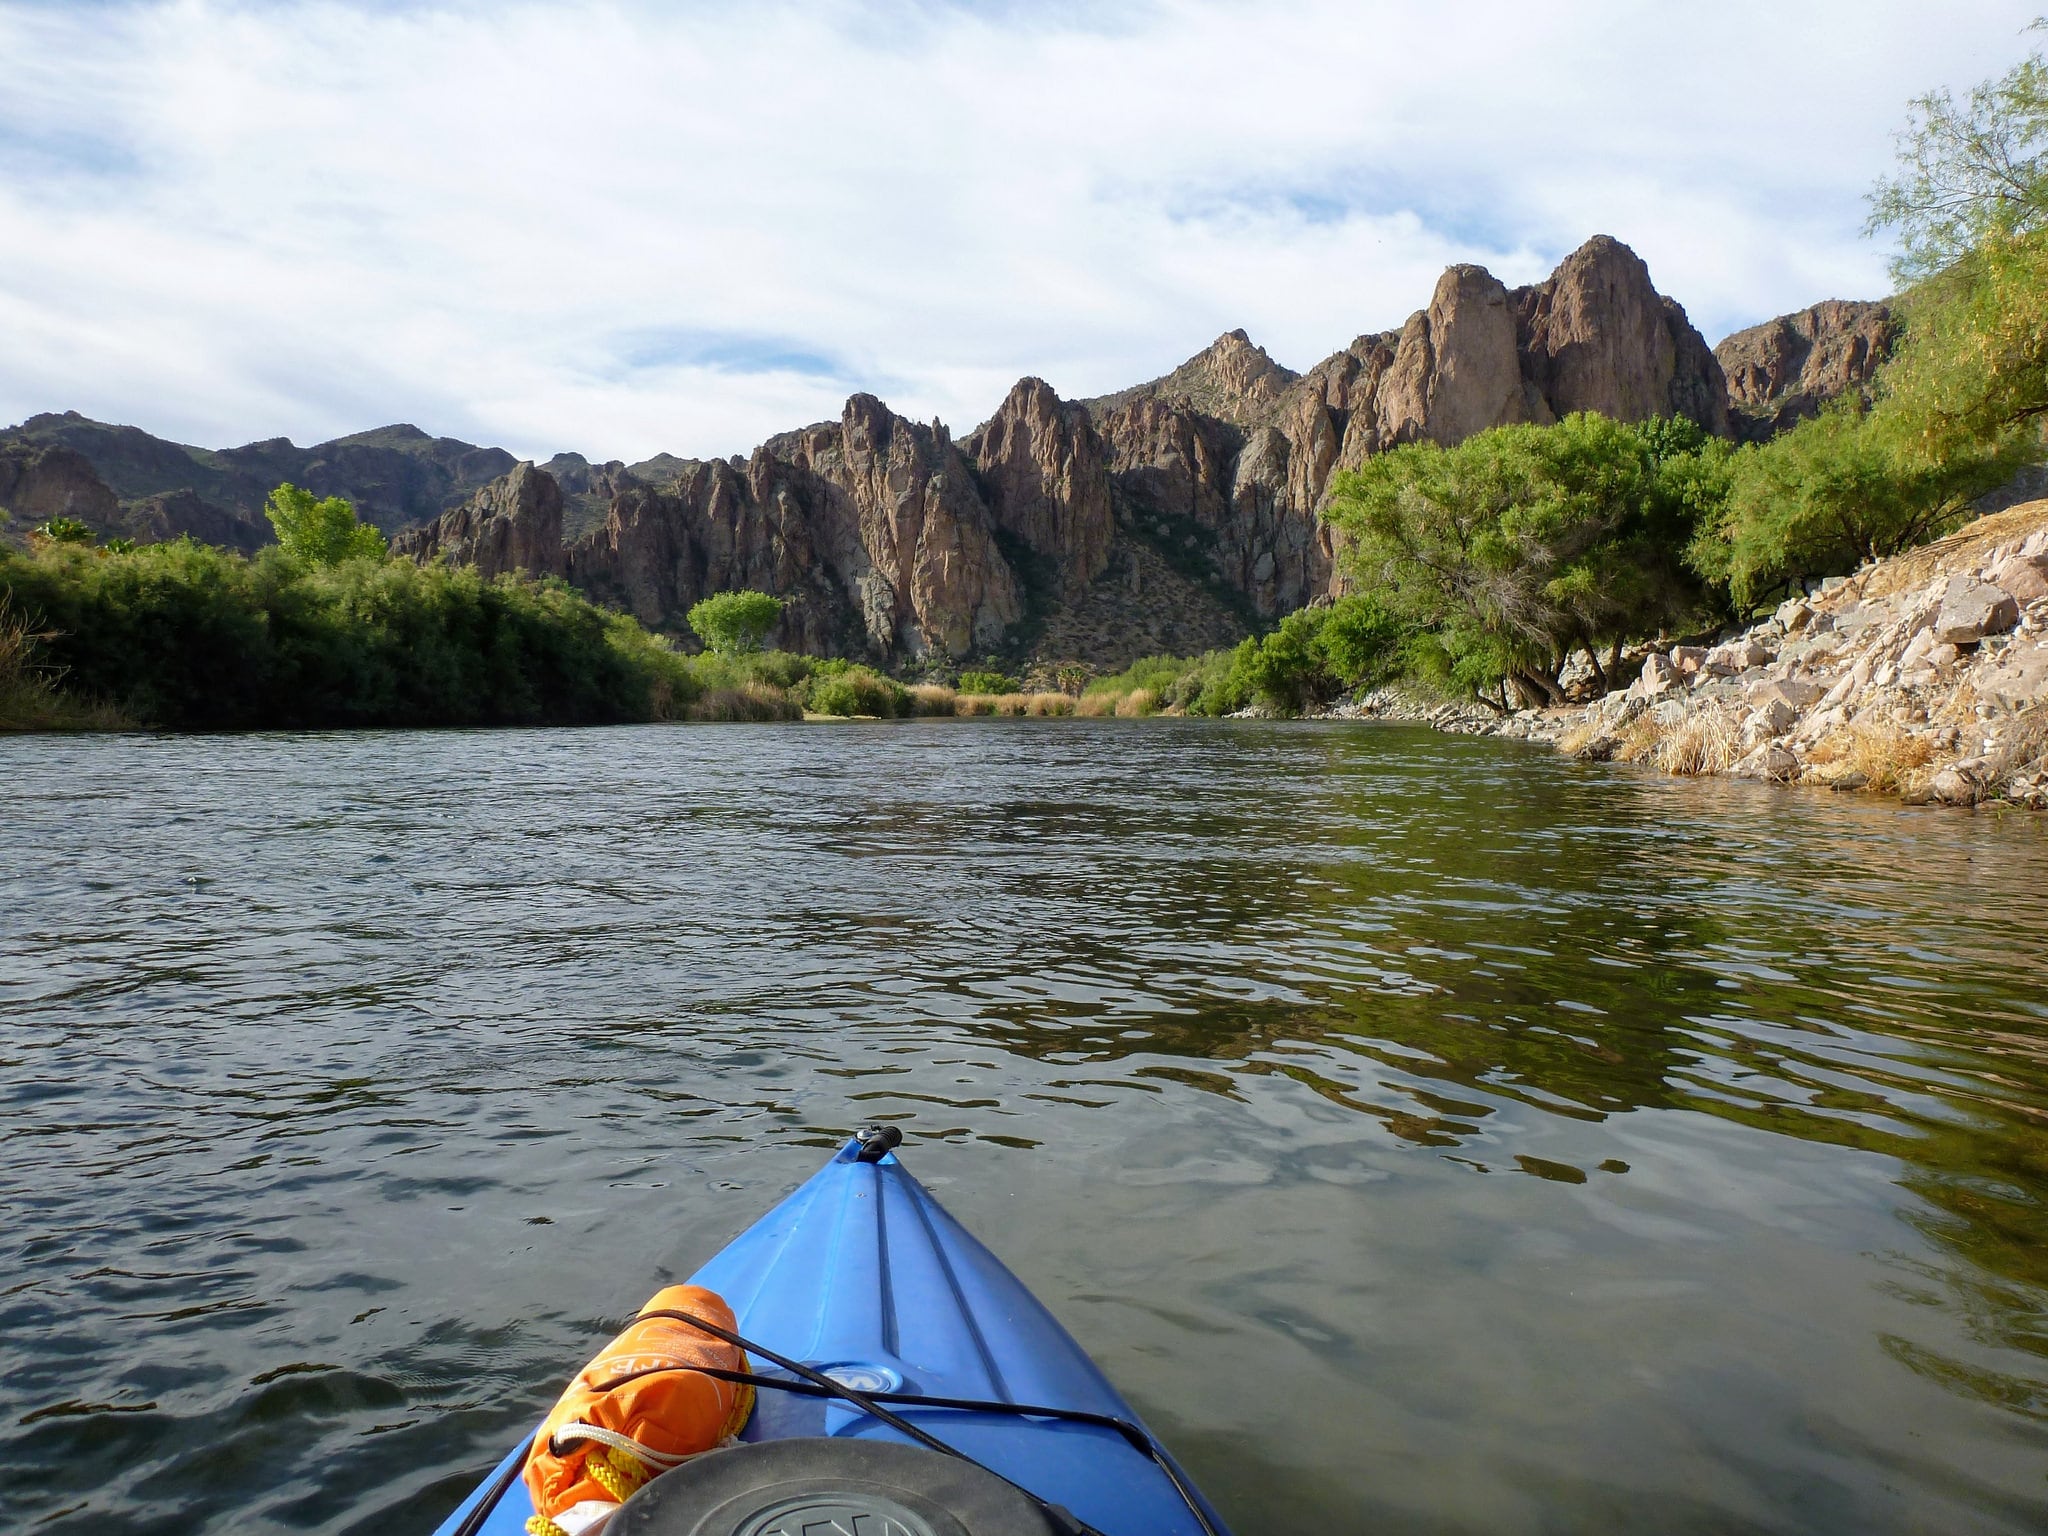
What's it like to kayak here?
Blue Ridge Reservoir is definitely a favorite of many kayakers in the state. The narrow, intimate lake is flanked by relatively steep pine-covered slopes, so it feels more like you're paddling a slow moving river than a broad lake. It's easy to feel like you're the only boat on the water here, as the lake curves around multiple bends just as a river does, obscuring other paddlers. With a treeline that comes right down to a 15 mile-long shoreline, the lake offers many opportunities to dock and enjoy a snack under the shade of the cool pines. Craggy rock outcroppings abound at the water's edge, offering plenty of geologic eye-candy while you paddle past.
The lake is split between two arms. The western arm is much longer, while the southern arm includes the interesting curved dam that holds the water back. At an elevation of 6700 ft, the paddling season runs from May through October. While small motorized boats are allowed, this isn't a place where paddlers will feel overwhelmed by motors.
How to get there
Blue Ridge Reservoir is located about 45 miles north of Payson, a roughly 2-hour drive from Phoenix. From Payson, continue north on Highway 87 for roughly 40 miles to FR751, near milepost 295. You'll see a large US Forest Service sign pointing the way to Blue Ridge Reservoir (as with most paddlers, the CC Cragin name hasn't quite taken hold). Turn east on FR751 and follow it about 4 miles to the boat ramp.
Parking at Blue Ridge Reservoir

One of the appealing qualities of kayaking on the Blue Ridge is the narrow, river-like canyon of the reservoir. Unfortunately, the same narrow width applies to the approach road, boat launch, and available parking area. You won't find a large paved parking lot capable of storing dozens of trailers here. Indeed, there are only a handful of legal spots clinging the guardrail near the top of the boat ramp loading area, with a small parking lot up the hill for the remainder of the vehicles. Parking is currently prohibited anywhere else along the road. In short, expect an uphill walk after your paddle to retrieve your vehicle. I recommend either arriving early in the morning or late in the day to claim a parking spot.
Camping near Blue Ridge Reservoir
The Rock Crossing Campground is just two miles from the reservoir boat launch, so it's well placed for a weekend of boating. It's a popular place during the summer months and no reservations are accepted, so you'll want to have a backup plan in case it's full. Blue Ridge Campground and Clints Well Campground are the next nearest options, each a 10 minute drive away.
In addition, dispersed camping is available throughout the surrounding national forest, so you shouldn't be without some sort of campsite to call home for the night. There are a handful of spots that work for shoreline camping from your kayak or canoe, if you're feeling adventurous.
Driving the Black Hills Back Country Byway

There it was—an obscure, thin black line on a map, a 21-mile dirt road shortcutting two sections of Hwy 191 along the eastern edge of Arizona: the Black Hills Back Country Byway. I had first noticed it when I was inspecting the map for the Gila Box Riparian National Conservation Area, one of the state's many National Conservation Lands. The road subtly poked into the Gila Box, providing a popular put-in spot for rafters down the Gila River. I wasn't here to raft the river though—at least, not yet anyway.
Arizona Highways had included the route in its listing of scenic drives in the state, so I had been attempting to work it into various trip itineraries for quite some time. On the return journey from southern New Mexico last weekend, I found my opportunity.
As we made our way north from the settlement known as "Three Way" [insert giggling], we wondered if the basalt-covered hillsides to the west were the black hills after which the road was named. We searched online for a detailed map of the backcountry byway, but—as is often the case these days—the BLM website was not forthcoming. After a bit of searching, we discovered that the 'Guthrie' and 'Toll Gate Tank' topo maps seemed most useful quads for navigating the route, and the Gila Box Riparian NCA map probably gives the best overview. Having a map isn't essential to this endeavor, as the main roadway is well defined and the turnoffs are well signed, but it's always a good idea when you're traveling in the backcountry. While high clearance vehicles are recommended by BLM, I'd consider the road passable under dry conditions by most sedans. Nonetheless, this area is remote and you should be fully prepared with extra water and emergency gear before attempting this or any backcountry drive. Not including stops, you'll need roughly 60-90 minutes to drive from end to end. You can access the Black Hills Back Country Byway off US Highway 191 near milepost 139 east of Safford and near milepost 160 south of Clifton. Both ends are well-signed and feature an informational kiosk a short distance up the road.
The Black Hills Back Country Byway isn't a knock-your-socks-off scenic drive, but it is definitely a worthy detour if you're passing through the area.
The byway follows the old road between Safford and Morenci built in the 1930s. There are a handful of interpretive sites and picnic areas along the way, as well as access to several rugged roads penetrating more remote areas. One of those side roads accesses the Black Hills Rockhound Area, where you can try your luck at taking some gems home. You'll also cross the historic Old Safford Bridge over the Gila River (built in 1918 and listed on National Register of Historic Places, but more recently renovated), which offers a great spot to stop and enjoy the river and the resulting shade. The 7-site Owl Creek Campground is on a bluff overlooking the bridge and riverway for those who want a longer experience.
The Black Hills Back Country Byway isn't a knock-your-socks-off scenic drive, but it is definitely a worthy detour if you're passing through the area. It's a rather pleasant drive through the backcountry of southeastern Arizona. The view from the Canyon Overlook Picnic Area overlooking the surrounding topography with Mt Graham looming in the distance is definitely camera-worthy. And the thin ribbon of lush green riparian vegetation along the Gila River also begs for an extended stop. The scenic drive would be a perfect compliment to any journey down the famed Coronado Trail.
Walking behind a waterfall at Horseshoe Dam
Overview
Located just outside the metro Phoenix area, there's a surprisingly cool waterfall that flows during the rare occasions when water is being released from Horseshoe Reservoir. The best part of this easy-to-get-to adventure is that you can walk behind the waterfall along a concrete walkway.
When to go
The "waterfall" only occurs when water is being released from Horseshoe Reservoir, one of several dams storing and delivering water to metro Phoenix. Unfortunately, large releases from Horseshoe Dam aren't that common, usually only occurring during wet periods when the system can't safely store any additional water.
That means that you'll need to pay close attention to conditions to catch it at the right time. If you see someone post a video or photo of the waterfall running, I'd hop on the chance to get there.
Your best bet is to check the SRP daily water report when you think there might be a release happening. Select today's date and look for the Reservoir Release section about halfway down. If you don't see Horseshoe Reservoir listed (it's currently highlighted in a little yellow box below the section), then you're out of luck. As you can see from this screenshot, the release was 425 cfs in the photos and videos you see here.

Getting there

The parking area is located about 24 miles from Carefree, Arizona. The road is about half paved and half good gravel or dirt. There are numerous potholes that blend in with the dirt, so pay attention and take it slow. If you're careful, you can make it in a sedan, though you'd probably be more comfortable in an SUV. There is one short section—maybe 20 yards long—that is quite rocky; be sure you go slowly over this section in particular.
Starting at the corner of Tom Darlington (Scottsdale Rd) and Cave Creek Rd in the town of Carefree, head east for a little over 6 miles. Turn right onto Bartlett Dam Road/FR205; you'll see signs for a ranger station and Bartlett Dam. You'll take this road for 6.25 miles until you see a well-signed road heading left (north) for Horseshoe Reservoir. Turn left onto this road and follow it for 10.5 miles.
You'll then want to turn right onto a well-maintained road signed for Horseshoe Dam Vista. Follow that for nearly half a mile until you reach the parking area. From the parking area, you'll be faced with two roads in front of you. The one on the right goes to a great viewpoint of the dam and the waterfall. The one on the left goes to a higher viewpoint, and is where you access the walkway behind the waterfall.
I've embedded a google map below with the route and some points of interest. You can clearly see the parking area and the viewpoints you'll want to see. You can even open this map using the Google Maps app on your phone to follow along.
Do you need a Tonto Pass?
Along the way, you'll see many signs telling you that you need a Tonto Pass. Sadly, an "interagency" pass, such as the America the Beautiful pass, does not count—that pass doesn't cover areas with "enhanced amenities," which is how Tonto National Forest gets away with not accepting the interagency pass. If this frustrates you as much as it does me, check out this organization that's leading the fight against additional fees.
The area that you'll be parking in does not have the elements required by law to qualify as an enhanced amenity area, but Tonto National Forest may disagree and ticket you anyway if you don't have one. I keep an unused one in my vehicle, so I often play-it-by-ear when I'm in an area that doesn't seem to qualify but is signed inappropriately. This is your decision, not mine, so don't blame me if you get a ticket.
What you'll see
I suggest starting with the viewpoint found on the road to the right from the parking area (point 3 on the map). This is the best view from this side and gives you a good overview of the scene.
From there, you can backtrack to the parking area and take the higher road on the left, or find one of the paths that leads up the slope to the higher road near where you're already at. From that viewpoint (point 5), you can clearly see the entrance to the walkway in front of you.
Once you're behind the falls, watch where you're walking—the footbed turns to gravel and puddles about halfway through. It's pretty relaxing to stare out as the water falls down in front you, separated into streams by debris barriers above you. The roar of the water is quite loud, and there's quite a bit of mist and some water dripping too.
Keeping walking and you'll find yourself on the other side of the dam. There's a sloping path up (point 6) to a viewpoint (point 7) that provides an interesting perspective looking back towards where you started. There are a number of cascades and smaller falls facing you, as the water finds its way down to the river channel below.
From here, you can make your way down the slope closer to the water for a slightly different view. Be careful, it's a steep slope that can get wet and slippery from the mist.
You can also make your way back towards the damn, arriving just below the walkway right where the water falls onto bare rock (point 8). The force of the water is very apparently from this vantage point.
When you're done exploring, head back the way you came—back up the slope, across the walkway, and back to the original vista point.
For an additional view of the runoff, follow the very rough road downstream that leads you to Fishermans Point. From here, you can wander out onto the rocks (point 9) for a good water-level view up towards the dam.
Before you head back to the city, you might want to explore more around this gorgeous area.
If you found this guide useful, please do me a favor and share this on social media or send the link to a friend. I appreciate it!
A moment of serenity at Pictured Rocks National Lakeshore
Sometimes, you just need a minute or two away—to recollect, to destress, to center yourself. To forget about the annoyances of the moment.
Here's an opportunity to do just that.
So sit back, put in your headphones, click the fullscreen button, and enjoy the late afternoon shoreline of Pictured Rocks National Lakeshore.
The Little Ruin Canyon of Hovenweep
Hovenweep National Monument doesn't get much fanfare. It's hard to live in the shadow—almost literally—of nearby world-famous Mesa Verde National Park. It's also hard to compete with the sheer number of cultural sites protected by Bears Ears National Monument and Canyons of the Ancients National Monument, both next door neighbors to Hovenweep. At only 784 acres, it's among the smallest national parks in the West, and a little bit out of the way for many travelers.
But it's the quaint nature of Hovenweep's aptly-named Little Ruin Canyon that really shines for visitors.
Behind the visitor center, an easy 2-mile loop brings you close to each of the canyon's major ruins: Tower Point, Hovenweep Castle, Square Tower, Hovenweep House, Rim Rock House, Twin Towers, Stronghold House, and Unit Type House. The canyon is small and feels homely—you can easily see across to the structures on the opposing rim. And the scale of the ruins here, known as the Square Tower Group, really makes it easy to imagine each as its own house on an ancient neighborhood block.

The Ancestral Puebloan people (often called the Anasazi until recently) who inhabited this canyon left behind countless ruins, rock art, and other artifacts in the Four Corners region. While the stunning Mesa Verde and Chaco Culture are among the best known parks preserving the remains of this culture, Hovenweep provides visitors with a different experience.
Whereas the sheer scale of Chaco's sprawling Pueblo Bonito or the massive Cliff Palace of Mesa Verde tell the story of great cultural centers, Hovenweep's story seems far more intimate. In some ways, it's like comparing Manhattan with a sleepy suburban neighborhood. One has the glitz and glamour, but the other excels at its relatability.

That even holds true with Hovenweep's small campground. Featuring just 31 sites—but equipped with curved shade structures and graveled tent pads—the small campsites give off a comfy, yet cozy vibe. There are even delineated trails thoughtfully placed from each campsite to the central restroom facility, which features flush toilets and running water. Not bad for a $10 stay.
When we camped there on a Friday night in March 2017, only three of the sites were occupied. And the occupants of each were fast asleep not long after dark.
That's too bad really, because the night sky is one of the best features of the park. In 2014, Hovenweep was designated as an International Dark Sky Park, a testament in part to the park unit's remoteness.
There's more to Hovenweep than just the canyon and campground, however. The national monument also boasts four outlying parcels—Cajon, Cutthroat Castle, Holly, and Horseshoe/Hackberry—each containing additional related ruins.
In short, Hovenweep is a great destination for avoiding the park crowds, visualizing what life might have been like for this community of Ancestral Puebloans, and enjoying an interesting and intimate little slice of the Four Corners region.
What are National Natural Landmarks?
While perusing a state map, you may have run across an area listed as a National Natural Landmark. There are about 600 such sites spread throughout 48 states and several territories, but not many people understand what these designations mean. After reading this short post, you'll know more than most. From Wikipedia:
The National Natural Landmarks (NNL) Program recognizes and encourages the conservation of outstanding examples of the natural history of the United States.
It is the only national natural areas program that identifies and recognizes the best examples of biological and geological features in both public and private ownership.
The National Park Service administers the program, but that doesn't necessarily mean they manage the land. NNLs are designated irrespective of land ownership—whether that's a federal entity, state entity, indian reservation, or even a private individual.
Participation in the program is completely voluntary, and does not convey any intention for federal acquisition. It is not a precursor for national park status. In fact, the NNL designation does not even transfer to the new owner if land ownership changes!
While many would assume that inclusion in the program would provide some level of resource protection, it's sadly not the case. Participation does not include any encumbrances or limitations on the property whatsoever. Similarly, there's no requirement for NNLs to be open or accessible to the public—and many are not. In fact, the National Park Service does not even provide a plaque for each area included in the program.
In short, National Natural Landmark status shows that a place is important, but does virtually nothing to ensure that those natural resources aren't degraded.
Nonetheless, the system does include some really amazing areas—from the La Brea Tarpits in LA to the Diamond Head Crater on Oahu to the under-appreciated Joshua Tree Forest in northwestern Arizona. All places worthy of a visit.
So be sure to consult the national NNL listing before you finalize your next road trip. Don't believe me? Check out the NNL photo contest for some instant inspiration.
National Conservation Lands: a series of underappreciated destinations
Our National Parks are often—and justly—referred to as crown jewels of our nation's public lands. They are simply amazing slices of our public lands.
But BLM's National Conservation Lands are among the least heralded and most underappreciated protected landscapes in the country. Many even rival the national parks we love so much.
The newest system of protected public lands
BLM (occasionally referred to by its full name, the Bureau of Land Management) traditionally wasn't known as a federal public lands manager with a strong commitment to conservation. But after the establishment of the National Landscape Conservation System—what we now call the National Conservation Lands—in 2001, that's starting to change.
More than 36 million acres, or about 10% of BLM's vast holdings, are now part of the system. That includes 27 national monuments and 22 national conservation areas (or similar designations), plus hundreds of BLM-managed wilderness and wilderness study areas. The system also includes the BLM-managed stretches of wild and scenic rivers and national scenic and historic trails. Needless to say, there's something for everyone in the National Conservation Lands.
If you're not familiar with the system, don't worry. I'll be writing about the National Conservation Lands here quite a bit.
A different kind of experience
Most areas in the National Conservation Lands offer a far different experience than the national parks. The vast majority have no visitor center in the unit, nor the regular ranger-led tours or programs. There aren't many visitor services to be found, and often not much interpretation either.
This lack of development allows for a much different visitor experience. Instead of being led down the path, visitors are forced to rely on their own preparation. That means you get to interact with the lands in a more intimate way. Instead of staying on the gravel trail and behind the fence, you can walk right on up to the pueblo ruin. You can pick up (and put down!) the pottery sherds, inspect the rock art up close (but don't touch it!), and generally experience the place on your own terms. Well, as long as you plan head at least.
Add these places to your bucket list
For now, you should immediately include these places in your to-visit list. Seriously, do it now. Right now.
- Grand Staircase-Escalante National Monument (UT)
- Gold Butte National Monument (NV)
- Agua Fria National Monument (AZ)
- Vermilion Cliffs National Monument (AZ)
- Rio Grande del Norte National Monument (NM)
- Bears Ears National Monument (UT)
- Red Rock Canyon National Conservation Area (NV)
- King Range National Conservation Area (CA)
- Canyons of the Ancients National Monument (CO)
- Black Rock Desert-High Rock Canyon Emigrant Trails National Conservation Area (NV)
As you travel the country in search of our nation's most important natural and cultural resources, make sure that you include the National Conservation Lands.
If you'd like to support the National Conservation Lands, please check out the Conservation Lands Foundation, and as well as the local groups in their network. The Wilderness Society also plays an important role nationally in defending the system.