
Travel Strategies
How to build a cheap water faucet and sink for camping
Jen and I have been dealing with a series of water leaks—4 completely different ones in the last 2.5 weeks. The latest is the main water supply line, which will likely require digging up much of the yard to replace. So, we've been without running water for far too many days recently.
Luckily, I had just upgraded our camping water system, so at least we have a place to wash our hands after, you know, peeing in the backyard (though sometimes, it's the alternative: "Hey babe, I'm going to the bar...I have to use the bathroom").
A simple water faucet system
My solution is a simple usb-powered water faucet that conveniently fits on top of a common Reliance Aqua-tainer. Toss in a collapsing sink, and you have a pretty handy system for camping—or using during major water leaks.
In short, you'll swap out the standard manual spigot and substitute in a hollow pvc piece that screws in place to hold a faucet while allowing for the water tube to be inserted into the water jug. The faucet pump is powered by an internal battery pack that you can recharge with a simple micro-usb cable.
While the default spigot is a sufficient solution, this faucet setup offers several advantages.
First, because you're pumping water out of the top instead of relying on gravity while it's on its side, you can use it on a table top—which makes doing chores like dishes much easier. No more hunching over to use the water, and with a portable sink, you can also avoid a muddy mess on the ground.
Second, you can simply press a button and get a preprogrammed amount of water dispensed, meaning it shuts itself off when you're done washing your hands. It doesn't seem like much, but it's hard to go back to the manual valve after using this for awhile.
Third is better cleanliness. While the manual spigot is handy in that it cleverly converts from lid to spigot, its design leaves the main tube open to the world during transport/storage, which means that there's nearly always some nasty crap in the tube when you go to set up. While the faucet doesn't maintain a water-tight seal when not in use—as the manual spigot generally does—it does block dirt from getting into the water jug. We simply keep the faucet, water tube, and connector in a ziplok bag with our gear. We still use the manual spigot during home storage and transport.
Want a readymade solution instead? Here is a reasonably priced and very similar all-in-one product on Amazon that seems to use the exact same pump.
What you need
- USB faucet ($14.72 on Amazon)
- PVC 3/4" x 1/2" reducing male adaptor ($1.76 at Home Depot)
- Aqua-tainer ($33/7 gal or $40/4 gal on Amazon)
- Collapsing bucket ($20 for 2-pack on Amazon)
Some alternatives
We prefer using the smaller 4-gallon aqua-tainer (it's easier to carry and we rarely need seven gallons between refilling) but this works with either size. We use the collapsing buckets as the sink (the two pack makes it easier to wash dishes), but you could also upgrade to collapsing sinks that have drain holes too.
There are a number of faucet options out there. This one has two buttons: on/off, and 600ml (which dispenses water until the limit is reached, which is perfect for hearty handwashing), a nice style, and an angled spout that shoots the water out at a bit of an angle, giving you more room for a sink. The base fits well over the pvc adaptor listed above, which still allows it to swivel depending on your needs. I've also added a slice of a thin pool noodle, which helps cut down on some minor wobbling when you press the on/off button. I use it about half the time.
Note that different faucets have different bases—which are often not shown in photos on Amazon—so you may have to alter this plan if you choose a different one. And keep in mind that some faucets have their water intake hose on the backside of the faucet base instead of the bottom, so they wouldn't work with this setup.
Assembly
Putting this together is dead simple. Just unscrew the standard spigot, screw in the pvc piece listed above (mine only screws in a few turns, which is more than sufficient), insert the water tube into the jug, and set the faucet on top. Boom, you're done.
Here's what it looks like, with the addition of the pool noodle slice mentioned above.

And there you go! A simple and cheap solution. We'll likely be using a similar set up in the minivan camper we're hoping to build.
Here’s a prebuilt solution I ran across.
A quick word on sacrifices made for travel
With quite a bit of downtime on our recent trip to Alaska—where we sat for 6 days in King Salmon hoping the weather would allow for a flight into the infamous Aniakchak Crater—we took a few unscripted moments to discuss some of the sacrifices we make in order to travel.
A few takeaways:
- A life of travel often requires sacrificing on spending in other parts of your life.
- Splitting costs is a great way to save on expensive travel costs. It might even be worth sleeping in a bunkbed in the living room or having your friend walk thru your bedroom to use the bathroom.
- Planning ahead, such as packing food to cook at an expensive destination known for expensive meals, is a great way to stretch your travel budget.
- Travel is rarely as sexy as what you see on social media. You rarely see the cheap meals, the long days, or the boring downtime spent waiting.
Here's the direct link to the video embedded above: https://www.youtube.com/watch?v=N81jhM8OZ-U


How I camp in my car during road trips
The plan was simple. With my girlfriend vacationing overseas with family, I'd hit the road and visit some places scattered around the West that I needed to mark off of my various travel quests. And along the way, I'd also visit some online friends near Las Vegas, Boise, Northern California, and Carson City. The trip would require quite a bit of driving—I guesstimated roughly 3,500 miles—and I needed to squeeze it into a short 10-day window to make it work.

And as a trip we hadn't exactly budgeted for, I'd also need to keep expenses to a minimum. So that meant two things: I'd have to be very efficient in my travel days, and I'd basically need to use my vehicle like an RV.
I have done a number of fly-and-camp trips before, but for this trip, I wouldn't be camping as much as living in my vehicle. Being able to sleep in Sam the Subie instead of having to set up a tent would give me the most flexibility in where I stayed each night. That was an important cost-saver, as it allowed me to avoid hotels and campground fees and either disperse camp on public lands, stay in a friend's driveway, or even catch some sleep in a rest area or parking lot. And since I wasn't sure how the weather would turn out, it'd also ensure that I had a warm place to sleep for the night—one where I could avoid the unrelenting wind I encountered the entire trip.
The video below will show you the main items I brought and where I kept them in the vehicle. Since I was driving my own vehicle, I could bring a few optional items I normally wouldn't bring on a fly-and-camp trip—most notably, a large foam mattress topper and a full-sized cooler. I also brought a hefty amount of food and snacks, as evidenced by the huge black tote bin.
The setup I used here worked great on my trip. While the video explains quite a bit, I'll go into more detail below on some additional topics.
What to bring and where to put it
When I'm traveling on a road trip like this, I prefer to keep my setup as simple and organized as possible throughout the trip. That means thinking about where everything goes before I hit the road, making sure that the things I'll need to access—either while I'm traveling or when I'm in bed—are easily accessible. That's why I try to keep everything in a container. So food and snacks go into one bin, and the cooking stuff goes into another. That makes it much easier to stay organized. The main exception to this is my clothes. I prefer to have clothes stored in batches so that it's easier to pick out what I need without having to struggle to extract an entire duffel bag.
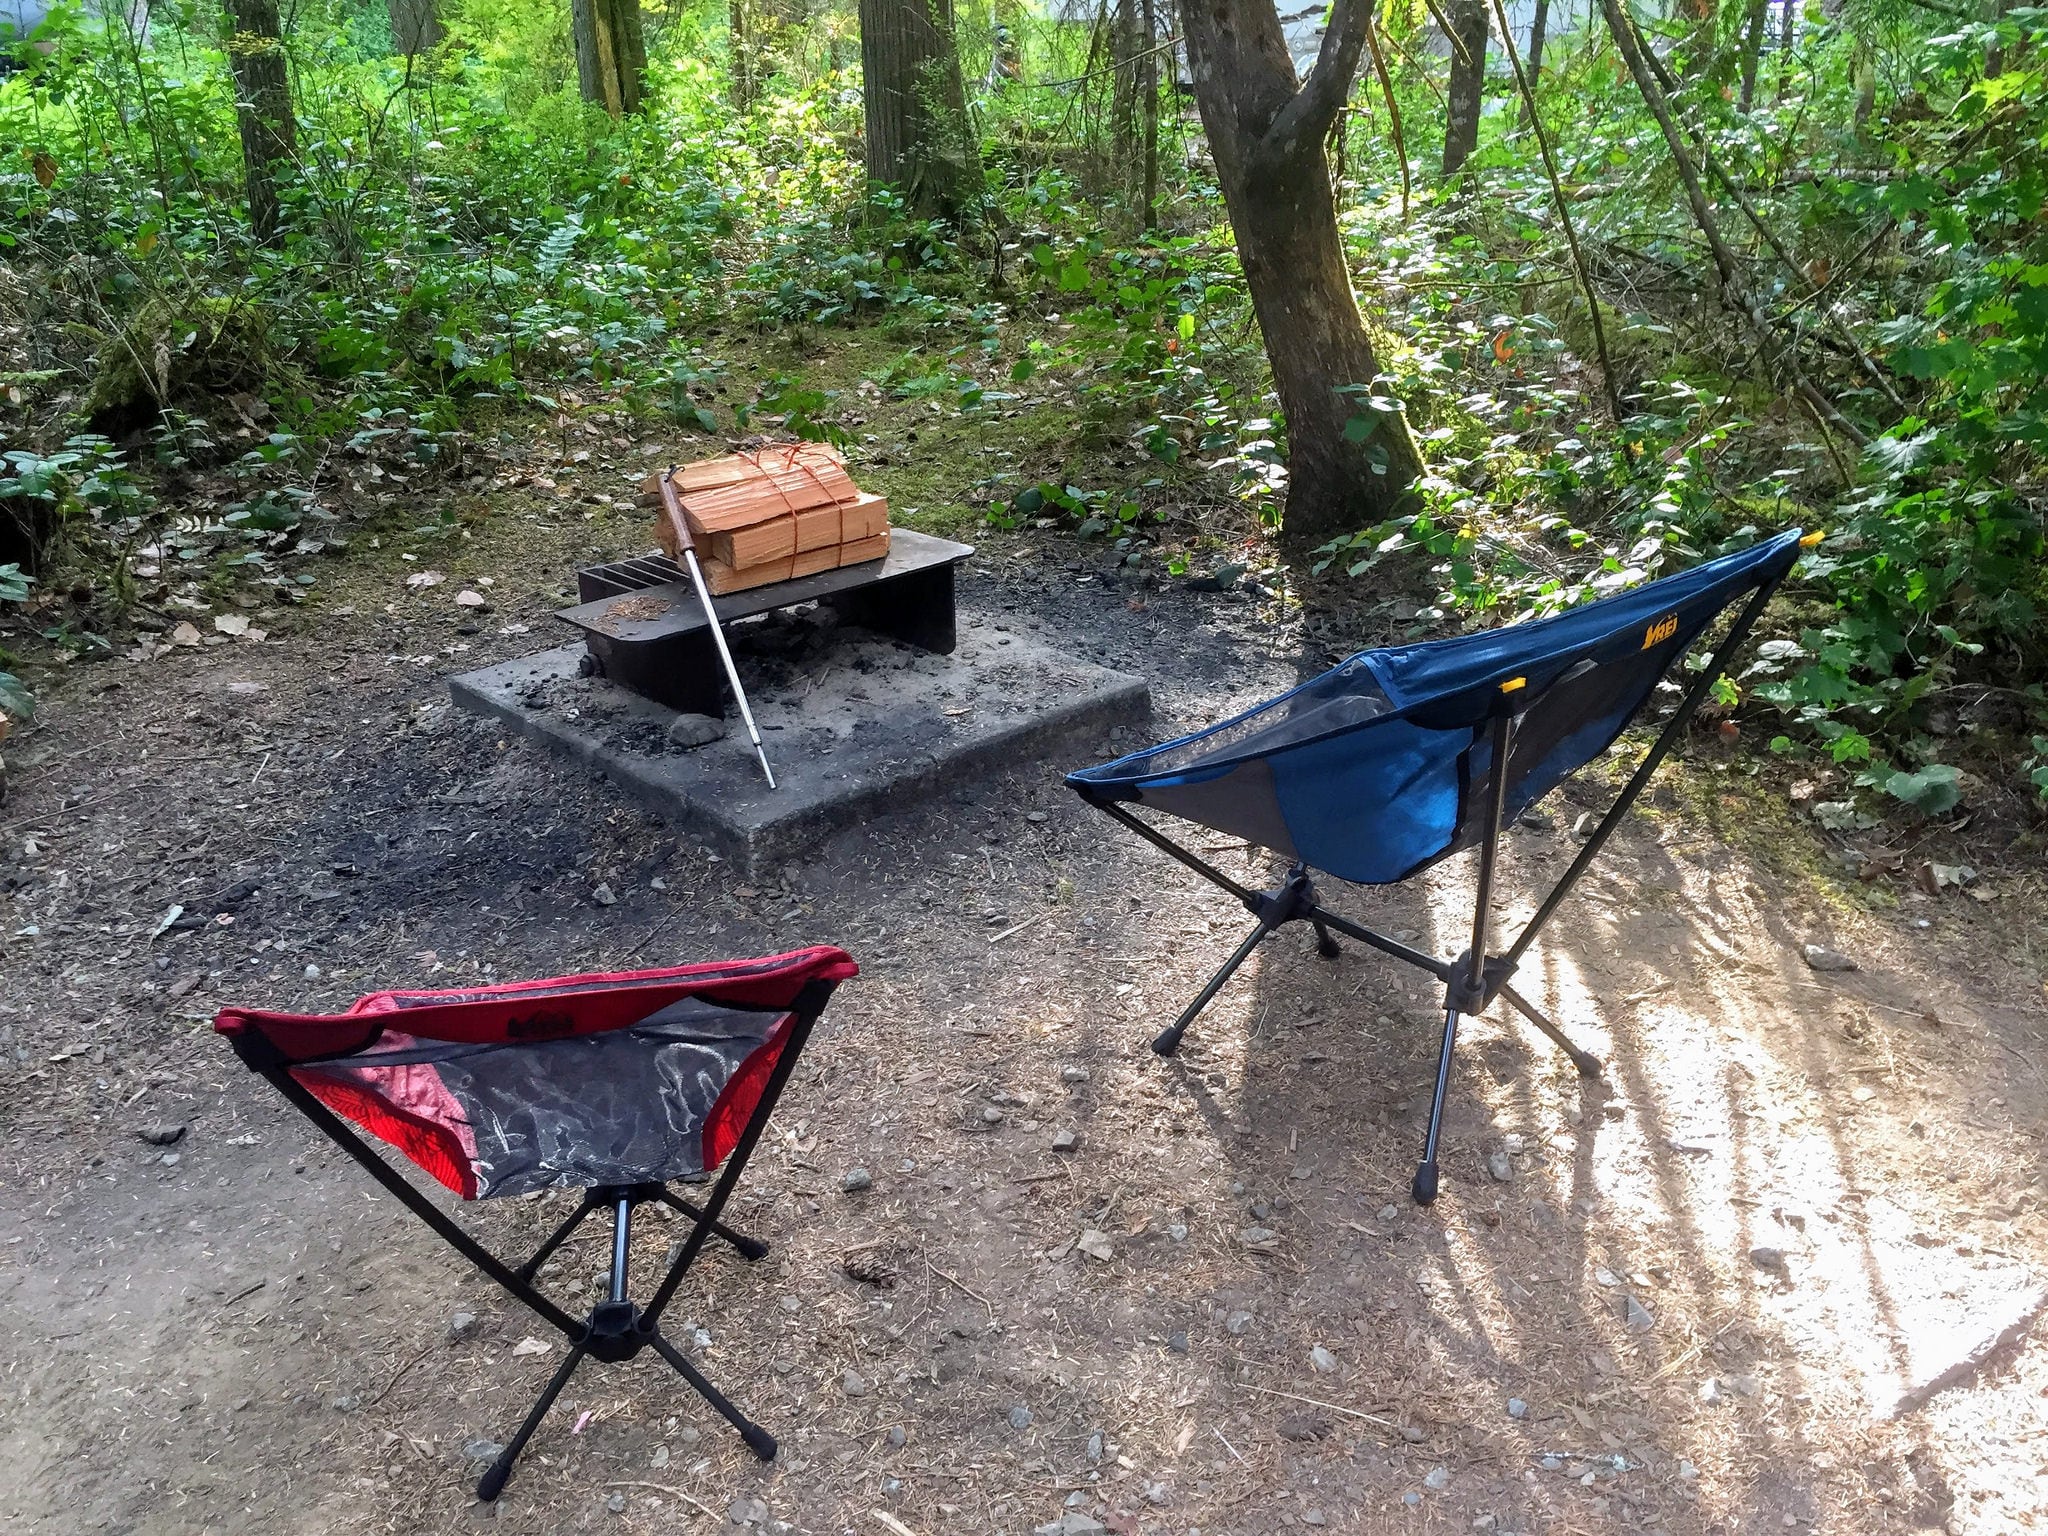
Keeping it simple and organized also means bringing a bit less and fewer "maybe I'll need this" sort of items.. The fewer items you bring, the fewer things you'll have to manage during your trip. In this case, I brought two things that I definitely didn't end up needing: my backpacking chair and my multi-use camping bucket. Both items were small and didn't clutter things up, so I tossed them in even though I wasn't sure if I'd use them. And, like just about every time, I was right. Because I didn't spend any time at an actual campsite, I never made a campfire—and therefore, I never needed the chair. When I ate, I simply sat in the backseat or at a picnic table. And I assumed that the bucket would come in handy for things like washing up and doing dishes. I really didn't need to do much of those tasks either, given the more frequent showers I snagged and how few dishes I dirtied.
Food and cooking
In order to save money, I planned on snacking for breakfast and lunch, and then cooking a simple dinner like soup, chili, or a grilled cheese sandwich. I also assumed that I'd occasionally get some cheap fast food, especially if I was tired and still had a long drive before bed. And I also hoped that I'd try a handful of breweries along the way when time permitted.
As it turned out, I spent quite a bit more time hanging out with friends during the trip than I had anticipated, including joining them for some home-cooked meals. And since I managed to add in a number of additional destinations, I would often arrive to my intended campsite pretty late, opting to snack instead of cook in what were often some rather fierce winds.
In the end, I managed to stay within budget, even though I cooked far less than I originally intended. And I also managed to sneak in stops at nine craft breweries, too.

The not-cooking strategy
But just because my plan this trip was to cook doesn't mean yours has to be. While one of the biggest benefits of camping is saving money on hotels and eating out, that doesn't mean that you have to cook every time you camp on a road trip. In fact, sometimes you camp just so that you can afford that fun night out on the town, as I did when I brewery-hopped around Boise halfway through my trip. And you can still save a lot of money by sleeping in your car while eating most of your meals out. Indeed, that reduces quite a bit of the gear you need to bring—though I still recommend bringing a cooler for cold beverages and plenty of snacks for the road.
Finding places to camp
Aside from one night at a friend's house, I didn't preplan where I'd sleep each night. But because most of my primary destinations were BLM Conservation Lands areas, I knew that I'd have quite a few dispersed camping opportunities. I also knew that there were a number of developed campgrounds around that would likely have space if I needed them. And because I was sleeping in my car, I could also get some shut-eye at a rest area, truck stop, or even a Wal-Mart parking lot if I absolutely needed to.

The first night I ended up stopping at a rest area right along the Pony Express Trail in northern Nevada to use the restroom. Since I kinda wanted to check out the trail the next morning and was already tired, I decided that I might as well sleep there. But boy, for being such a remote place, it sure was a busy rest area—and given the layout of the parking lot, it was hard to block out all of the rest area lights and approaching headlights.
After about an hour, I decided to find another spot. I hopped on Google Maps, turned on satellite view, and took a look around the area. It took just a handful of seconds to find a better spot about a quarter mile away, and probably about 90 seconds to drive there. It's a whole lot easier to move your campsite to a better location when you don't have to pack up a tent. Once I relocated, I slept great under the dark and quiet sky. When you're traveling in the West, there's often a good campsite not too far away—especially during the shoulder season.
There are a number of apps and websites you can use to locate possible places to camp. When looking for dispersed camping sites, I usually start by scouring a state atlas or gazetteer, then when I've narrowed down my target area, I switch to Google Maps satellite view and zoom in to identify specific sites that might work. In addition, I also regularly consult FreeCampsites.net, Campendium, Boondocking.org, and the iOverlander app for sites that others have already identified. When I'm looking for developed campgrounds, I check recreation.gov, Reserve America, or just google "campgrounds in my area," though those search results tend to include RV parks. Allstays is a highly rated app you might also want to check out.
Driving versus sleeping mode
While most of my stuff stays in the same spot throughout my trip, I do move a few items when I shift to sleep mode. When I'm driving, I like having the passenger seat free for things like maps, a snack I've pulled out of my food bin, or any other items I might need quick access to. But when I get to my destination for the night, I move any items that had occupied the rear seat (usually my food bin and my computer backpack) up to the passenger seat. This gives me a completely empty rear seat right next to my bed.
An empty rear seat
Having this rear seat available is great. Once I get the car set up for the night, this tends to be where I spend my time before I lay down to sleep. I can easily change clothes, watch a movie on my tablet, put on my shoes, snack or eat dinner, work on my laptop, scour maps while I revise the next day's itinerary, and so forth—all while escaping the elements and not drawing any attention to the vehicle. Importantly, it's also the easiest way to get in and out of bed, something you'll want to consider if your vehicle doesn't have an easy way to open the rear gate from the interior. I just climb up onto the bed and swing my legs around. When I'm sleeping, the seat conveniently converts into a handy bedside table where I place my glasses, headlamp, and phone for quick retrieval in the middle of the night.
Parking for the night
When I park for the night, the first thing I do is decide on how I want to position the vehicle. The primary considerations here are blocking any annoying lights, and pointing into the wind. If there's any annoying light, I try to point the car towards it so that the sunshade I put in my front window blocks it from shining into the rest of the car. If it's windy, I often position the car into the wind, which cuts down on the vehicle shaking or the windows whistling.

Once I have the vehicle pointed the right direction, I put on the emergency brake to limit any rocking when I'm moving around in the vehicle. I transfer the items from the rear seat to the front seat and get my bed ready.
I then put on the mesh window coverings, always covering both of the rear windows. These are the perfect solution to keeping annoying bugs out, but they also help shield bright lights and even light rain. If it's hot out or I'm worried about it raining, I'll add them to the front windows too. I then roll down the windows to the desired level. If it's cold out, that might just be an inch or two for both of the rear windows. If it's hot and I want a lot more airflow, then I'll roll all four windows all the way down. This is something you can play around with, but you'll want to keep at least one window cracked during the night.
I usually keep the car keys easily accessible on my center console and lock the doors when I'm ready for bed. I like to keep the drivers seat completely clear so I can quickly hop in and move the car quickly if I need to. When I'm camping in my own car, I always bring a full size pillow and also a cheap fleece blanket to cover my face in the night if the breeze is cold or to block out any unexpected light, like a bright moon moving across the night sky.
The entire process of shifting from driving to sleeping mode takes less than two minutes—much quicker than setting up a tent. When I wake up in the morning, I get dressed and shift it back before hitting the road again.
Toilets and showers
Probably the most popular question I get about these types of road trips is how and/or where I use the restroom and shower. For the most part, the answer is pretty easy. Except in some pretty remote areas, there's nearly always a restroom available somewhere—whether at a rest area, gas station, fast food restaurant, or even a campground or wilderness trailhead. In the event that's not the case, I have a trowel and toilet paper. If you want something a bit more convenient, there are a number of other options, including luggable loo and other portable toilets, female urination devices, and so forth—though none of these really works inside the vehicle.

As for showers, I knew that I'd be staying with a friend about halfway through the trip, so I was guaranteed at least one shower. Beyond that, I knew I could either pop into a truck stop or developed campground and pay for one, so I came prepared with my normal public shower kit (sandals, quick dry towels, shampoo/body soap, and a plastic bag to keep my stuff dry). But in a pinch, I could also rig up something shower-like on top of my car if it was warm enough out, or make sure to get to the hot springs on my itinerary, or just make due with a "backpackers shower," also known as a wet wipes bath. I could have brought my camp shower, but it just didn't seem like I'd need it. There are a lot of other showering solutions available out there, but I'll wait to tackle those in a future post.
In the end, I got a bit lucky on the trip and ended up having access to a shower at each place where I visited an online friend. And because we ended up having a meal together, I also ended up cooking far less than I had expected. It's great when things like this happen—but on trips like these, I always try to be self-contained as possible.
Sleeping in a rental car
Not taking your own vehicle on a road trip? Don't worry, you can pull off much of this in a rental car, too. Because not all vehicles have seats that fold flat, however, you'll have to manage to snag a vehicle that does. I've had the best luck with full size SUVs and minivans with stow-and-go seating. Either way, don't drive off the lot until you have one that will work for you.
Here's a video of what I brought when I camped in a rental car a few years back. The video quality isn't great, but it's still useful in understanding what items I brought with me.
You should also check out my extensive post on travel camping, which outlines which camping items I bring when I "fly-and-camp."
Some other tips
- You don't need a mattress set up as stupidly comfy as mine. Most of the time I sleep in my vehicle, I just use a simple backpacking sleeping pad.
- Not all Wal-Marts allow overnight parking. Here's a listing of recent reports.
- Passing by a national park unit on your trip? Remember that many of the visitor center restrooms stay open all night.
- I use a pool noodle slice to cover up the hook that the rear seat attaches to. Trust me, this is preferable to bashing your hip against it when you shift in your sleep.

- Headlamps fit great on the back of headrests.
- If you don't want to wake up at sunrise, consider where the sun will be rising. I use the Peak Finder app to determine this, but you can also just make an educated guess. Same with a full moon, which can seem incredibly bright when you're trying to sleep.
- Have a membership to a national gym chain? Well, that's a great place to grab a shower while traveling.
- Too hot? Too cold? You can always turn on the vehicle for awhile to cool off or warm up.
- I like bringing a small pack towel in with me when I stop at public restrooms so I can dry off after rinsing my face when there are just hand dryers available.
- Not a great sleeper? Bring some ear plugs to help drown out weird noises. You can also bring a sleep mask to help shield bright lights from other campsites, vehicles, or lampposts.
- If you want to add some additional privacy or black-out those weirdly shaped rear windows, try using some reflectix and trim it to fit. If you're planning on stealth camping, spray mount some black fabric to one or both of the sides. These also work great for insulting the vehicle and you can store them flat under your mattress when not in use.
- These headrest hooks are quite handy. I use these frequently throughout the day when I'm on the road, and later at night, I hang a water bottle from one attached to the drivers headrest so I can easily find it when I'm in bed.
- Don't forget these important tips on making ice last longer in your cooler.
How to keep track of your hikes using Google Forms
There are dozens of ways to keep track of your hikes, from relying on your gps track history to simply writing it down in a trusty notebook. Each method has its own benefits and downsides.
I used to keep track of my hikes by writing the date and the names of my hiking companions at the bottom of the page in whichever hiking guidebook I was using. It worked well enough back in the 1990s, when guidebooks and magazines were the primary sources of trail information. But now that trail databases have migrated to the internet, that old system is only occasionally applicable. I've also run out of room on the pages of my favorite local trails that I hike frequently, or upgraded to newer editions and abandoned my old notes.
I now keep track of my hikes by creating a simple Google Form that I've bookmarked on my phone. It's free, easy to set up, and you can customize it to track whatever information you want. Best of all, it's always right there in your pocket when you need it, and the data is easy to use and store well into the future.
Why keep track of your hikes
If you're just a casual just-once-in-a-blue-moon hiker, then it probably doesn't matter if you track your hikes or not. But if you hike more regularly than that, I'd recommend you start doing it. This is especially true if you have a personal hiking goal like the #52HikeChallenge. It's a quick little habit to start that you might really appreciate having access to later.
In addition to keeping track of your personal goals, a hiking log can make it easier to figure out which trails you've already hiked and with whom, including any special or noteworthy details that you won't find in guidebooks or online trail descriptions. I particularly like keeping notes on memorable things that happened during the hike, such as stumbling across some pottery sherds, or an interesting animal encounter, or what day the wildflowers started to bloom that year. Since you customize exactly what you keep track of it, you can also include whatever tidbits you don't want to forget.
Hiking logs also serve as a helpful historical record of your hiking accomplishments. They can be used to calculate and analyze statistics such as how many miles you've hiked this year, how many times your pooch joined you on the trail, or how much faster you hike that local quad-burning trail now that you've gotten into better shape.
Tracking hikes for the #52HikeChallenge
The 52 Hike Challenge is a great idea, but their tracking spreadsheet isn't the easiest to use on a phone. As a fellow challenge hiker, I find that a simple Google Form makes entering my hike each week much, much easier. Even better, I get to capture more than what the 52 Hike Challenge tracking spreadsheet does, which makes the log that much more useful to me.
Benefits of using Google Forms
There are a variety of mobile apps out there that you could use to track your hikes—many of which include useful features like GPS tracks and trail maps. But as new apps are released, feature sets shift, or subscription fees change, many hikers find themselves switching between apps or using them for only a subset of the trails they hike. For instance, I'll rarely fire up Gaia GPS for a local hike in the nearby Phoenix Mountains Preserve, as I know exactly where I am at all times. On the flipside, I probably won't use a GPS app on my phone to track a long day hike in the Superstition Wilderness due to concerns about my phone's battery life. Another problem lies in trying to export your data from many of these apps; it's not always an easy task.
The end result is a mishmash of hiking data siloed in multiple apps, or missing entirely. But with your own custom Google Form, you can solve many of these issues by simply logging your data in the form after each hike, no matter which GPS app you might use to track your route. Or, if you didn't use one but know the basic details of the hike you completed (such as the distance and elevation gain), it's easy to enter that data later—something that's impossible to do with many of the leading hiking apps. Sometimes, simple is just plain better.
Best of all, it's free and all you need to get started is a browser and a google account. And since it dumps the data into a basic spreadsheet, it's rather easy to analyze the data. That allows you to do things like quickly total up your cumulative hiking miles for the year, figure out how many feet of elevation you climbed, or total up how many different trails you hiked during the year. And depending on which fields you include, you could also analyze all sorts of other interesting tidbits, as well. Since it's all contained in a simple spreadsheet, that data is easily transportable too, so you don't have to worry about future software incompatibility.
Which fields to include
You have a lot of options here, so spend a few minutes to decide what items you'd like to keep track of. If you're on the fence about something, my recommendation is to include it on the form and make sure it's not a required answer. If you later decide to stop logging data for that item, you can simply ignore or delete that field when you review the spreadsheet later.
Here are some possible options of data to collect—you'll need to decide for yourself which ones to include.
- Date of your hike
- Name of the trail(s) you used
- Mileage hiked
- Elevation gain
- Duration (how long did it take you to hike?)
- With whom did you hike?
- Was this an organized group hike? (you can even use a drop-down menu for your common hiking groups)
- Did you lead this hike?
- Did your dog(s) join you?
- Did you record a GPS track?
- Link to the GPS track
- Your personal rating of the hike (use the linear scale field type; keep in mind that you can create multiple rating questions, each on a different aspect of the hike, if you'd like to get detailed)
- How tired you were hiking the trail (or maybe how many times you had to stop to take a breather)
- Links to photos
- Links to blog post
- Wildlife encountered
- Type of trail (e.g., out-and-back, loop, lollipop, etc)
- Location type (such as national park, wilderness area, state park, or city preserve)
- Where to find hike details (guidebook, link to website, etc)
- Rating on the "Fun Scale"
- Notes (capture any other details in this section)
How to use it on your phone
As I mentioned in the screencast, I strongly recommend that you add the form as a shortcut to your phone's home screen. A hiking log is only as good as the data you enter, so you want it easily accessible so you can get to it whenever you remember to log your hike.
The first step is to get the link to your phone's browser. There are a number of ways to do this, such emailing it to yourself, typing into your mobile browser manually, or using a universal clipboard. Once you have the link on your phone, it's a breeze to add the shortcut.
Keep track of other types of adventures
You don't have to use this solely for tracking your hikes—you can create forms to track any of your other adventures or outings, too. It wouldn't be hard to create separate forms to track things like how many nights you camped, what trails you mountain biked, or what lakes or rivers you paddled. I've even used google forms to get track of hikes I want to do, or at least to add to my adventure map.
Get started!
Be sure to check out the screencast above to learn how to design your hiking log. Then hop on over to forms.google.com to get started, and let us know in the comments if you have any other suggested uses or fields that others might want to copy.
I gave up the NFL to make more time for adventuring
Football season is once again upon us, but I won't be donning my favorite jersey on Sunday mornings this season, yet again.
Don't get me wrong. I grew up a San Francisco 49ers fan. Well, make that a rather passionate Niners fan.
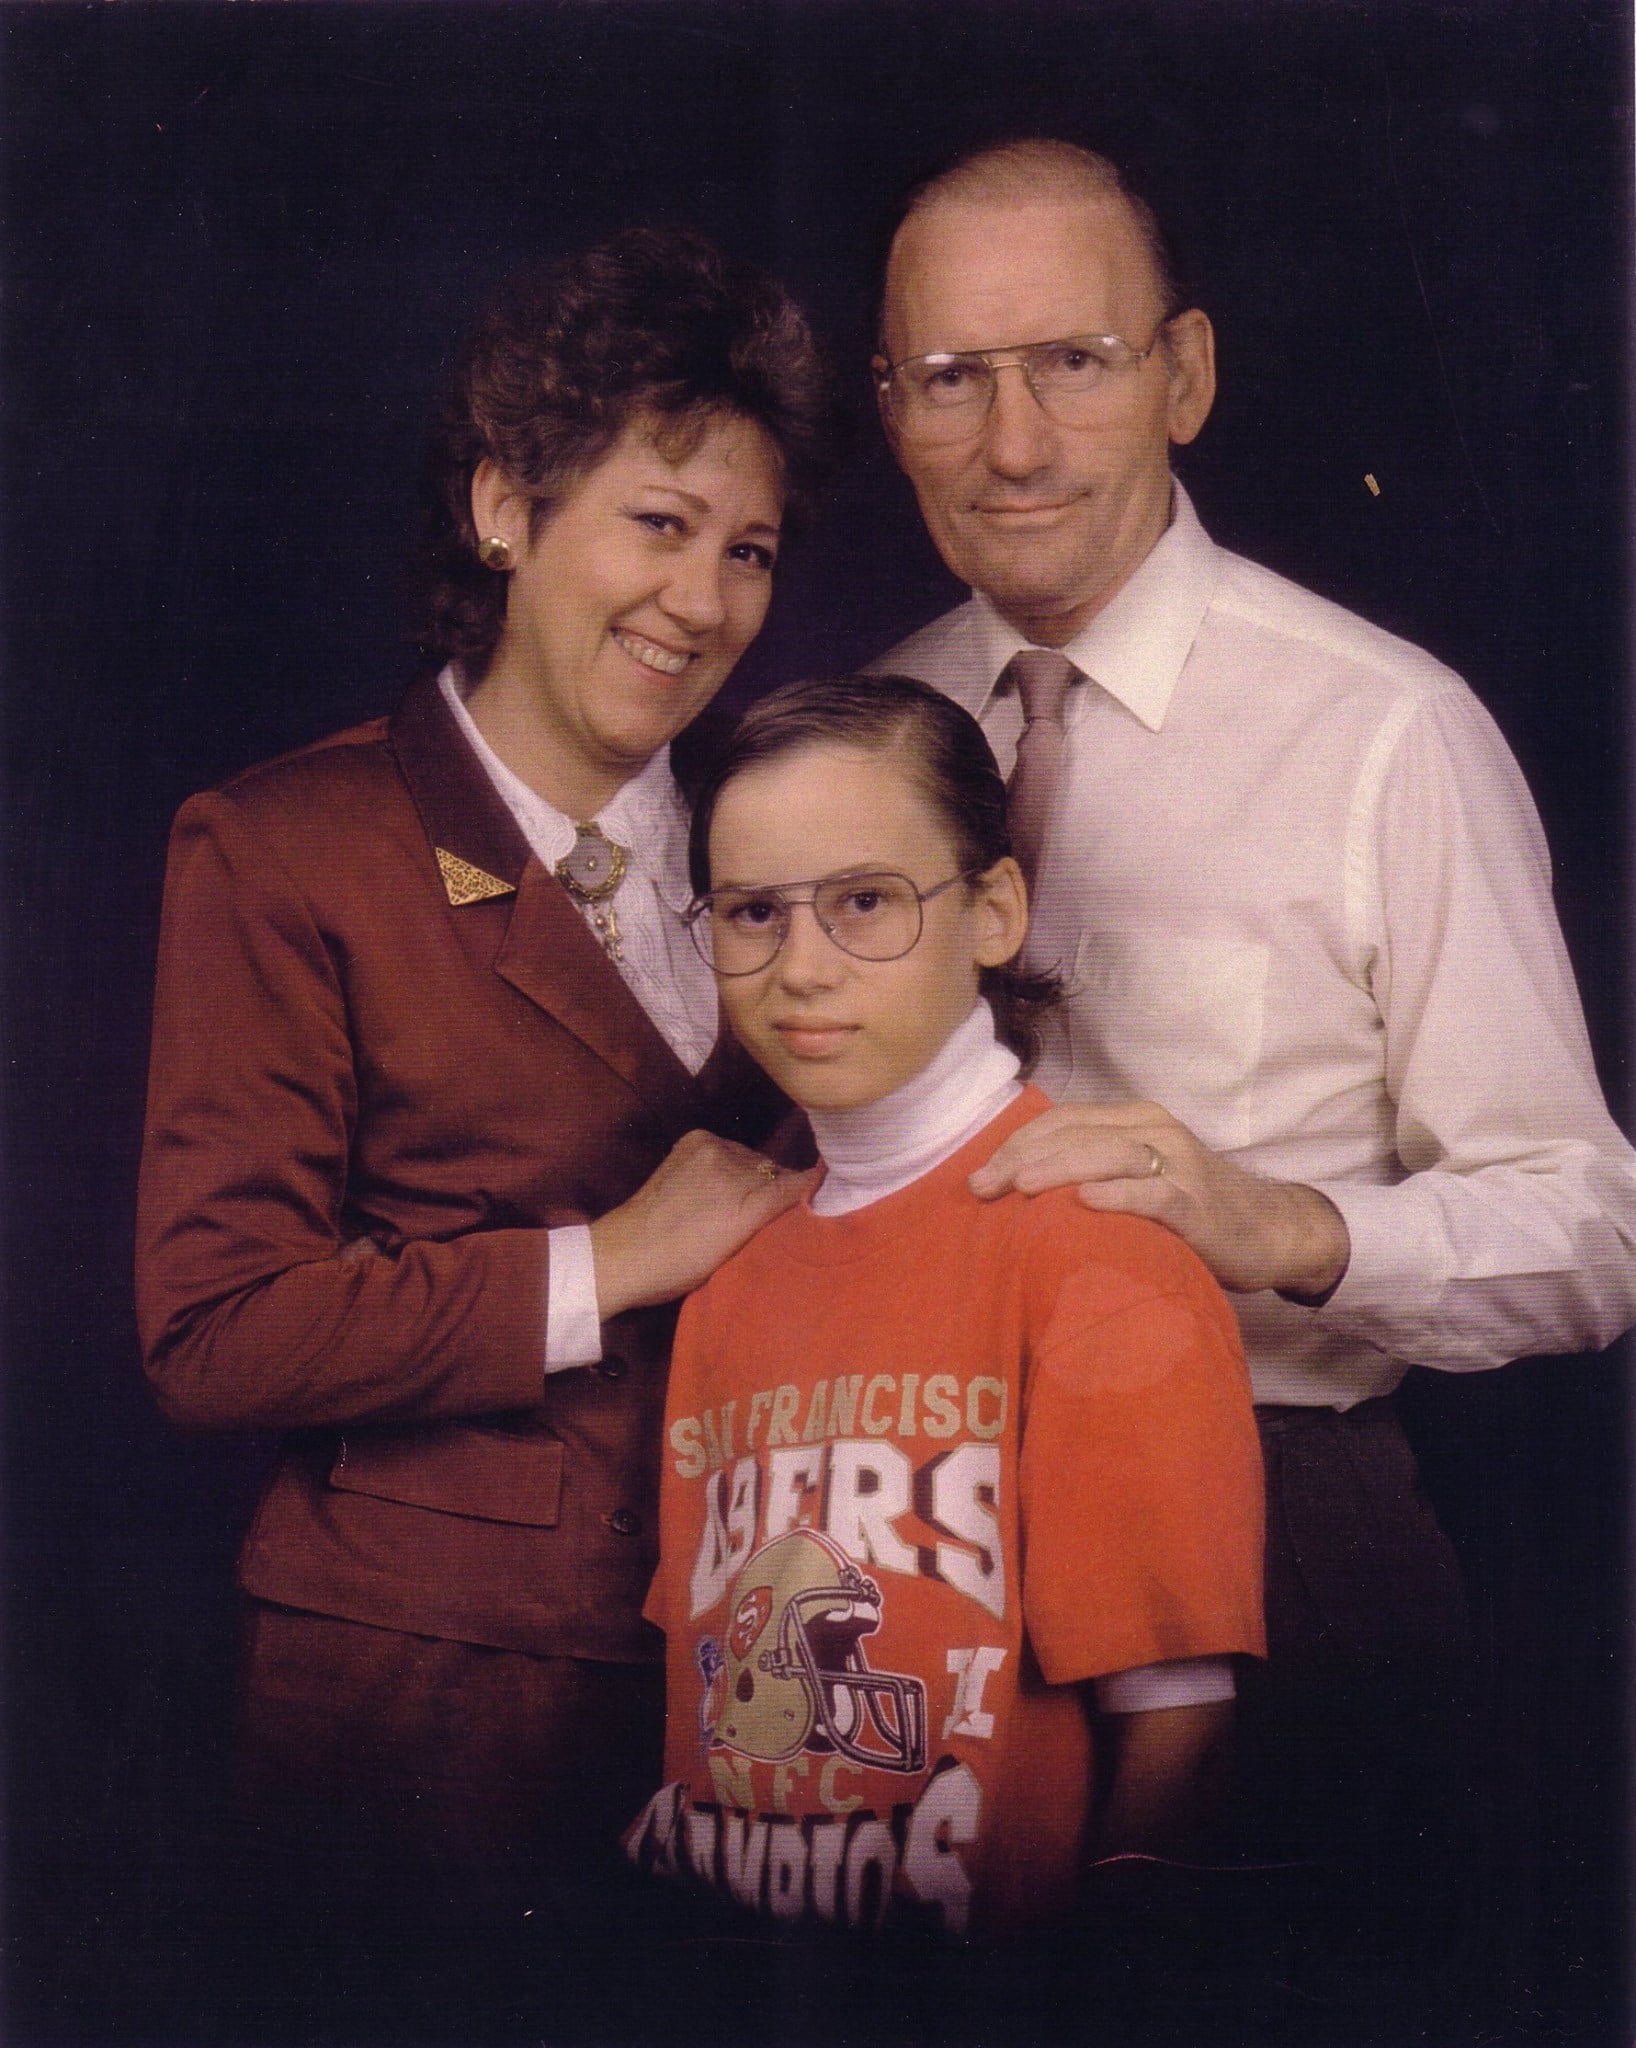
How passionate you ask? Well, passionate enough to persuade force my parents to let me wear a Niners shirt during one of our few formal family portraits. Yes, that's an actual family photo from my childhood.
I remained a dedicated fan through my youth and into adulthood. I'd rejoice in the playoff runs and endure losing seasons. But my loyalty to the game—and especially my team—never waned. One of the true constants in my life has been spending my fall Sundays watching NFL football. I'd record and later rewatch Niner games so I could better understand how plays and the game unfolded. I attended game watching parties with the local 49ers fan club. I made a pilgrimage to Canton to worship the busts of 49er greats, and I could batter rival teams with an unusually comprehensive bevy of cutting insults. I owned far too many products sporting the team logo.
And then three years ago, I gave it all up—cold turkey.
In short, I gave up the NFL to make more time for travel and adventuring.
I boxed up all the shirts, hats, jerseys, cups, plates, and other memorabilia I owned and unfollowed countless NFL and 49ers social media accounts. That might seem a bit dramatic to some, but sometimes the best breakup is a clean break.
Don't get me wrong, I still love football. And my fall travel opportunities remain substantially limited by the football schedule—I'm an even bigger Sun Devil football fan, after all. But it all came down to choices. And while I loved watching pro football on Sundays (and Mondays, and even Thursdays), it wasn't worth devoting so much of my fall to the sport. Because it's not just watching a game or two or three every week, but also keeping up with the latest news, the latest conjecture, the nonstop discussion and analysis. You know, casually turning on the NFL Network and suddenly wondering what happened to the last two hours. There are surprisingly large phantom time costs involved. Until I opted out, I didn't realize that being a diehard pro football fan takes up a lot of one's free time.
Choosing priorities
Obviously, I'm not arguing that you should join me in ditching the NFL. It's simply a gentle reminder to be intentional with your time and attention.
Life is full of tradeoffs and opportunity costs. You can't have everything, so you have to prioritize based on what's most important to you. Maybe the NFL makes the cut in your own life. For me, making space for more adventures—even if that's just squeezing in a hike or day trip each Sunday—was more important than participating in America's most popular fandom. And yes, even if it was something that I truly did love.

Don't get me wrong—I do occasionally miss it, at least a bit. But overall I'm pretty happy with my decision...surprisingly so, in fact. I had expected it to be more difficult than it really was. I had forgotten that it can be a bit of a relief to step away from something; doing so often provides an odd yet empowering sense of newfound freedom. And when I can direct that new freedom towards something I love doing even more? Well, that's worth making the change.
As I dropped the NFL, I also made a conscious effort to curtail my investment in college football. I don't read up on other teams much anymore, nor watch random games on television, even when it's a much-hyped matchup of top 5 teams. In fact, it's rare that I watch a game that doesn't involve my Sun Devils. Ok...I admit that I still occasionally gleefully watch that awful team down south lose again, just for funsies.
Making some choices
If you want to travel more, or go on more adventures, then you may need to make some adjustments to your life to make that possible—whether that's freeing up time, saving money, or both. Often, that will involve some choices—potentially hard choices—about where you place your focus.
I'm often asked how I manage to travel as much as I do. Some of it stems from some pretty big decisions I've made in my life, such as choosing not to have kids, or not pursuing more financial stability by working 70 hours a week in order to climb the corporate career ladder. And it's also because of how I travel—traveling fast and camping in order to avoid the expense of hotels—even when I have to fly to my destination. But it's not just those things alone. It's also the priority I generally give travel in my life.
It means skipping happy hour after work on Tuesday so that I can do laundry and prep for a weekend trip, so I can leave immediately after work on Friday. Or choosing a cheap sub over a nicer restaurant so I can save some gas money for next weekend's road trip. Or typing this on a 6 year-old MacBook Pro, even though my battery is toast and I've been dying to upgrade. It means driving my car into the ground before replacing it with something better.
But it's not just about saving money. After all, my divorce with the NFL centered on saving time, not cash.

Being time poor but great at bar trivia
I'm not well versed on pop culture. That's rather clear to anyone who knows me today. I haven't seen the latest movies, I only watch a handful of tv shows, and I don't spend any time following celebrities. Most modern pop culture references zip over my head. I'm simply not someone you want on your bar trivia team. I bet most of the people who've met me in the last decade or so would assume that's just "who I am."
The truth is, that wasn't always me. I used to go to the movies at least once a week, and I had enough shows I watched regularly that it was a constant struggle to keep a sliver of space available on the DVR. And I sought out all the football I could find, at least when I wasn't playing it on xbox instead.
It was actually a period of minimalism—an attempt to reduce the number of material possessions I owned—that helped spark the change. I was already thinking critically about what items I owned, and why I owned them, so it was natural to turn the same analysis towards how I spent my time. And it's astounding how much of a time sink all of this pop culture consumption can become.
The opportunity cost of time wasters
When I sat down and looked at how I was spending my time, something jumped out at me. It was all the things I didn't seem to have time for anymore. I wasn't reading any of the books I had bought. I hadn't written a blog post in ages. I wasn't hiking as often as I'd like—and when I was, I was simply returning to the same familiar trails instead of seeking out new ones. I had countless projects I wanted to work on, but I never seemed to have time to get started on any of them.
I was spending, at minimum, a dozen hours a week watching tv or movies that I didn't care too much about—shows I probably wouldn't miss if I just stopped investing in them. It's remarkably easy to keep watching a show after you're a season or two in, even if it's no longer especially entertaining. The sunk cost fallacy and simple inertia are more powerful than we realize. And as a result, I was stuck just passively consuming entertainment instead of creating my own.
So, let me pose a question. What could you accomplish with an extra 12 hours a week?
Could you spend some of that on a side hustle that could fund that big trip to Alaska you've been fantasizing about? Could you plan out some weekend adventures that you might not otherwise had gotten around to taking? Could you spend it learning how to be a better photographer, or maybe a better photo editor? Could you spend it prepping your gear so your next trip was easier to prepare for? Could you spend a day finally completing that day hike that's been on your list for a decade?
Would any of these things inspire you to cut out a few hours of senseless sitcom watching each week? Because it sure did for me.
A constant reassessment
There are simply endless ways to waste time—and that was true long before social media cratered our collective productivity. But the key is to be proactive in deciding what's most important to you and what's worth the time you give it. And let's be clear: I'm not perfect at this, by any means. I'm surely due for a reassessment of how much time I spend on twitter, for instance.
An important thing to keep in mind is that your own priorities will likely change over time. This endeavor is something that requires periodic re-evaluations. And to be truly valuable (and I'm convinced it is), this requires candidly honest assessments, not simple rationalizations.
The point is to be open-eyed and intentional about how your time gets spent. If you want to just get out more, then you may have to make some trade-offs to accomplish that. You may need to reduce some of your existing time commitments, even if that means renegotiating your relationship with something you otherwise enjoy—maybe even something like the NFL.
Have you cut out something from your life to make more time for travel and adventure? Tell me about it!
Travel Camping: how to fly and camp in a rental car
The cheapest way to travel
One of the best ways to save money while traveling is to camp instead of staying in a hotel. Some people might think that this strategy is limited to destinations you can drive to. But it's not. With a little bit of planning, you can save big on your trip by flying your trusty camping gear and picking up a few items along the way. I call this fly-and-camp strategy travel camping.
Here's what you need to know to give it a try.
But, wait...
"I don't want to waste money on things I'm barely going to use."
That's often the first response I get when someone first hears about travel camping. Yes, you will likely buy some things on the trip that you won't use all of, or that you'll only use a few times before discarding. For budget travelers, it can feel especially weird to pick out a cooler that you only intend on using for a week or so. But that doesn't mean that it doesn't make financial sense.
After all, substituting just a single night of camping in place of a hotel stay will undoubtedly save far more cash than you'll spend on any items you'll have to discard later. When you add together several nights—and especially if you include cooking some meals at camp—then you're suddenly saving hundreds and hundreds of dollars. Don't take my word for it; after reading this post, do some sample math for your next trip and see how much you'd save by travel camping. We could all use some more travel money, right?
To be fair, travel camping isn't always the best choice for your trip. For instance, if you're heading to the Sonoran Desert in the summer, I'd recommend staying in a hotel with air conditioning instead of sweltering in a tent (a free tip from this Arizona native). Similarly, I'd much rather pay for a hotel room than camp in a Minnesota winter.
And if your primary destination is a major metropolis, your camping options might be pretty limited or less convenient—though sometimes you can be surprised. For instance, there are camping options just across the Golden Gate Bridge from San Francisco, campgrounds within a 10-minute drive of the major Scottsdale resorts, and plenty of "this-will-do-for-the-night" private campgrounds and rv parks at the edge of most large cities.
Your gear bag
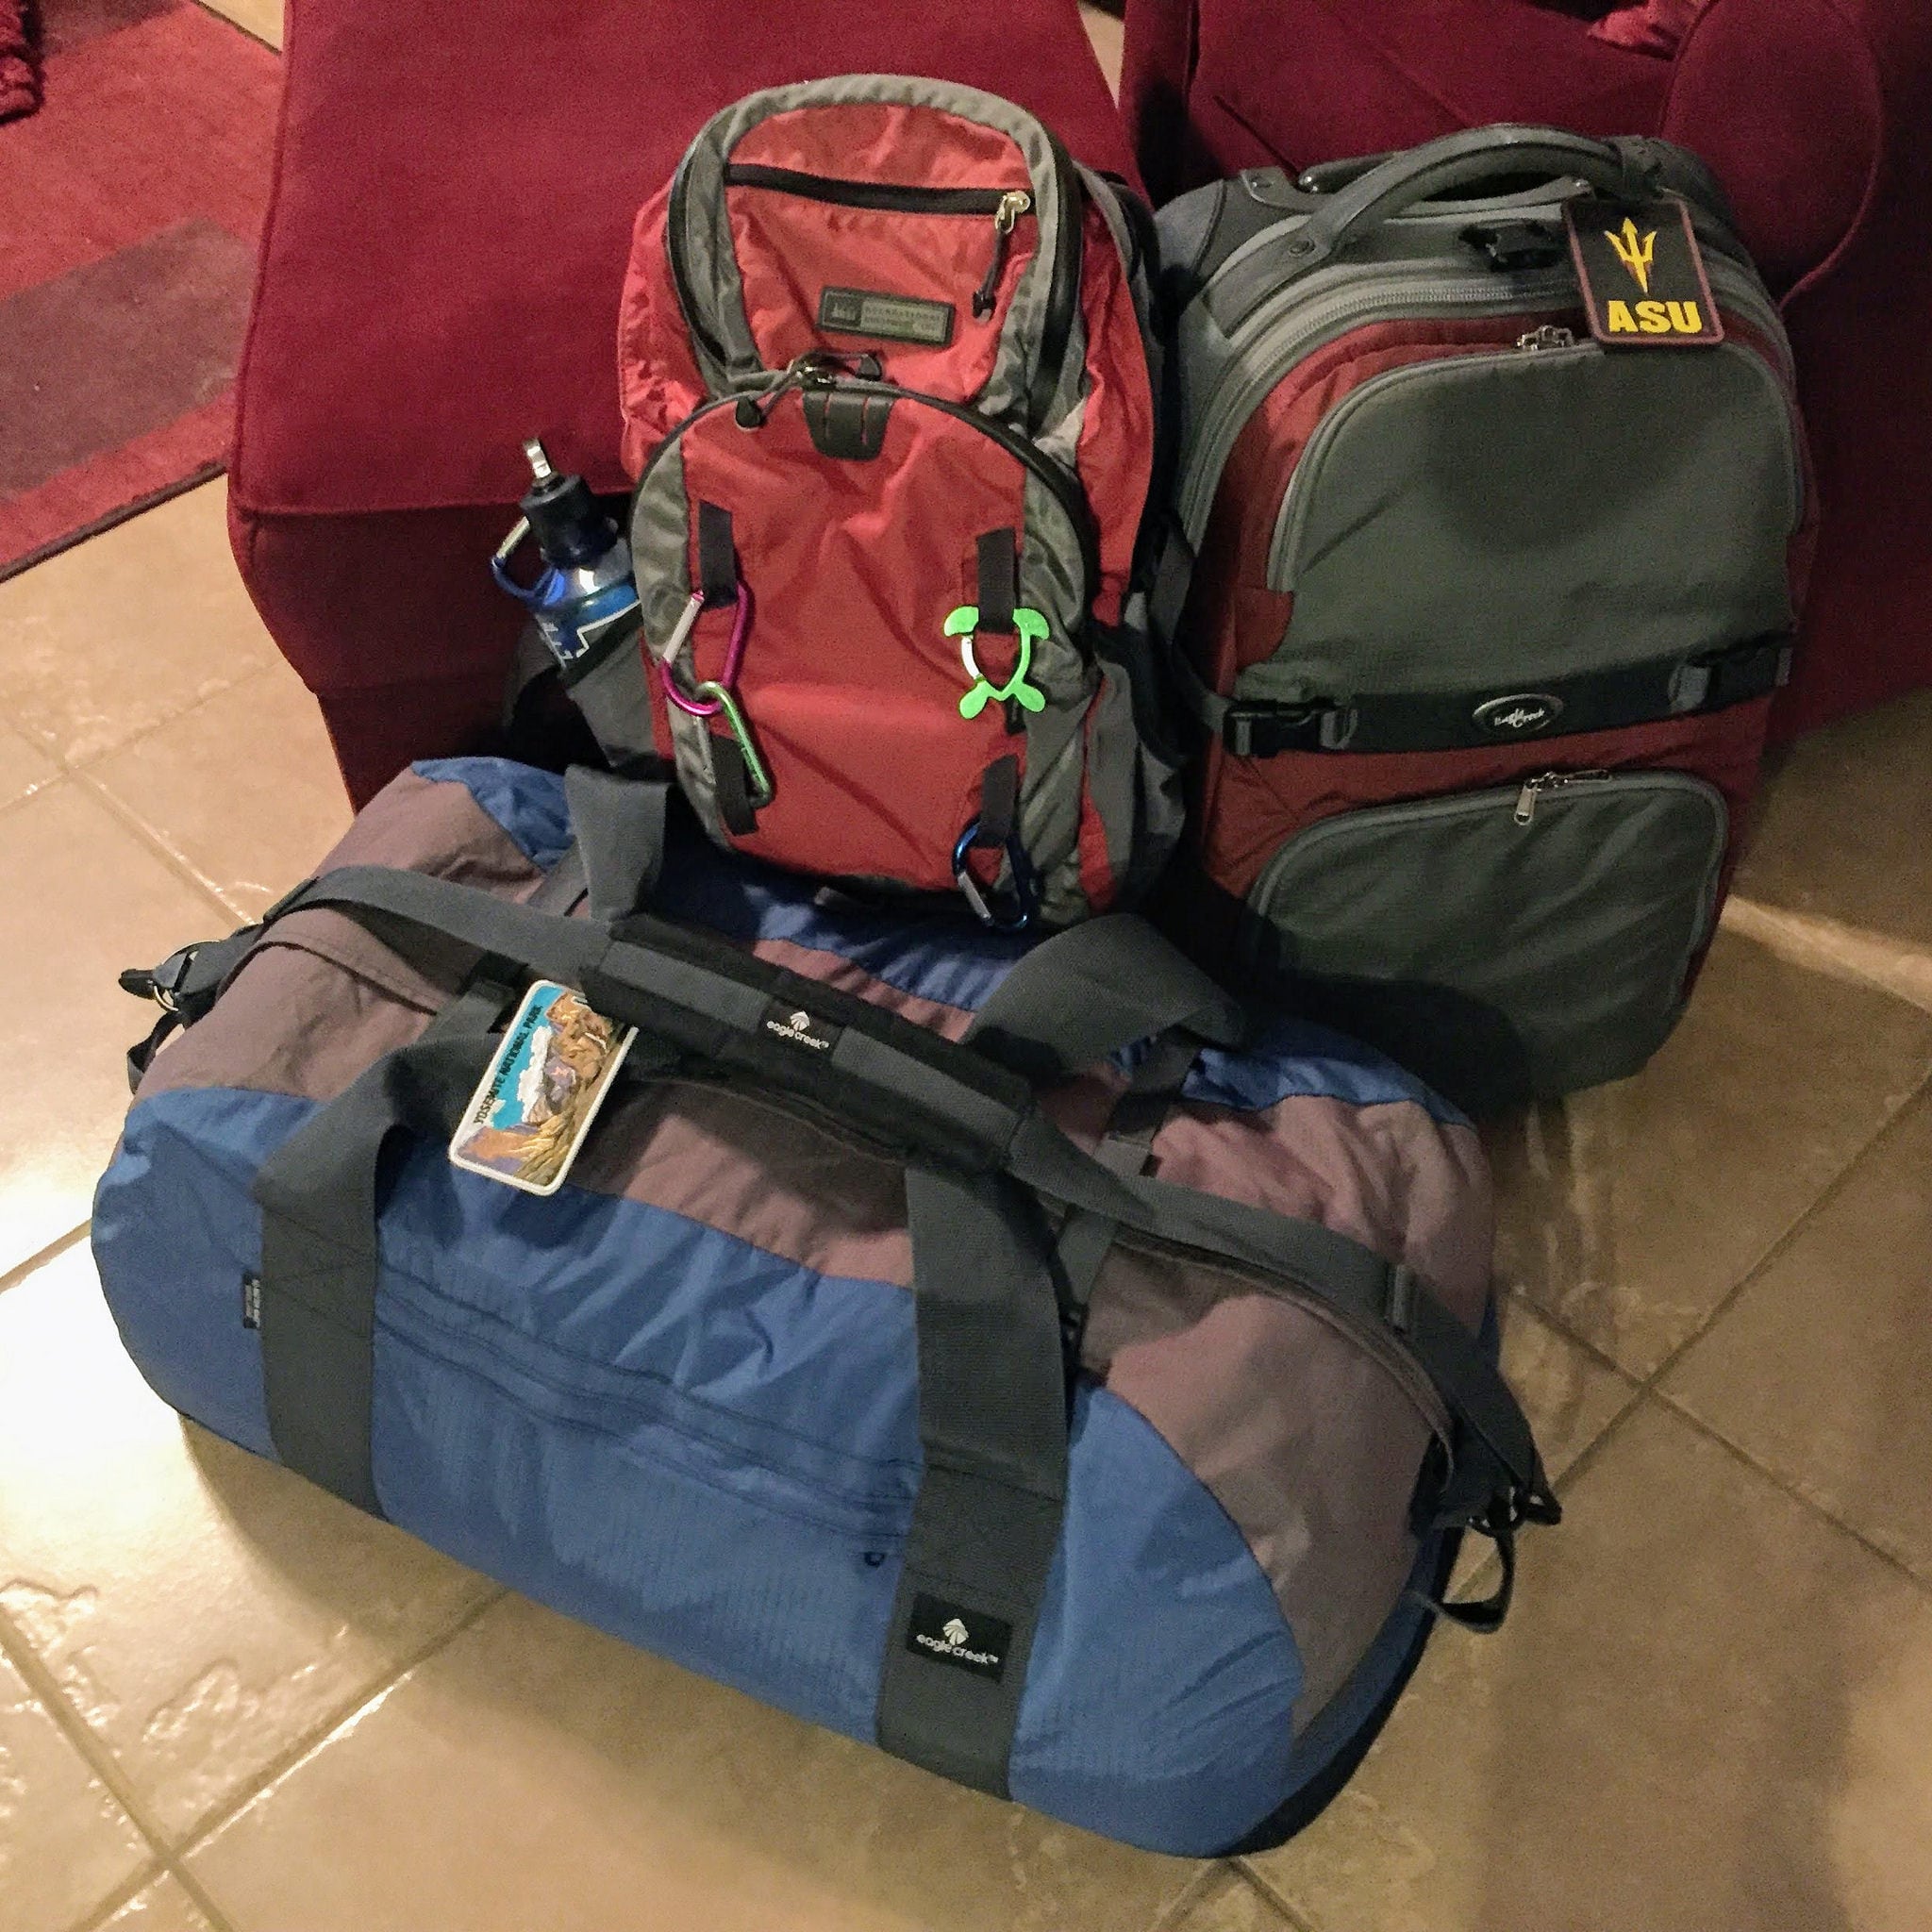
The first thing you'll need to get started with travel camping is some sort of gear bag to carry everything you're bringing with you. I happen to use a large rolling duffel bag for this, but you have quite a few options here. The key is to use something that meets your airline's baggage limits so you don't have to pay any oversized baggage fees (typically triggered by anything that exceeds 62 inches when you add together the bag's length, width, and height).
Similarly, you'll want to make sure that this bag doesn't get too heavy to avoid overweight charges, usually bags weighing more than 50 lbs. Depending on what you're bringing, that might mean strategically carrying some heavier items in your carry-on to help better distribute the weight. Likewise, some items might simply fit better in a standard carry-on suitcase than a large duffel bag, so keep that in mind when you're packing too.
I usually try to check a single gear bag of camping gear and stashing my usual carry-on suitcase in the overhead bin. I also carry a daypack as my so-called personal item (be sure that this meets your airline's size limits, which seem to be getting smaller and smaller). If you plan on travel camping often, you might want to consider buying a large rolling duffel for your gear bag; it's the easiest to carry around the airport and to your rental car. I've gone years without one but recently upgraded and it was worth the expense.
What's allowed in checked vs. carry-on luggage
Not sure what items you're allowed to fly with? Below is a list of camping-related items and whether or not they're allowed in checked or carry-on luggage. Please note that these rules can change regularly, so please double-check the TSA list before your trip. Also keep in mind the liquids rule for carry-on baggage when you're packing.
What camping gear can you bring on the plane?
Some items are allowed only in your checked luggage while others can only be in carry-on baggage; a few items aren't allowed in either checked or carry-on luggage. For more details on each type of item, check out the links I've provided.
- fuel canisters - neither
- camp stoves - both, as long as they are cleaned and no residue fuel or odor remains
- sharp blades (knives, leatherman/multi-tools, etc) - checked only
- scissors - depends on blade length
- disposable & zippo lighters - carry-on only (unless empty)
- torch-style lighters - neither
- strike anywhere matches - neither
- safety matches - carry-on only
- tent stakes - checked only
- lighter fluid - neither
- firestarter - neither
- hand warmers - both
- hiking poles/walking sticks - checked only
- corkscrews with a blade - checked only
- corkscrews without a blade - both
- bear spray - neither
- snowshoes - both
- crampons/snow cleats - checked only
- coolers (empty) - both
- hatchets and axes/ice axes - checked only
- hammers/mallets - checked only
- sunscreen sprays or bug repellent - both (following liquids rule)
- flashlights - depends on size
- utensils - both (but no sharp/pointed knives in carry-on)
- tripods/monopods - both
- wet wipes - both
- emergency beacons - check with airline
- solid candles - both
Sleeping arrangements
The first thing to decide when planning your trip is your sleeping situation. Will you bring a tent? Will you rent an SUV or a minivan that you can sleep in the back of? Are you a hammock sleeper? You'll also want to consider where you'll be sleeping. For instance, will you be staying in developed campgrounds, dispersed camping on public lands, or stealth camping in a city?
The answers to these questions will help determine what gear you'll need. For instance, if you'll be sleeping in a vehicle, then you don't need to bring your tent. And if you're staying in a developed campground, then you'll likely have a picnic table that you can use for both cooking and sitting at. Consider what items are important for you to have given the circumstances you'll likely find yourself in.
Will you be cooking?
The next big question you'll want to answer is whether or not you will be cooking any meals. Cooking your own meals usually saves you a ton of money while traveling, but it also requires additional gear and takes time away from other activities.
Not cooking
Even if you decide to eat out for all of your meals, you'll still save hundreds of dollars by camping. Just be sure that you'll be near appropriate restaurants during your expected mealtimes—especially if you have any dietary restrictions. You don't want to find yourself hungry and in a remote area after hours with no place to eat.
You might want to consider how you could supplement your meals with snacks or beverages to save additional cash. For instance, even if I'm not planning on bringing a stove and cooking during a trip, I might still grab some food and drinks to have with me. I sometimes pick up some sort of small cooler (even if it's a cheap "keep-groceries-cold-on-the-drive-home" style) and toss in some sodas, water, beer, and few snacks—just so I have some options if I get hungry or for when stopping for food isn't convenient.
Cooking
Being prepared to cook at least some meals provides you with the most flexibility on your trip. After all, you can always grab a bite at a restaurant if you're feeling lazy or if you run across a place that's too good to pass up. You'll want to do some pre-planning before you hop on the plane, though. First, you'll likely need a few basic items: a stove, a cooler, pots/pans, plates/bowls, and utensils. Depending on your trip and what you already own, you could bring all of these, buy them all at your destination, or a combination of the two. I tend to pack gear I already own that's easy to bring on the plane, and then buy the remainder when I arrive.
What to bring and what to buy there
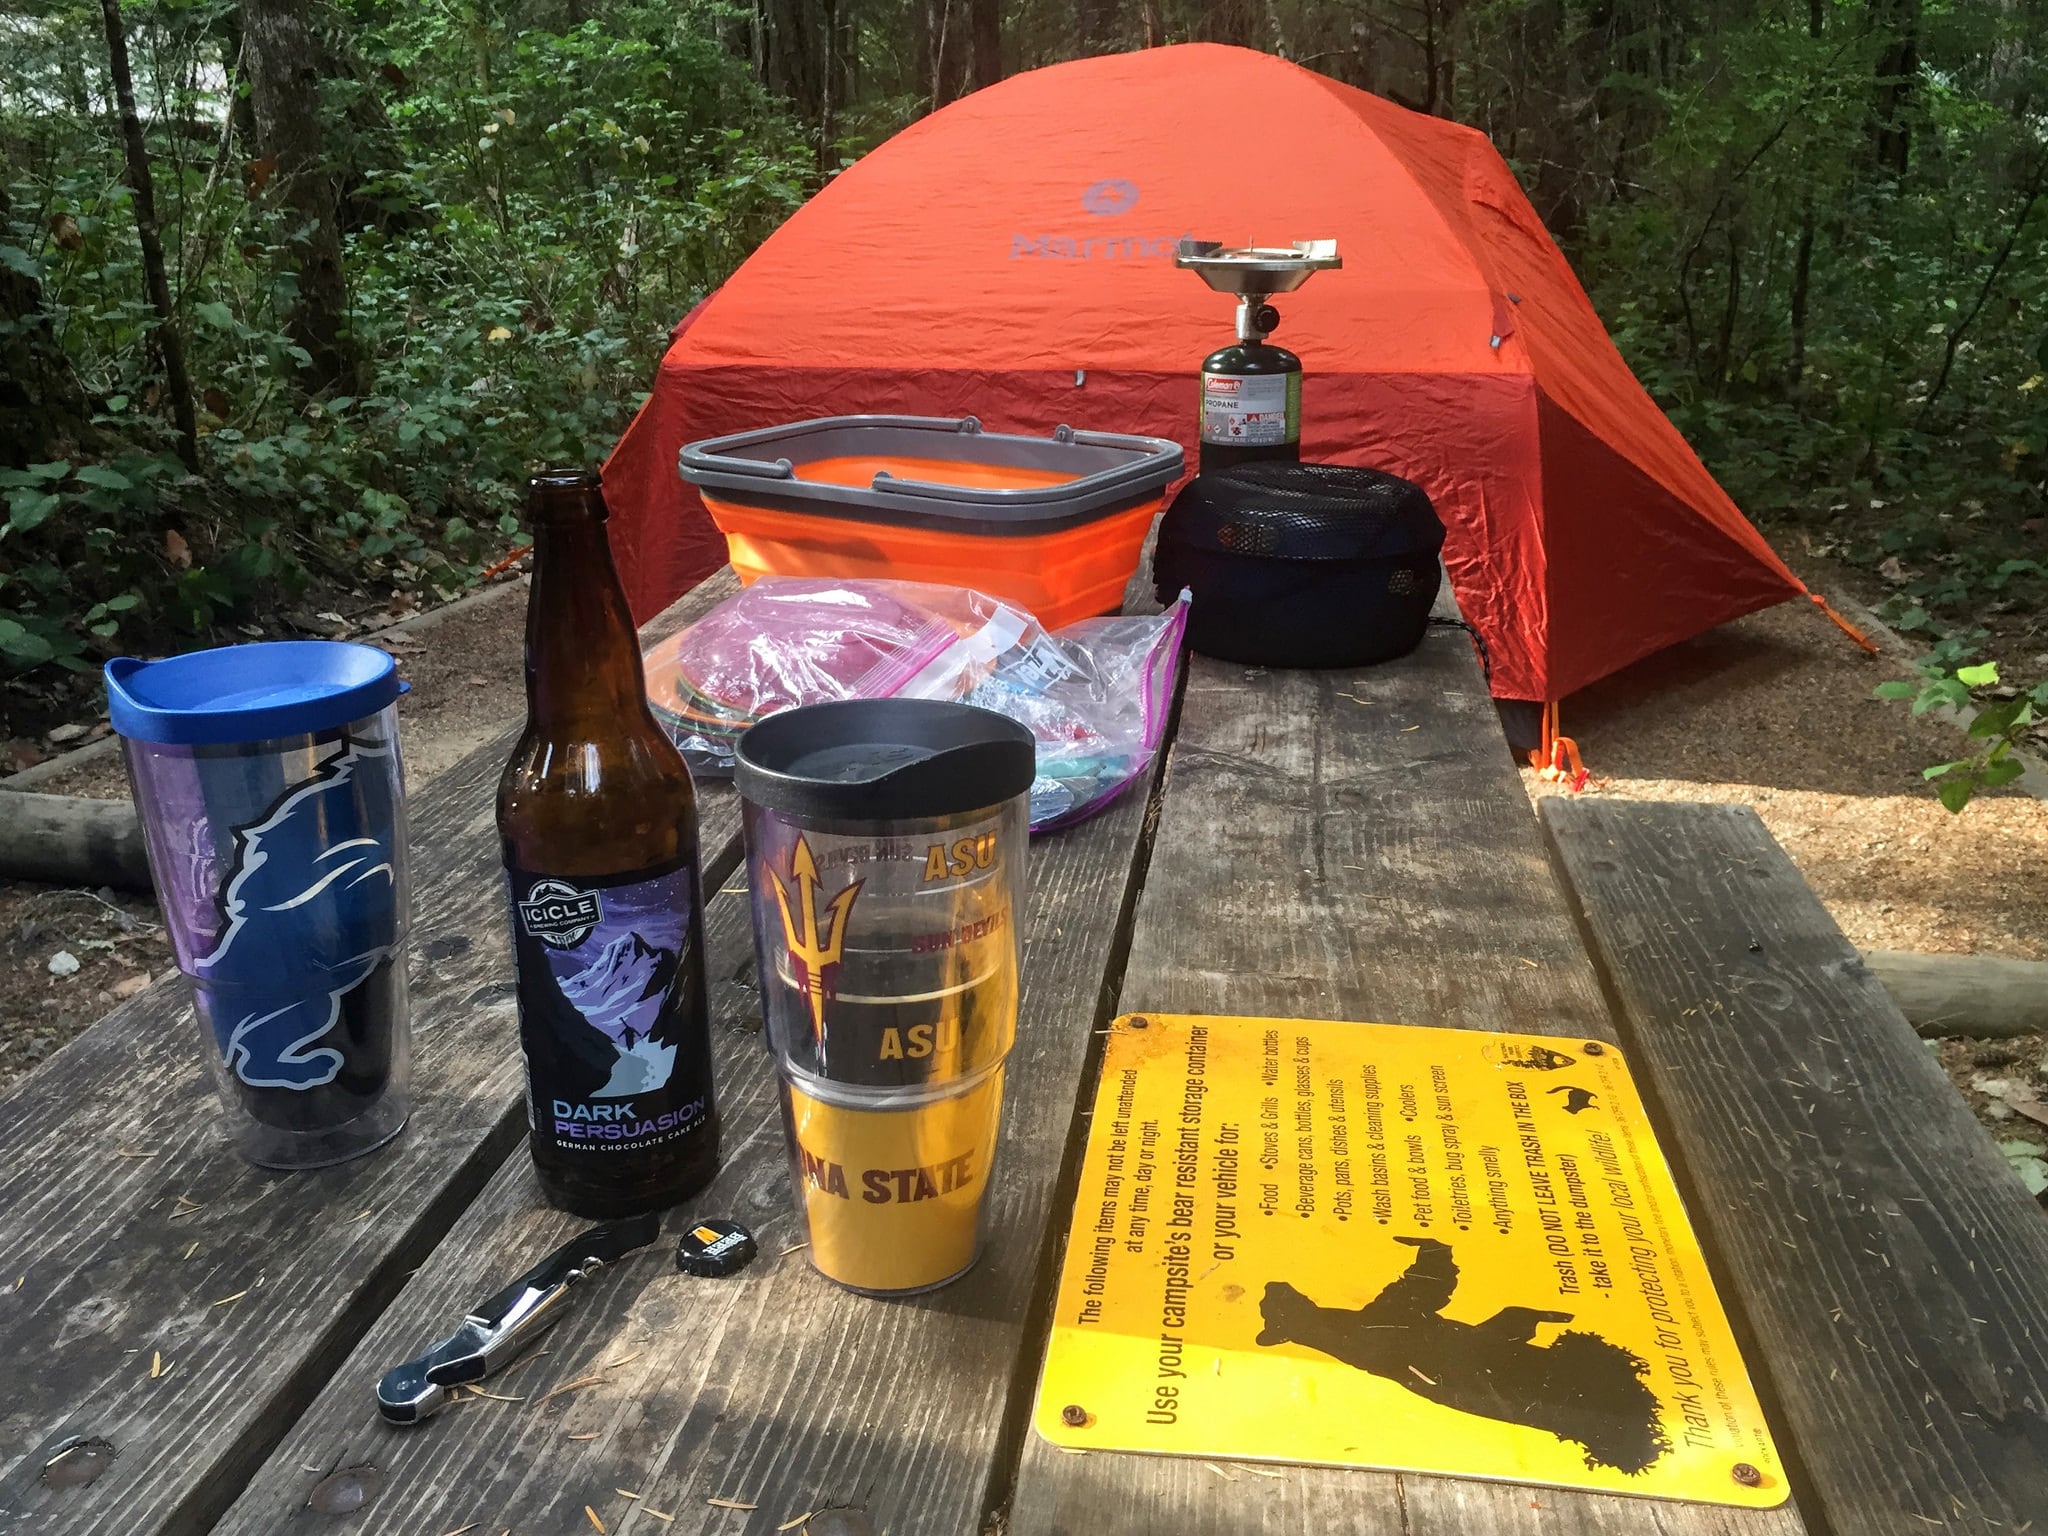
While I own plenty of compact and lightweight backpacking gear, I usually bring slightly bulkier car camping gear when I do these sorts of trips. For instance, I prefer to bring my Coleman single burner stove that uses one of those ubiquitous green 1 lb propane canisters over my much smaller backpacking stove that uses a harder-to-find isobutane canister. While the larger stove is a bit bigger to pack, its fuel canisters can be found at just about any grocery store, gas station, or Walmart. It also cooks a bit more evenly and is more stable while holding a heavy pot. The same goes for my cookware; it's usually my weekend car camping set, not my lightweight titanium backpacking pot. Keep in mind that this is just personal preference, so choose the gear that works best for you and your trip. [Update: we've recently bought this stove, which we paired with a converter so it can use the 1lb propane canisters—this is now our preferred travel camping system].
Plates, bowls, and utensils are items that you can either decide to buy there—you can usually pick up disposable items for relatively cheap—or to bring with you, depending on space considerations. Remember that if you're cooking, you'll also need to consider how you'll be doing dishes, too (this is where disposable items are especially useful). You can often find free condiment packets, salt & pepper packets, napkins, and plastic cutlery at most big gas stations, grocery store deli counters, or fast food restaurants. I often snag some of these instead of buying large quantities I'll never use up during a trip. However, I do bring some smaller and less common items (like a particular seasoning I like on my sandwiches) along with me so I don't have to buy a large container of something I'll use just a bit of.
You can't bring stove fuel on the plane, so plan on buying a canister when you arrive. You'll also need ice and a cooler, too. You can usually pick up a cheap plastic cooler for about $15-20 or so; I usually grab either a 28 qt or 48 qt size, depending on how much food and beverages I plan on having at any one time. I also pick up a cheap plastic bin to keep my food dry inside the cooler. My general preference is to buy just a few days' worth of food at a time instead of plotting out every meal for the trip in advance; I always seem to end up with quite a bit extra food/drinks when I try to buy it all at the start. Also don't forget to grab a gallon or two of water. You can usually refill these at campgrounds when you run low.
The cheaper (and less enviro-friendly) styrofoam coolers are also an option may people consider, though they come with quite a few downsides. First, you'll need a lot more ice to keep your food cold, as the lid doesn't close very well. They can also be a bit top-heavy, so you'll want to brace them in the vehicle so they don't tip over. Unfortunately, they also squeak quite a bit (especially when braced in), which quickly drives everyone in the vehicle nuts. No matter which route you choose, check out my post on how to make ice last longer in your cooler for some useful tips.
I do my best to buy only simple, easy-to-prepare meals that don't require many a long list of ingredients to make. Items that can do double-duty in more than one meal are great too. For instance, sliced cheddar cheese works great in both grilled cheese sandwiches and as a snack when paired with pepperoni and crackers. Items that don't need to be kept especially cold—like the aforementioned cheddar cheese and pepperoni—make it a bit easier to manage while you're on the road. I generally recommend sticking to foods and meals that you're already used to making and that you enjoy eating. It's never fun when dinner isn't as appetizing as you imagined it'd be, or worse when doesn't quite agree with you and you're stuck running repeatedly to the campground toilet.
Here's exactly what gear I've brought on trips
Every trip is a bit different with its own unique gear needs. In the collapsible sections below, I've listed the gear I packed for three very different travel camping trips. The first was a road trip through the Pacific Northwest where we brought quite a few luxury items. That's much different than our trip to Hawaii, which featured just the basics for sleeping at a campsite. The last trip—a solo, fast-paced but frugal road trip through the South—sat somewhat in the middle of the other two. I've listed these to provide a bit of context into the various pieces of gear you might bring for each kind of trip. Keep in mind that your own travel or camping style may require a much different packing list than what I brought.
Roadtripping the Pacific Northwest
This trip featured a combination of hotel stays (3 nights in Seattle early in the trip, and then a night in Bend in the middle) along with 7 camping nights scattered across Washington. We had opted for a cheap economy rental car, so we would be sleeping in our tent. Our schedule was rather variable—some places we'd just be quickly crashing for the night, while others we'd stay for three nights and spend a lot more time at the campsite. We were also a bit worried about possible rain, wanted to ensure that we could shower at camp, and expected to spend several nights enjoying an evening campfire. As a result, we brought quite a few "luxury" items that I normally don't bring on travel camping trips. Because of the crowds expected for the impending solar eclipse, we also reserved sites in developed campgrounds for each night we weren't in a hotel. Each of them had flush toilets, but only one listed shower facilities.
The main video above provides some additional context and reasoning for the items we brought. Here's the list:
- 3 person tent
- sleeping pads [mine, Jen's]
- sleeping bags [mine, Jen's]
- fleece throw blankets
- camp/travel pillows
- camp lanterns
- headlamps
- camp towels
- backpacking chairs [mine, Jen's]
- cheap ikea doormats
- camp fire poker
- tarps
- paracord
- bungee cords
- extra tent stakes
- ziploc baggies
- all purpose camp knife
- single burner propane stove
- nesting pot/pan set
- sponge/soap/scraper dishwashing kit
- plastic plates & bowls
- plastic cutlery
- spatula
- kitchen knife
- thin plastic cutting board
- bottle opener/corkscrew
- spices/seasoning
- tervis-style insulated cups
- folding sink
- camp shower
Island-hopping around Hawaii
This trip was evenly split between hotel nights and camping, which saved us well over a thousand dollars due to Hawaii's expensive hotel rates. We decided to skip cooking and eat out every meal on this trip for two main reasons. First, we were bringing all of our snorkeling gear, so we weren't sure it'd all fit in our normal gear bag and didn't want to pay for an additional checked bag. We had several inter-island flights, so not only would we have to pay for that extra bag on each flight segment, but we'd also have to continually buy additional supplies (like a cooler and stove fuel) between flights. This just seemed like too much of hassle.
Because the climate in Hawaii is so mild, we skipped warm sleeping bags and instead brought a $23 lightweight full/queen comforter from Ikea to share. It was tightly rolled in plastic, so it was easy to pack for the flight there. But we weren't sure if we'd be able to get it packed again once we used it, so we were willing to donate it instead of bringing it home. With some compression straps, however, we managed to make it fit and we've used it on several other road trips since then. Sometimes, picking up some additional gear is worth ensuring you have a great experience.
As you can see from our gear list, you really don't need much to pull off a few nights of camping—especially if you aren't going to be cooking.
- 3 person tent
- sleeping pads [mine, Jen's]
- comforter
- camp/travel pillows
- camp lantern
- headlamps
- camp towels
- sandals
- corkscrew/bottle opener
- silicon bottle topper (in case we didn't finish a bottle of wine in one sitting)
Quick note about where we camped
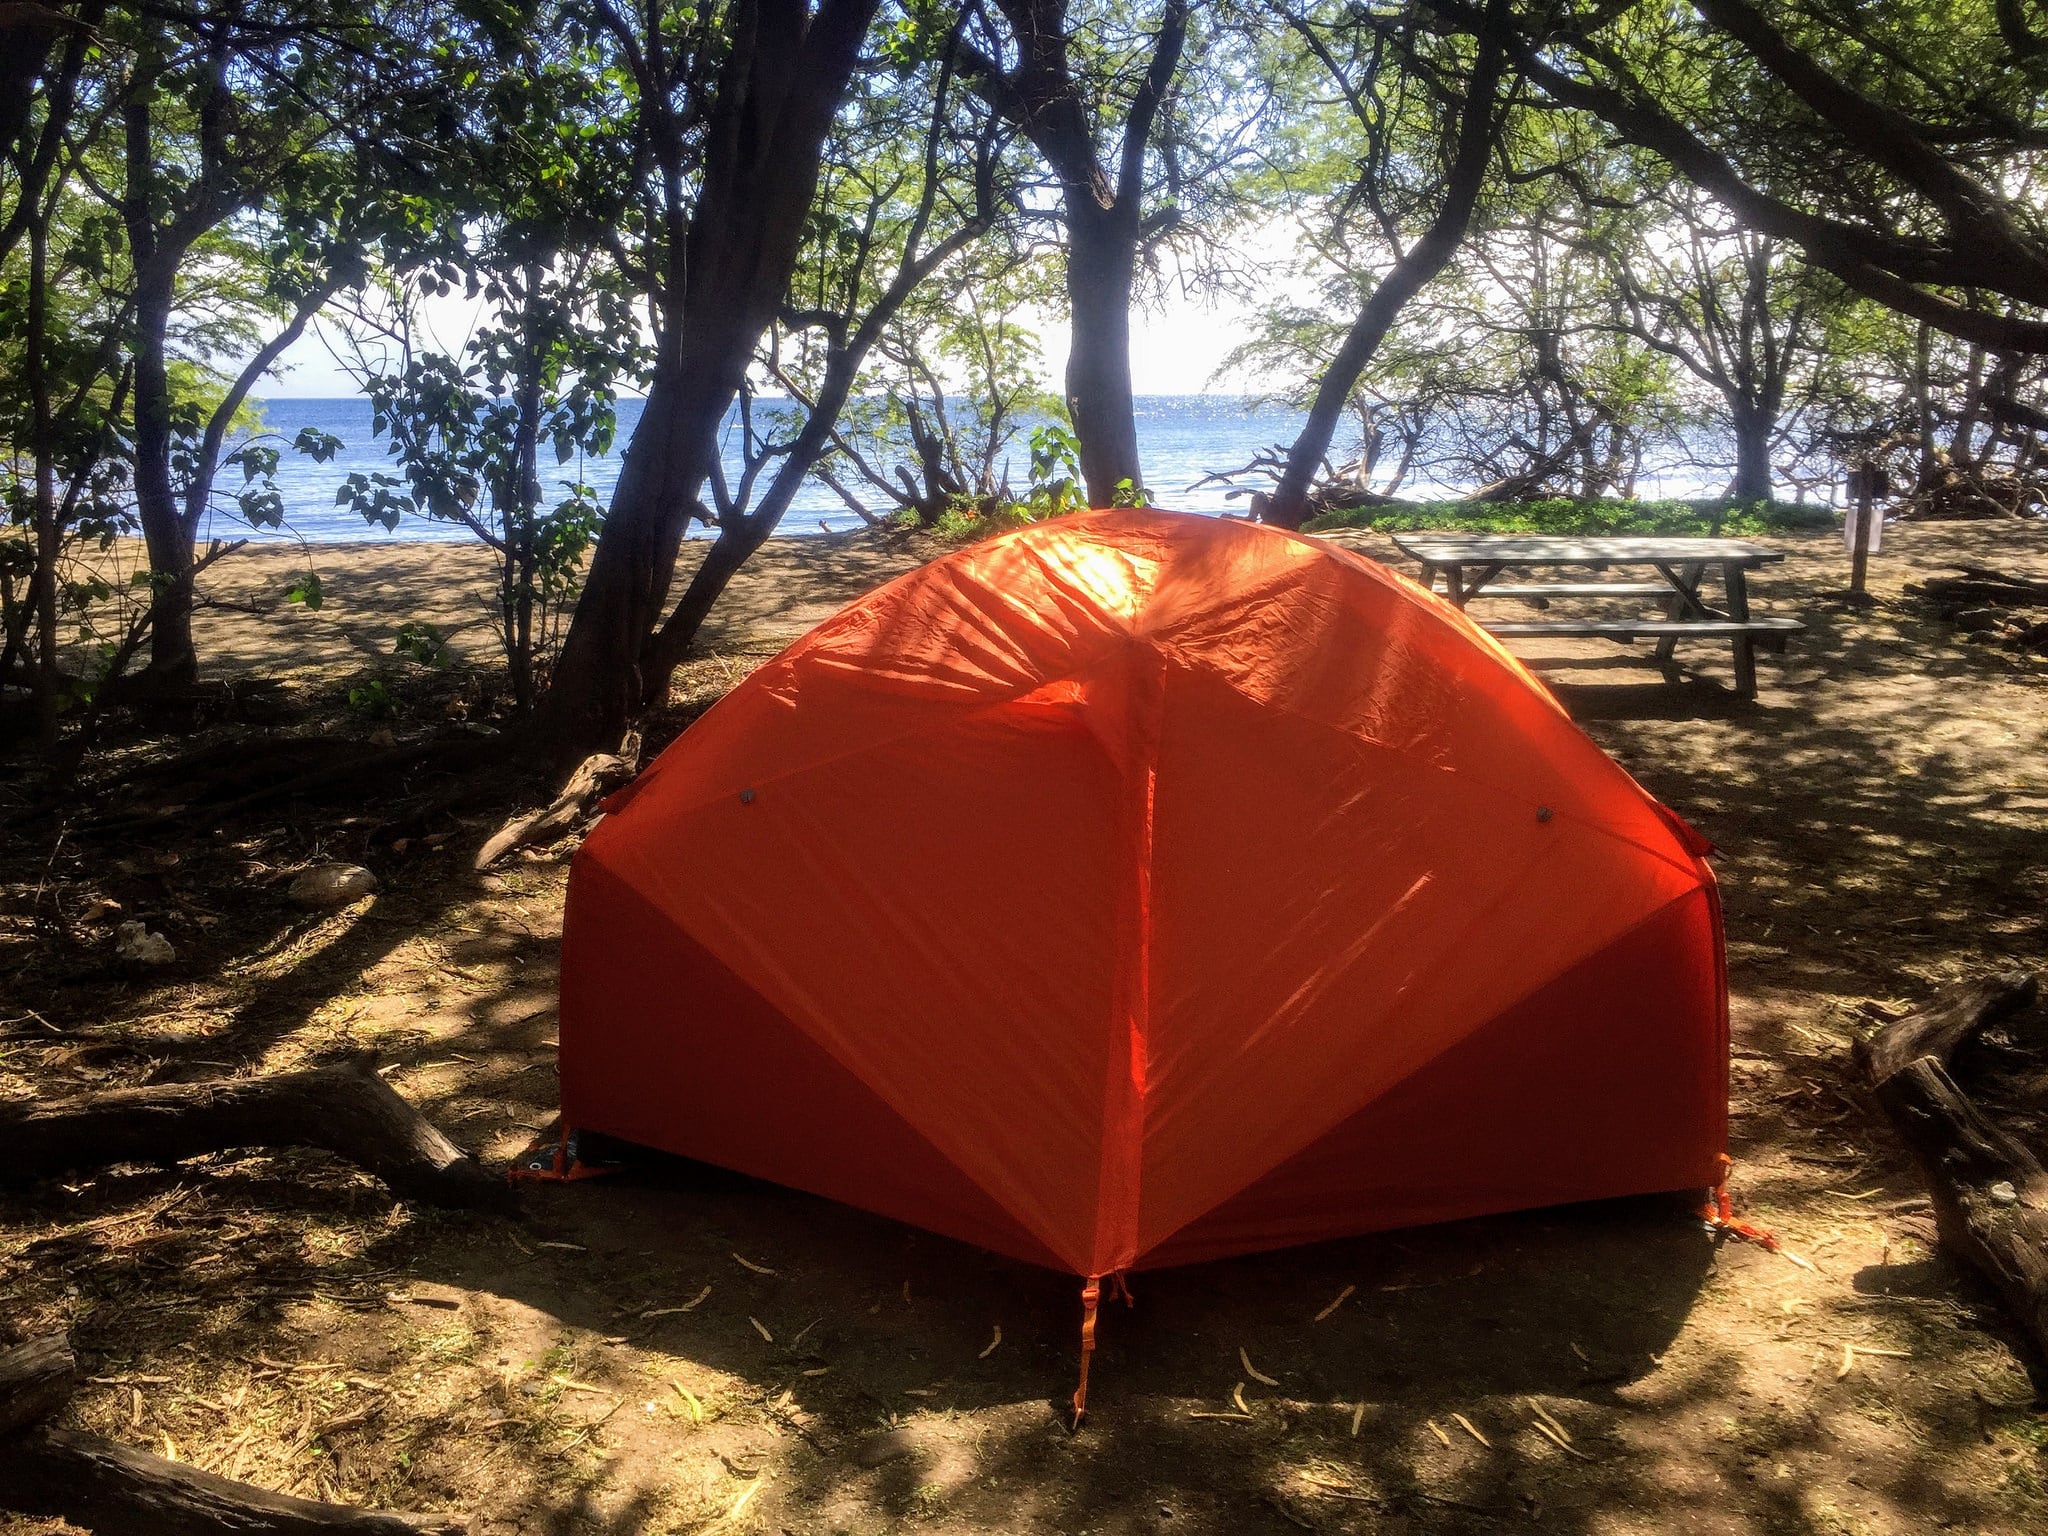
During this trip, we primarily camped at Camp Olowalu on Maui. They have recently renovated their campground and installed some very nice outdoor showers and toilets. We loved the place—we even had our own private beach that we could snorkel off! Best of all, it cost $20 a night instead of the $280 we would have paid in the city. To be honest, we actually enjoyed the campsite more than any of the hotels we stayed in and should have booked several additional nights there. Did I mention that we hung out with some sea turtles right off the campsite?
A frugal road trip around the Deep South
Last spring I did a 9-day multi-state road trip around the Deep South to mark off a handful of national park units and other attractions I hadn't yet visited. With an expensive trip to the US Virgin Islands & Puerto Rico coming up just two weeks later, I really needed to pull this trip off as cheaply as possible. I was able to pick up my flights using airline miles and had one free hotels.com night stay to use, so I'd need to camp the rest of the time to make my budget.
Because this would be a solo trip and I had an aggressive itinerary of destinations to visit, I knew that it'd be go-go-go the entire trip. I also didn't have a set itinerary planned out in advance, so I'd need to look for a campsite on the fly. I usually prefer to save my longer drives for after sunset in order to maximize what I can see during the day, so it seemed likely that I'd be arriving in camp late each night after driving several hours from my last destination.
So while I brought several items intended to comfortably pass the evening hours at camp—the hammock, tent, and backpacking chair, for instance—I fully expected that I'd be arriving late and leaving early. On this trip, camping was primarily just a way to save money on hotels. Because I got a great deal on a large SUV for the trip, I mostly planned on sleeping in the back of the vehicle. This would allow me to avoid setting up and tearing down camp every day, saving me both time and hassle—especially since the forecast called for rain for much of my trip.
I kept my meals simple and ate out about half the time. That usually meant bagels with cream cheese and a yogurt for breakfast, random snacks during the day (sometimes making a sandwich or heating up some soup or chili), and often grabbing a quick sub or some fast food for dinner before hitting a local brewery to sample their offerings. I ate cheaply in part so I could enjoy these brewery stops, which also gave me a great opportunity to research possible spots to camp each night. It also provided a bit of social time with locals (solo travel can get a bit lonely at times). If I was hungry later, I'd just heat up some soup or snack on something when I finally arrived at camp.
Here's a quick (and poorly-shot) video on what I brought with me for this trip. I've also included the list below.
- single person tent
- sleeping bag
- sleeping pad
- hammock and straps
- headlamp
- one-burner propane stove
- medium cook pot with frying pan lid & handle
- some snacks & drink mix
- mayo packets
- seasoning for sandwiches
- disposable bowls & plates
- tervis-style insulated cups
- plastic bin for cooler
- utensils
- bottle opener
- kitchen scissors
- kitchen knife
- koozie
- plastic camp cup
- ziploc baggies (variety of quart & gallon sizes)
- small daypack
- sandals
- hiking boots
- swimsuit
- backpacking chair
- nalgene bottle
- carabiners
- camp towels
- 2 reusable shopping bags
- power inverter (to charge my laptop)
- binder clips (I use these as "chip clips")
Other items you don't want to forget
- Headlamp
- Towel(s) for showering
- Camp/shower shoes
- Ziploc bags (especially useful for repacking snack foods)
- Can opener (though I try to only buy cans with pop-tops)
- Bottle opener/corkscrew
- Paracord
What to do with items that you can't bring home
If you purchase items like a cooler or other food you don't use, consider how you can best donate it at the end of your trip. If I'm staying at a developed campground, I'll often donate my half-full propane canister and other camping supplies to the camp host to use or redistribute to underprepared campers. Another option is to look up a charity like Goodwill where you can donate items like a cooler; I usually look for one that's on the way to the airport. With leftover food or beverages (and sometimes coolers), I usually donate them to panhandlers before I fly home.
Some recommendations for first-timers
If you're not a seasoned camper, you can still have an excellent travel camping experience. I recommend easing yourself in on the first trip or two so you can get the hang of it. That means:
- splitting your time between camping and staying in hotels
- reserving every campground you'll need in advance
- choosing campgrounds that provide both flush toilets and showers
- being ok with eating most meals out (in case you need or want to)
- scheduling a more leisurely itinerary
- bringing or buying some snacks so you always have something to eat
The goal here is to give yourself the best shot at enjoying the experience, even if you end up making some mistakes along the way. Once you get a trip or two under your belt, you'll have a better idea of what works best for you and your own preferences and can modify from there.
More on what I bring for my "personal item"
Have a good travel camping story?
Tell me in the comments!
This post contains affiliate links.
In defense of traveling fast
"Wow, that sounds exhausting. I think I'd rather just spend more time at one place," she replied after hearing my itinerary.
I responded with a knowing nod. I understood why she felt that way. For many people, a vacation is all about slowing down, about relaxing. It means sleeping in, having nowhere to be, and taking one's time.
The concept of slow travel is generally revered among travelers. Countless books and blog posts extol the virtues of slowing down so as to "authentically" and intimately experience a specific place. And there's a lot to be said for that. There is absolutely nothing wrong with this approach; immersive travel is an amazing way to experience new places.
But it's not always the best approach for everyone. In fact, the push for slow travel as the single "best" or "right" way to travel seems a bit disingenuous. Like most people, I don't have gobs of time available to devote to a single destination. I simply have too many restraints on my travel opportunities—and faaaaar too many places I want to visit—for slow travel to be a viable strategy for each of my destinations.
In practice, many people don't spend the extra time they might devote to a destination to truly getting to know that place, anyway. Instead, they might spend much of it cooking a more elaborate meal at the campground, drinking for hours by the campfire, or just reading a random novel in a hammock. Each of these can be a fun way to spend your weekend, but they're often totally devoid of place. After all, you could be doing them just about anywhere, and they add nothing to further experiencing a specific locality. In effect, those travelers have traded time they could have spent seeing something they've traveled great distances to experience for the opportunity to cook bacon and eggs and lounge around camp in the morning.
To me, fast-paced travel is about seeing and experiencing more of the places you do visit, or visiting more places than you otherwise might. It's about considering the opportunity costs at play and deciding in favor of seeing more of the unique places you can't easily otherwise see, rather than spending that time doing something that's routine or commonplace. It's about maximizing your opportunities to experience places, not shortchanging them (as it's often portrayed). What motivates me is that, by traveling fast and efficiently, I can sometimes even add bonus stops to my itinerary, or have extra time for spontaneous or unexpected activities.
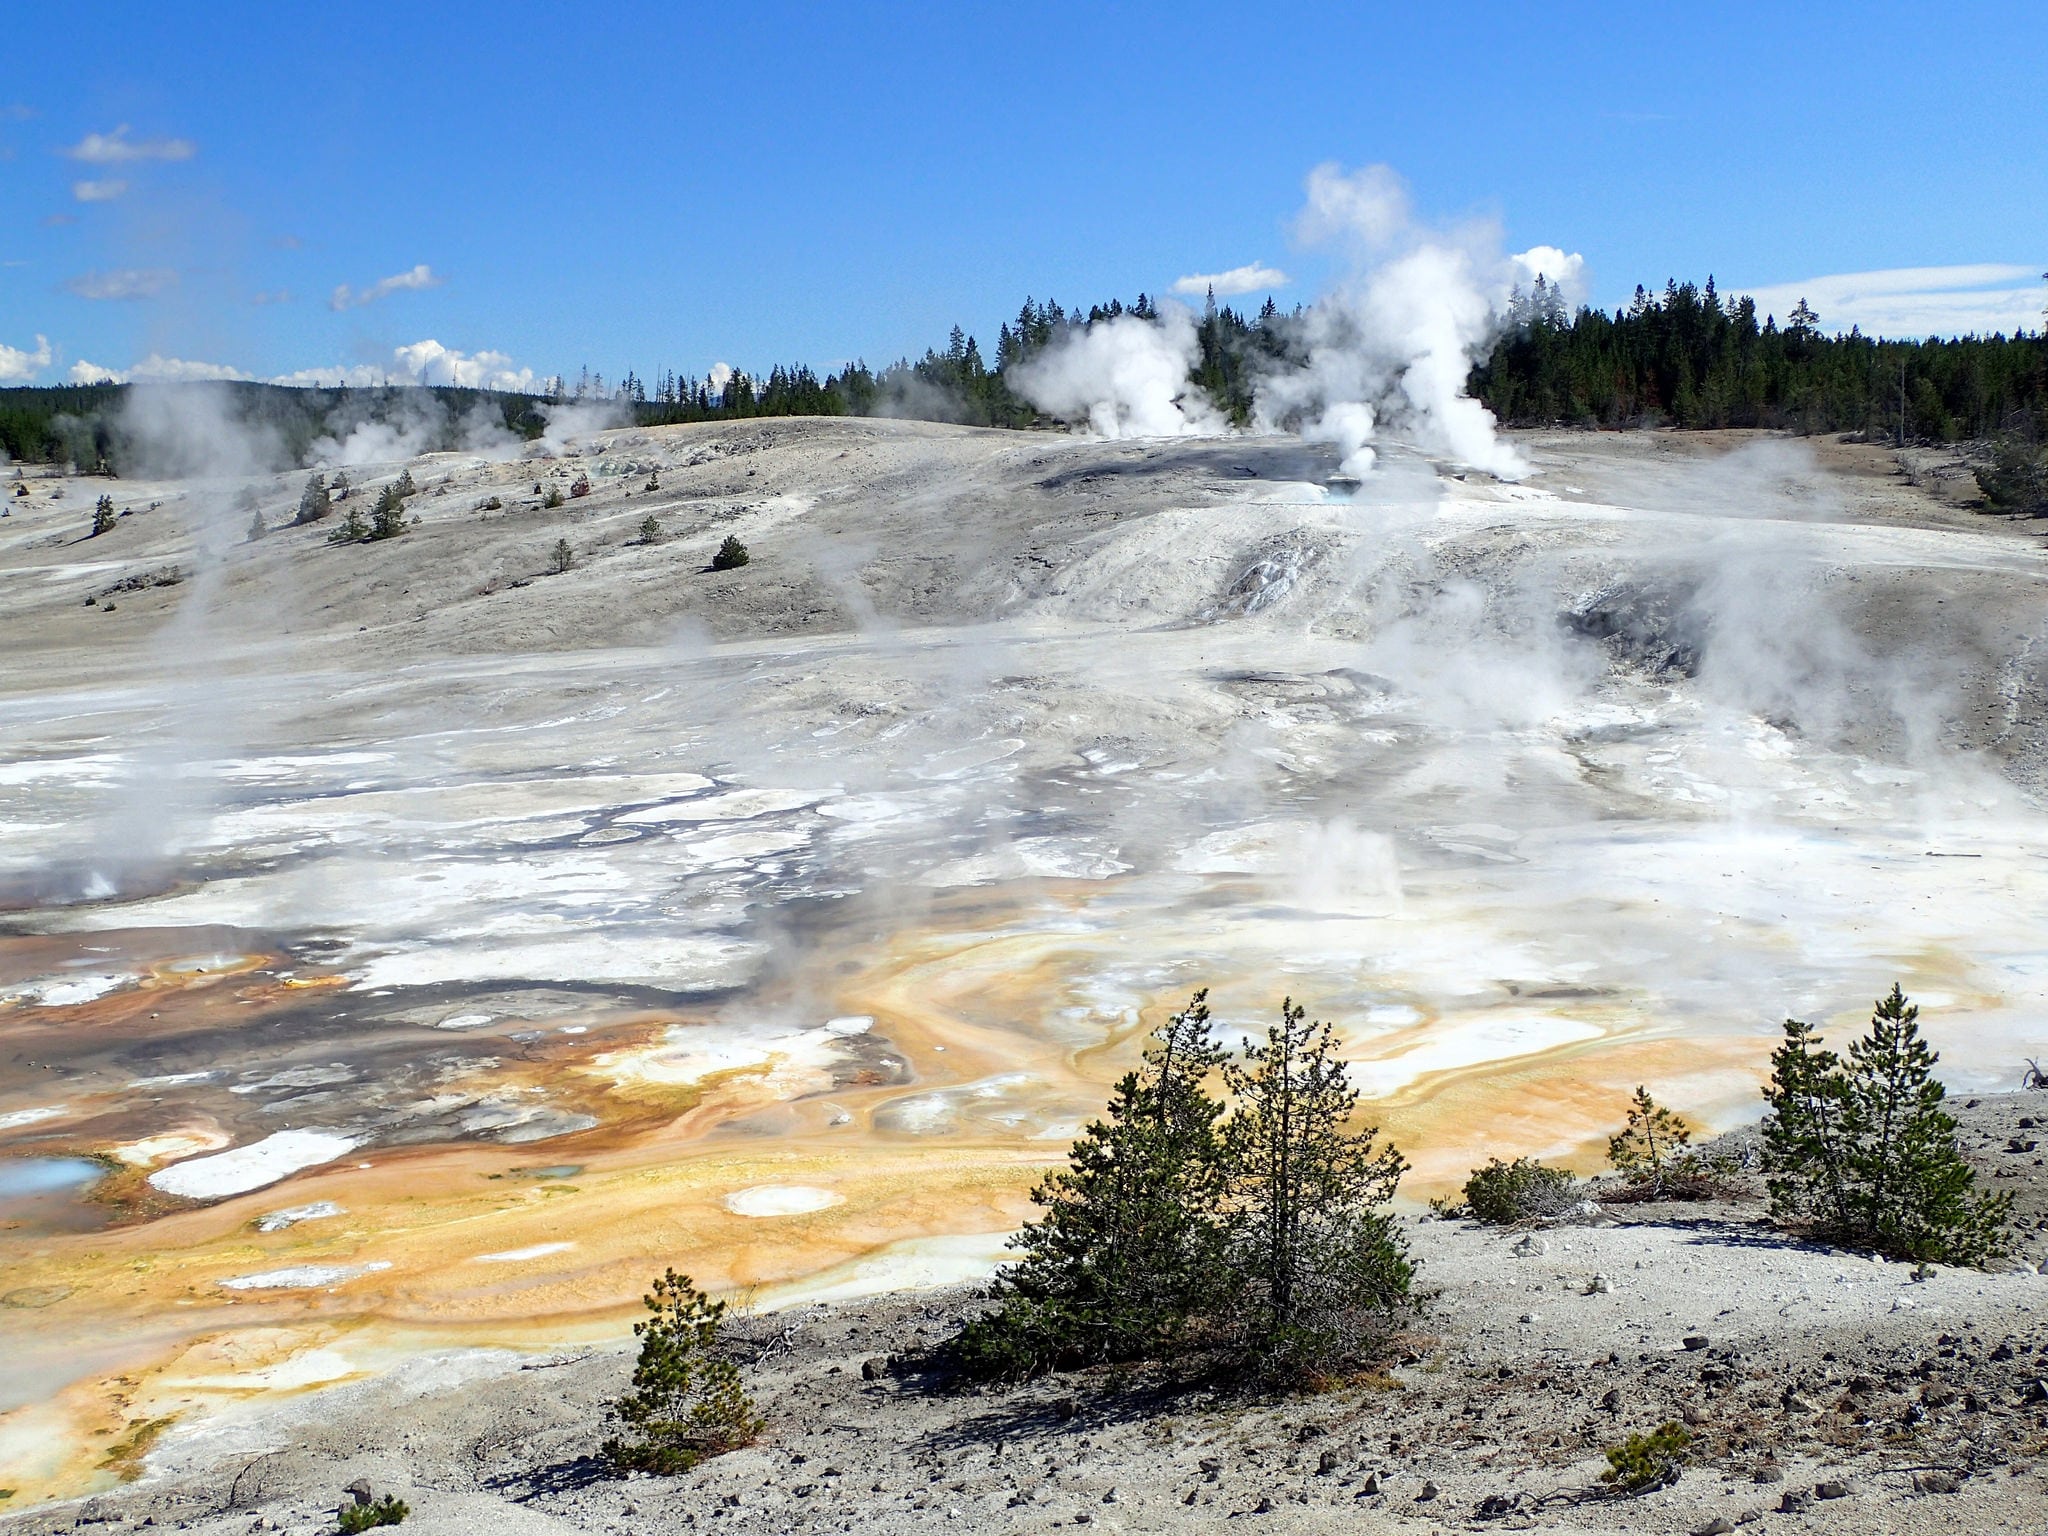
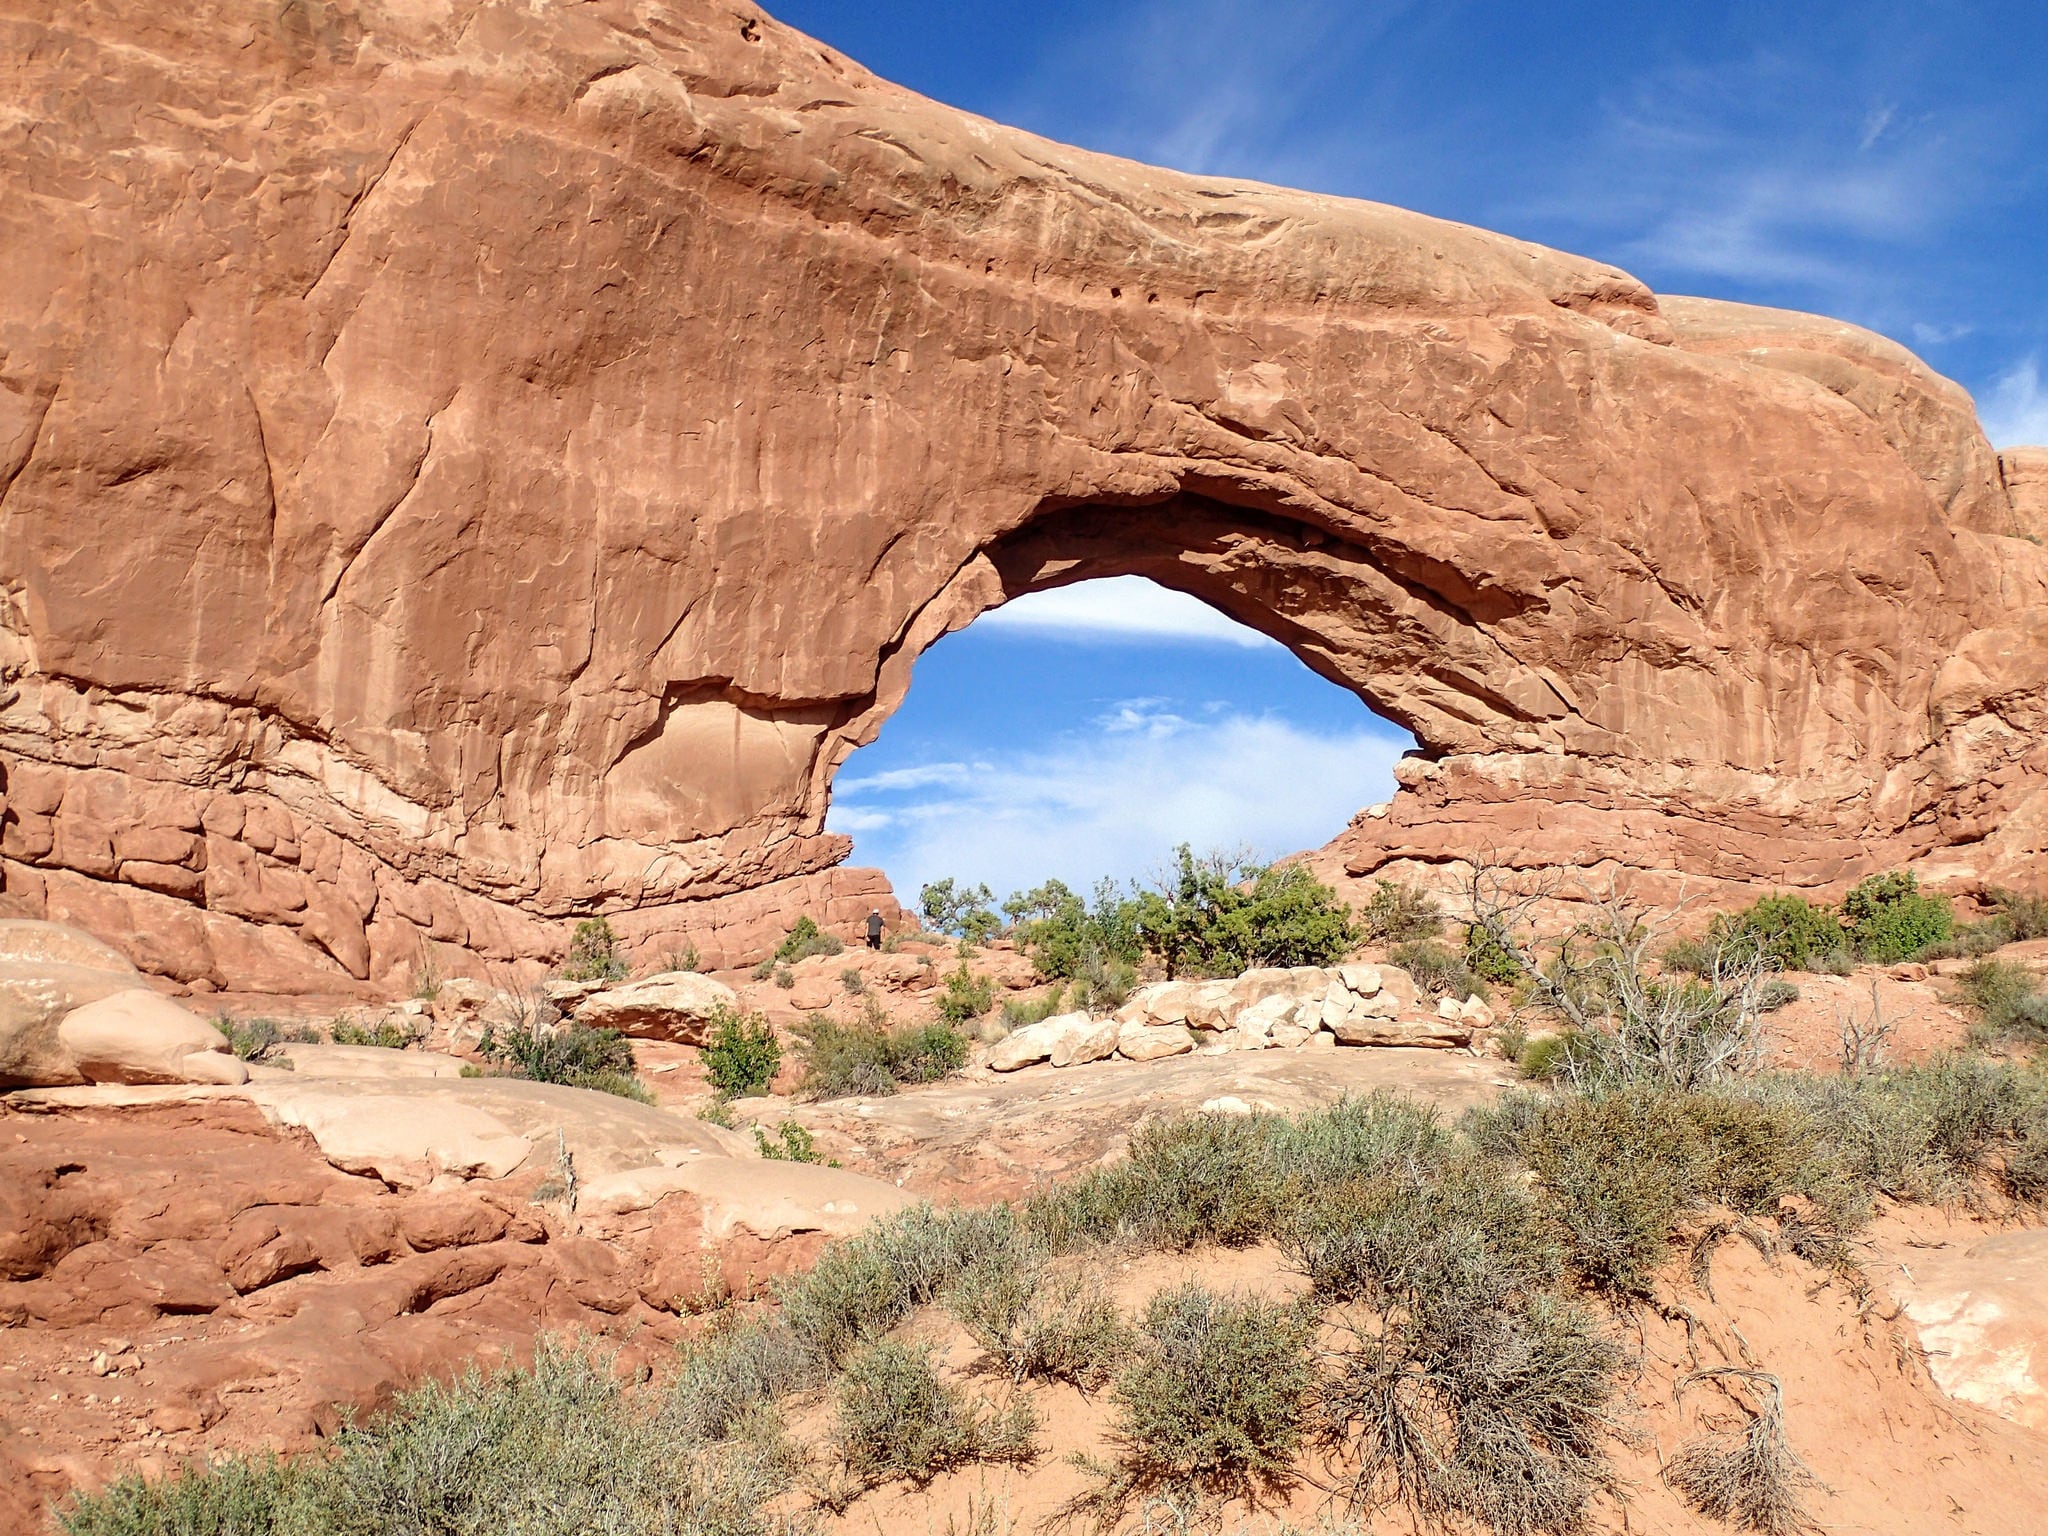
"You can't see Yellowstone in a day and a half," she denounced. "Wouldn't you rather just go when you could visit for a whole week instead?"
"No, you certainly can't see it all. But you can sure see a lot of it, and that's vastly better than seeing nothing," I responded. That's always been my philosophy, at least.
After all, waiting for the ideal trip is often a fool's errand. You may never have such an opportunity. They say there's no "right" time to have a baby. Similarly, there is unlikely to be a perfect time for a specific trip. Perpetually postponing travel for a mythical ideal opportunity in the future usually means that the trip in question simply never happens. Instead of focusing on what you can't accomplish during a short visit, consider what experiences you can have. You'll be surprised at the good time you can have just popping into a national park along your route for an hour or two. At the very least, it might be enjoyable enough to inspire you to prioritize a return visit.
So just go and see what you can, when you can, even if it's not exactly the absolute perfect visit.
What I'm not arguing
That doesn't mean you shouldn't be strategic when scheduling or planning trips. If you can legitimately postpone a visit until a substantially better time—one that's actually likely to happen—then it probably makes sense to do so. I'd much rather visit Death Valley National Park for four days in February than for a single day in July—but only if that February trip was actually something that was likely to happen. After all, an abbreviated trip to the scorching hot park—even in the dead of summer—is better than never getting there at all.
Similarly, if I have three things I absolutely want to see in the Philippines and I'm unlikely to get back there anytime soon, then making sure that I schedule enough time to visit those three things during my trip is entirely appropriate.
I'm also not arguing that you should ensure that your trips feel overly rushed. That's not the point, either. The goal here to increase your travel efficiency so that you can maximize the amount of time you spend seeing stuff you want to see—not simply so you can rush through every possible experience.
That said, I often do employ the 80/20 rule when it comes to my travel activities. That is, the things that bring me 80% of my joy during a trip tend to come from about 20% of the time I spend in various activities. As it becomes more obvious what activities that 20% includes, I strive to do those things more frequently. For instance, if I'm touring yet another historical house from the early 1900s, I might move more quickly through interpretative displays (of concepts I'm already familiar with) in order to spend more time learning about the specific historical figures that lived there. For me, the 80/20 rule helps ensure that I'm spending my time wisely.
Benefits of traveling fast
You get to see more places
This one is the most obvious benefit—and probably the most important one, too. It's pretty simple, really. By not wasting time on inconsequential things, you get to spend more of your time visiting other places. I'll gladly forgo a sit-down meal in favor of a quick sandwich if it means I can add a stop at that petroglyph panel that's not far off our planned route.
You get to see more of each place
Traveling fast isn't just about getting to stop at additional destinations. It's also about making more time for the destinations you're already at. By ensuring that you prioritize the time you spend actively experiencing places, you'll naturally get to spend more more time enjoying each destination.
You'll be better informed for future trips
Even if you don't get to spend as much time as you'd like at a destination, a short visit can often help better inform a return trip. You'll have a better sense of the place, usually have access to additional materials (like maps and brochures) and can often inquire for some recommendations. Quick drop-ins to help scout a destination can really help you plan a better, more complete return trip.
A few tips on how to travel faster
There are a variety of strategies for getting the most out of your trips. Here are some of the ones I most often employ; while many of these are roadtrip-centric, the underlying strategy can be applied to other types of trips, too. Pick and choose which ones might be the most effective for your own travel.
Prepare an itinerary
One of the best reasons to prepare a rough itinerary is so that you don't waste time researching what to do after you've already arrived. Knowing what you're interested in doing before you get there is a great way to save time. Now, that doesn't mean that you can't be spontaneous. Indeed, having prepared a rough itinerary can actually aid in being flexible, as you already know what you'll be giving up or how to reconfigure your trip to allow for this new activity. Best of all, you won't end up standing in a visitor center negotiating with your travel partner what you should do first.
My trip itineraries often include what I like to think of as "bonus" items—destinations or activities that aren't part of my planned itinerary but can be added (or substituted) when appropriate. That allows me to quickly add an additional stop if I'm running ahead of schedule, or to easily shift to a better activity if bad weather thwarts my original plans. Since I try to overestimate how much time I'll need at various destinations, I often find myself adding several additional stops during road trips. It's a great feeling to have extra time to add even more fun stuff than you had originally planned. Keeping track of these places using a custom google map makes the whole process even easier.
Keep things simple
Keeping it simple is often good advice no matter how you're traveling. But it's especially useful when you're trying to reduce wasted time during a trip. You can apply this strategy in a variety of ways. For me, I tend to focus in on food and gear. That means choosing meals that are relatively easy to prepare and require fewer ingredients and cookware. That way, I'm not spending excessive time preparing complex recipes and washing countless dirty dishes.
For me, it also means only bringing gear that I'm actually likely to use, so I don't have to spend extra time managing stuff I never end up using. That doesn't mean that you shouldn't be prepared for possible weather conditions, or that you can't bring a luxury item that you might not get a chance to use but really want anyway. But if you've brought your GoPro on your last five trips and never gotten around to powering it up, maybe it's time to leave it (and its countless accessories) at home.
Prep what you can before the trip
As much as possible, I try to prep food and other gear before I leave my house. For instance, I'll often get future meals prepped ahead of time by chopping any vegetables I'll need, measuring out ingredients, and putting everything together in a ziplock bag. That makes cooking both quick and easy while also limiting the number of dishes I have to clean, too. Similarly, packing your daypack ahead of time for that first hike will save you from pulling apart the car to assemble what you need when you get to the trailhead. Putting together activity-based kits, such as a grab-and-go bag of everything you need to shower at a campground, is also a simple way to prep for your trip. Best of all, once you get these things organized once, it's easy to keep them ready-to-go for future adventures, too.
Stay organized
This item probably goes without saying. The more organized you are, the easier it is to travel quickly. For me, being organized is all about having systems that work for how I travel. It's one of the reasons I love having a camping bin, why I try to pack my vehicle the same way each time, and why I create detailed trip docs with all of the relevant trip information listed on one master google doc. Each of these helps keep me organized, which means I waste less time managing my stuff or figuring out trip logistics while I'm on the trip.
Consider the trade-offs
The most important tip in this post is to consider the trade-offs you unconsciously make during a trip, then to choose the option that lets you maximize the unique experiences you can have while traveling.
For instance, I recently had only 1.5 days available to spend in Yellowstone National Park during a road trip. Even though my buddy and I had brought plenty of food to cook and were trying to travel cheaply, we opted to eat dinner at the park. By doing so, we were able to spend three additional hours in the park instead of heading back to camp to cook when we got hungry. Having three more hours to visit the geyser basins was worth the extra $9 we spent on food that day. Similarly, instead of spending an hour cooking and eating breakfast and then cleaning up afterwards, we opted to grab a quick fast food breakfast sandwich on the drive instead. Sure, it was less enjoyable of a meal, but we were more than willing to trade that subpar breakfast for some extra time enjoying the geothermal wonders of a park we so rarely get to visit.
Now, the point here isn't to inspire you to order more crappy fast food, but it's to think about what trade-offs you're making and what's most important for you. In our estimation, eating a quick $5 burger and getting an extra hour in the national park easily outweighed enjoying the breakfast we would have cooked for ourselves. Your mileage may vary, of course, but consciously considering these trade-offs is the important thing.
Arrive late, leave early
I'm referring to your accommodations here, not your intended destination. Arriving too early at your campsite or to your hotel room means you've left some valuable time unused. Since I try to soak up every ounce of daylight seeing things that matter to me, campsites or hotels are mainly just places to sleep and shower before I'm off on the next day's adventures. For instance, I couldn't tell you the last time I turned on a hotel room television. Why would I? I arrive well after dark and head to bed quickly, then depart as soon as I'm ready in the morning. I can watch tv any time I want at home, but I can't spend that time enjoying a distant national park.
Set up camp in the dark
I regularly hear people say that, above all, it's important that they set up camp "before it gets dark." I wholeheartedly disagree. Unless you're searching for dispersed camping, setting up camp in the dark is no big deal. Indeed, in nearly every developed campground you'll find, it's a virtually identical endeavor as setting up in the daylight. The only difference is that you've traded precious daylight you could have used adventuring for time spent in what's likely just a run-of-the-mill campground. Today's tents are incredibly easy to set up; you'll do just fine using a headlamp. Spend 10 minutes trying it out at home first and you'll be all set.
Skip time-fillers that you can do anywhere
While I'm traveling, I try to reduce the number of activities I could otherwise do anywhere else, like watching tv or reading a book. If it's not something that is adding a new experience—especially one that I can only have at my destination—then I do my best to skip it. Now, that's not saying that you shouldn't brush your teeth in the morning, or take a shower unless you're doing it under a backcountry waterfall. But if the choice is between watching another Law & Order rerun in your hotel room versus staying out an extra hour to hear the Yellowstone wolves howl, well...I'd choose the latter.
Drive at night
Whenever possible, I schedule the long drives between major destinations for after the sun has set. That way, I'm not wasting daylight in the car just staring down the highway when I could otherwise use it to enjoy a canyon vista or watch some elk graze in the meadow. There are sometimes additional considerations here, especially for areas with high deer populations or for those who struggle with night driving, but the general strategy here is to minimize the amount of useful sightseeing time you spend stuck in a moving car. Obviously, if your intended destination is a scenic drive, well then, schedule accordingly.
Make good use of time in the car
Most trips require substantial time in either the car or in a plane, train or bus. While it's easy to see this solely as "lost" time, there are a variety of ways to help pass the time while improving your trip. You can do this by researching what activities to prioritize at the next stop, researching other nearby destinations you might want to add to your itinerary if time allows, creating shopping or other task lists for your next stop, deciding where you might want to eat dinner, or revising other trip logistics. It's also a great time to complete any tasks that might otherwise subtract from your available time or attention at future destinations, whether that's posting to social media, providing updates to family members, or catching up on critical work emails. It's also a great time to journal or think about what you've seen during the day.
"This all sounds exhausting"
I know, I hear you. And truth be told, sometimes traveling fast is.
Sometimes that's just the trade-off I'll happily make to see and experience as much as I can during a trip—a trip that's rarely as long as I'd like it to be. Traveling fast is all about maximizing the amount of time you have available for seeing new places (or returning to your old favorites) during the limited time most of us have available for travel.
I'm not here to convince you that this is the only way you should travel. It's not even the only way I myself travel. I'm simply arguing that it's a viable approach for many, and one that provides some great experiences that can't easily be duplicated. Even if you're still a bit skeptical about parts of this, I hope you can glean a few tidbits that will enhance your next trip.
Have some additional tips to share? Want to chat about this? Contact me.
How to 'Leave No Trace'
If you've spent any time recreating outdoors, you've undoubtedly heard the phrase "leave no trace" or seen the popular acronym, LNT. But do you know what it really means?
Below are the seven major Leave No Trace principles, along with some bullet-point examples of what each one looks like in practice. Click on any principle title for an even more detailed explanation and additional resources. Want to learn even more? Complete the online awareness course or attend one in-person.
It is our responsibility as users of our public lands to ensure that our recreational activities don't impair these places. Please, do your part.
The Leave No Trace Seven Principles
Plan Ahead and Prepare
- Know the regulations and special concerns for the area you'll visit.
- Prepare for extreme weather, hazards, and emergencies.
- Schedule your trip to avoid times of high use.
- Visit in small groups when possible. Consider splitting larger groups into smaller groups.
- Repackage food to minimize waste.
- Use a map and compass to eliminate the use of marking paint, rock cairns or flagging.
Travel and Camp on Durable Surfaces
- Durable surfaces include established trails and campsites, rock, gravel, dry grasses or snow.
- Protect riparian areas by camping at least 200 feet from lakes and streams.
- Good campsites are found, not made. Altering a site is not necessary.
- In popular areas:
- Concentrate use on existing trails and campsites.
- Walk single file in the middle of the trail, even when wet or muddy.
- Keep campsites small. Focus activity in areas where vegetation is absent.
- In pristine areas:
- Disperse use to prevent the creation of campsites and trails.
- Avoid places where impacts are just beginning.
- In popular areas:
Dispose of Waste Properly
- Pack it in, pack it out. Inspect your campsite and rest areas for trash or spilled foods. Pack out all trash, leftover food and litter.
- Deposit solid human waste in catholes dug 6 to 8 inches deep, at least 200 feet from water, camp and trails. Cover and disguise the cathole when finished.
- Pack out toilet paper and hygiene products.
- To wash yourself or your dishes, carry water 200 feet away from streams or lakes and use small amounts of biodegradable soap. Scatter strained dishwater.
Leave What You Find
- Preserve the past: examine, but do not touch cultural or historic structures and artifacts.
- Leave rocks, plants and other natural objects as you find them.
- Avoid introducing or transporting non-native species.
- Do not build structures, furniture, or dig trenches.
Minimize Campfire Impacts
- Campfires can cause lasting impacts to the backcountry. Use a lightweight stove for cooking and enjoy a candle lantern for light.
- Where fires are permitted, use established fire rings, fire pans, or mound fires.
- Keep fires small. Only use sticks from the ground that can be broken by hand.
- Burn all wood and coals to ash, put out campfires completely, then scatter cool ashes.
Respect Wildlife
- Observe wildlife from a distance. Do not follow or approach them.
- Never feed animals. Feeding wildlife damages their health, alters natural behaviors, and exposes them to predators and other dangers.
- Protect wildlife and your food by storing rations and trash securely.
- Control pets at all times, or leave them at home.
- Avoid wildlife during sensitive times: mating, nesting, raising young, or winter.
Be Considerate of Other Visitors
- Respect other visitors and protect the quality of their experience.
- Be courteous. Yield to other users on the trail.
- Step to the downhill side of the trail when encountering pack stock.
- Take breaks and camp away from trails and other visitors.
- Let nature's sounds prevail. Avoid loud voices and noises.
These Seven Principles are © 1999 by the Leave No Trace Center for Outdoor Ethics: www.LNT.org.
How to create a google map of places you want to visit
This post is primarily a screencast tutorial on how to create a custom google map of places you want to visit—or what I like to call an Adventure Map.
An Adventure Map is a handy repository for all of those places on your OMG-I-Want-to-Visit list. It's a place to store those random campsite tips you get from friends, that instagram post about a backcountry waterfall, or that killer hike your friend just posted on facebook. There are plenty of ways to save this information for later, but I find that a custom map is one of the most useful.
The screencast tutorial
In this tutorial, I show you my personal Adventure Map and explain how I use it. I then teach you how to create your own adventure map. The entire screencast lasts about 27 minutes. If you're in a rush, the tutorial itself starts at the 8:30 mark. I've also added some additional notes below that I didn't mention in the screencast, as well as another short tutorial on how to load your new Adventure Map onto your mobile phone.
Even if you've used Google's My Maps before, I hope there some nuggets that can you can put to good use. If you have additional tips, please leave them in the comments.
Thanks for watching. It's quite a bit longer than I would have liked, and I'm not particularly happy with my performance, but I hope you found it useful. Below are some items I didn't mention in the screencast that you might want to know about.
Additional notes not mentioned in the tutorial
Other ways to add pins
You can also add pins by clicking on the pin icon in the toolbar and clicking directly on the map. This is especially useful if you're setting pins to investigate on the ground later, like possible indian ruins or dispersed camping sites. In addition, you can also search for a location by gps coordinates, which makes it easy to add destinations that you might have found from blogs, guide books, or someone else's custom map.
More on driving, biking, and walking directions
Another method to add driving directions is to click the draw a line tool and select the add a driving (or biking or walking) route from the drop-down menu. Then click where you want the route to start and trace the path you want to the directions to follow. Double click to end the route. This will create a new layer containing the directions. Using this tool, Google will calculate a route based on the roads in its database. So if you start your route 1/4 mile from a road, the directions instead start at the nearest point on the nearest road, and only follow roadways. Awkwardly, this is also the case with walking and biking directions, too. Nonetheless, this is still a useful method when you're trying to force Google Maps directions to follow a particular route.
Drawing lines and shapes
You can also add lines and free-form shapes (using straight lines only) to your map. I find this to be useful when there's an entire area I want to save for future investigation, such as a long wall of petroglyphs, or what appears from satellite view to be a complex of pueblo ruins. Select the draw a line tool, click to add the starting anchor point for the line, then move to where you want the second anchor point to be and click again. You can continue to add anchor points, creating a multiple angled line. When you're done, double-click to lock it in.
Or, if you're adding a shape, follow this same procedure around the edge of the area you want, being sure to end back at the first anchor point. Once you've saved your shape, you can go back and adjust the location of the corners or create a new corner by dragging the dimmed circle that's midpoint on each line. Once you've saved your area, Google will calculate the perimeter distance and area for you.
If you're trying to undo a line or shape, you can easily abort by clicking ESC on your keyboard. If you click ESC again, you'll be returning to the default select mode where you can click to select items or drag to pan the map.
Measuring distances and areas
This tool functions similar to the one used to add line and shapes, except that it doesn't add any permanent items to your map. Instead, it simply shows you the distance of the line, or the perimeter and area of a shape. One useful feature of this tool is that when you're measuring distances, it keeps a running total using "mile markers" along the line path.
How to load your Adventure Map onto your phone
As mentioned in the screencast, one of the benefits of using a custom google map is that you can load it as the base map on Google Maps on your phone. Below is a brief tutorial on how that in iOS.
Here's how to do the same thing on Android. Even better, the My Maps app for Android allows you to create and modify your custom maps directly from your device [edit: the app is no longer available in the play store, perhaps the functionality has been included in the Google Maps app?].
Share some love and pin it

Why you should use a camping bin
You know what sucks? Getting stressed out by packing for what's supposed to be a relaxing camping trip. Yeah, that definitely sucks.
Eliminate packing stress
You can alleviate much of that stress simply by having a camping bin—a plastic storage container already set up with the stuff you need to pack for your average camping trip. Because it's already ready already, you can just grab it and go. Ok, well, you'll probably want some other stuff like a sleeping bag, tent, cooler, and food, too. But having all of the main camp items in one or two ready-to-go bins makes packing a snap.
Makes finding things a breeze
With everything all in one spot, a camping bin also makes it easy to carry your stuff to the picnic table, too. It all stays clean and organized, tucked inside a plastic bin until you need it. You'll be able to quickly find what you need instead of scrounging around the car for various items. That means you'll spend less time managing your stuff and more time enjoying your trip. And best of all, when you're ready to pack up the campsite, it's just as easy to return the whole kit to the vehicle.
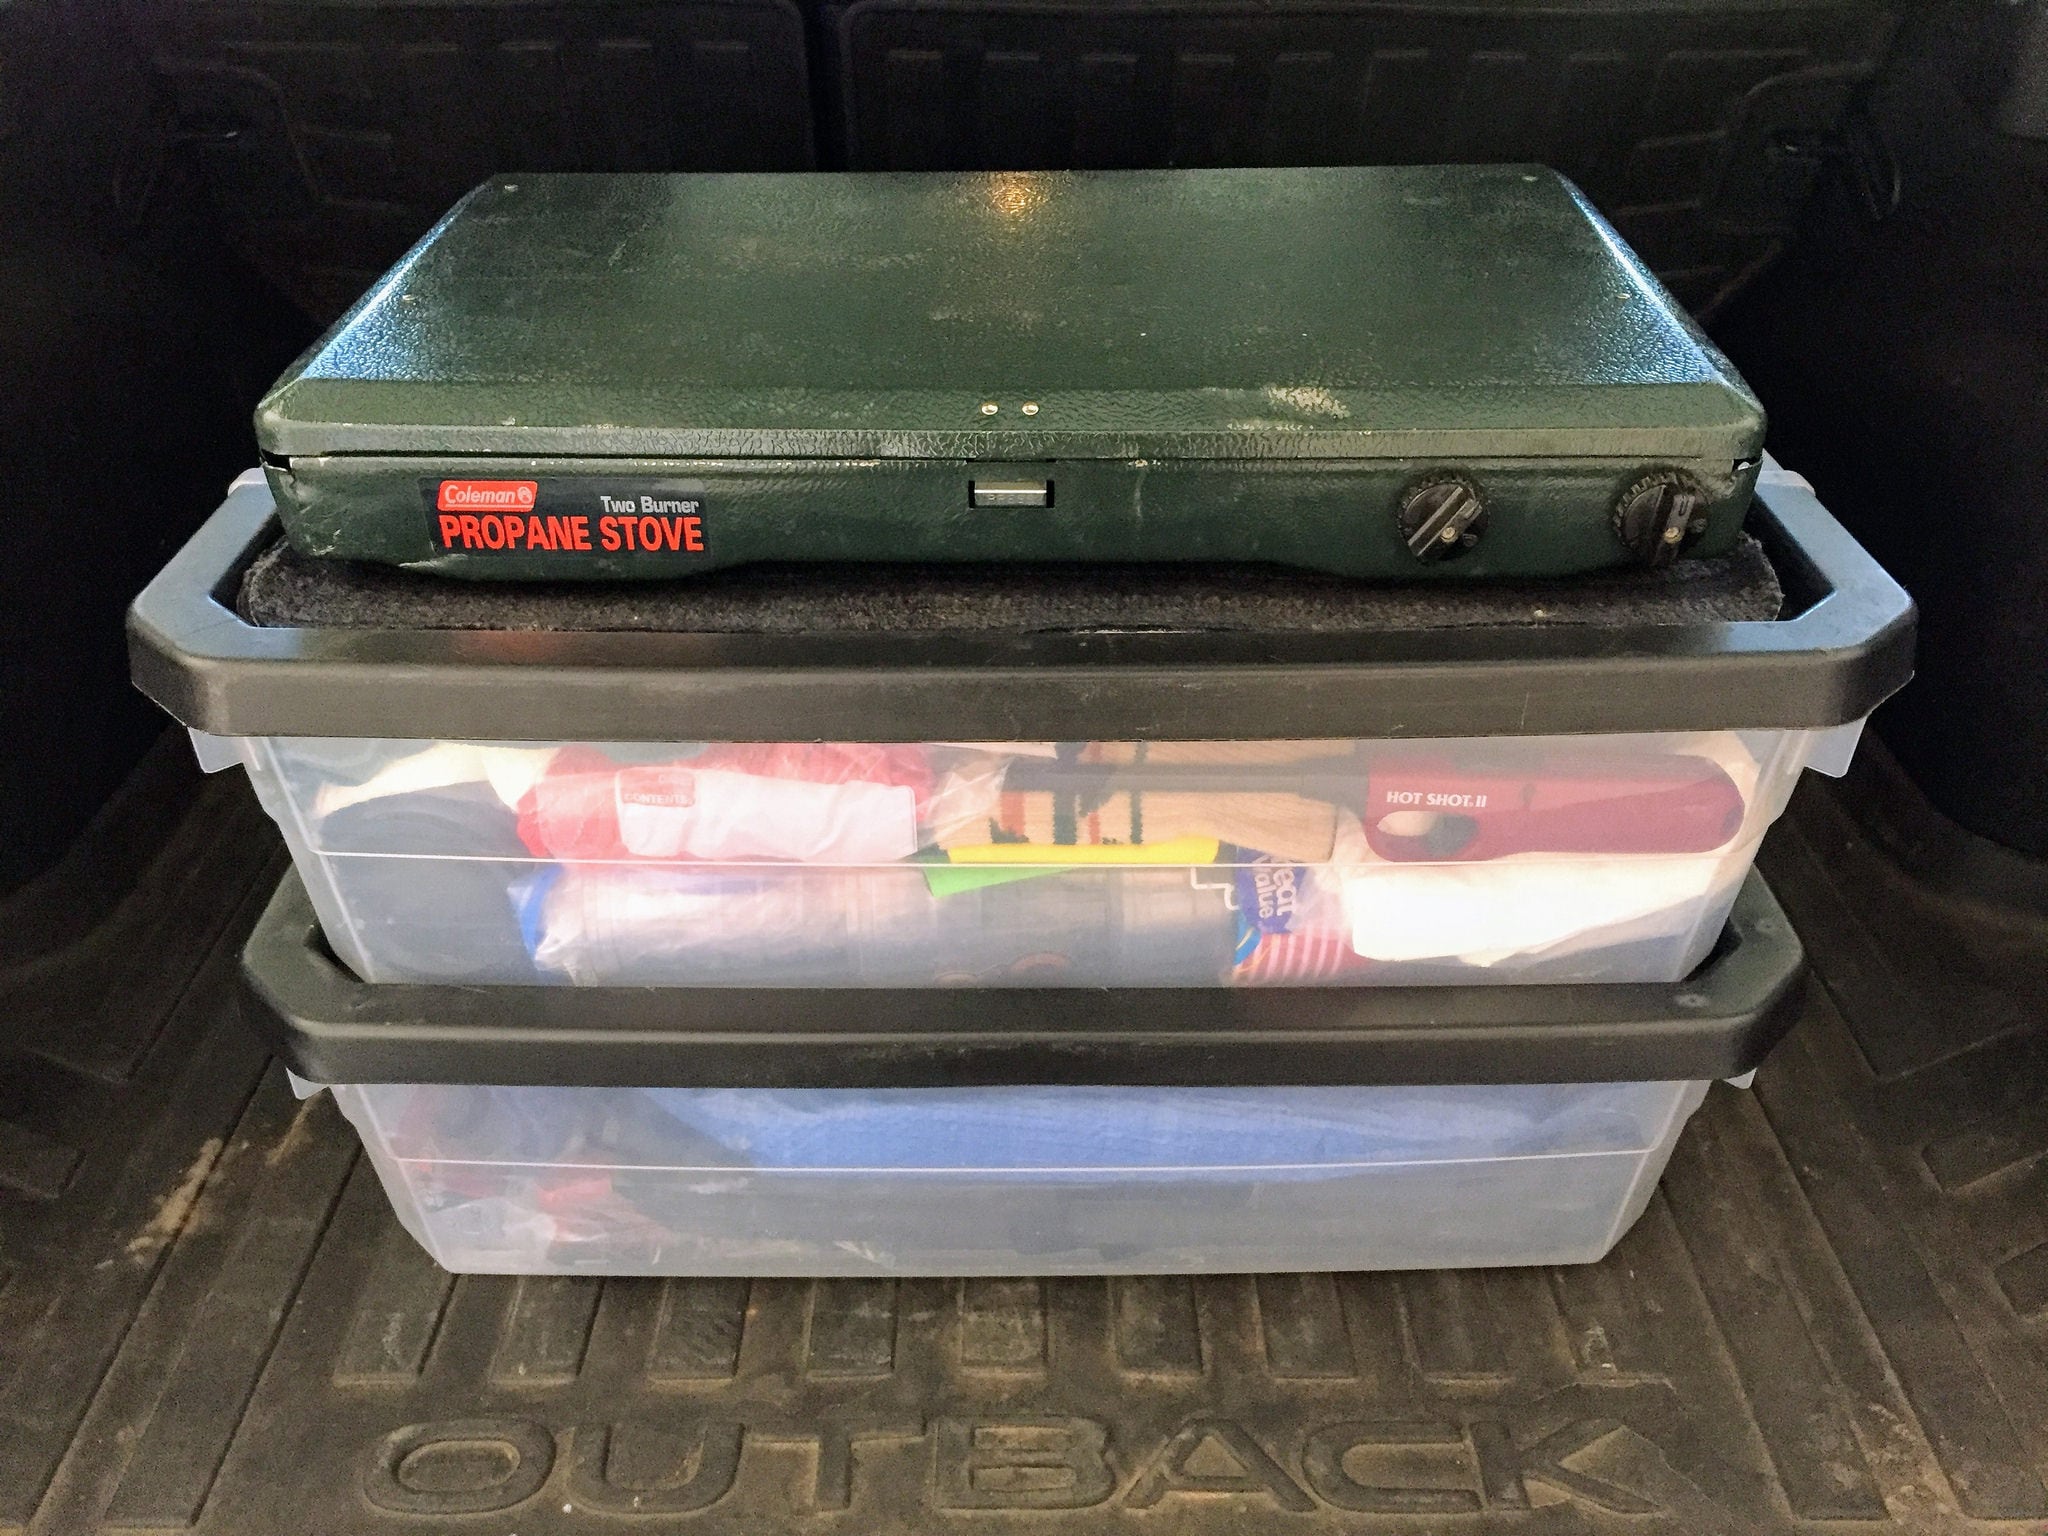
Here's exactly what I use
I've broken down the contents of my various adventure bins below so you can get a better sense of what these look like.
A few caveats
Before you start stalking—or critiquing—what items we bring, I should explain why this kit works well for our needs. First, we have no kids, so everything here is just for us. We're also not huge camp foodies. For some people, camp cooking is the main reason for going camping. That's not us. We nearly always prefer simple to extravagant, and we're usually just cooking for the two of us. We also prep much of the food before we go so we don't have to spend as much time making dinner at the campsite. That makes sense, as we're often just camping to save money on hotels. So your bin may look exceedingly different than ours, and that's totally fine. This is all about putting together a system that works for you.
I should also note that I'm not holding this up as the World's Best Camping Bin™ set-up. It just happens to be what I use—as of today, at least. It'll change over time as I refine further or upgrade. Some of this gear is 20 years old while other components were acquired in the last year. I usually only upgrade gear when there's a substantially better product that improves my experience and seems worth the money. Most of these items are cheap and unspecial in any substantial way. If you're just starting out, I recommend starting with cheaper stuff first and only upgrading later, if it's necessary. Most of the time, it isn't. Keep in mind how incredibly easy it is to overspend on camping gear and save some of that cash for trips instead.
Click to expand or retract each section
Click on the bin name to "open" the lid and peak inside. To head off some anticipated questions, I've linked to a few items that people might want to know more about.
[powerkit_collapsibles]
[powerkit_collapsible title="Main camping bin"]
Main camping bin
What I use this for
This is my primary camping kit—it goes on every single camping trip I take.
I prefer using a shallow bin so that there aren't too many layers of things, which makes it easier to both find and repack items. The 10 gallon "stacker" style bin I use measures roughly 25" x 18" x 7" and has locking handles to keep the lid tightly secured. Two 4 gallon bins stack perfectly on top of this one, as does the 19 gallon version, so there are a lot of options that work well together if I decide to expand in the future. The current bin is fully packed, so there's not a lot of extra room for additional items.
I also keep some cheap Ikea doormats on top of this bin. We use them outside our tent (or vehicle doors, if we're sleeping in the car) to make it easier to put on our shoes after we crawl outside. The doormats fit perfectly on top of the bins and our trusty two burner Coleman stove sits on top of them. This works especially well, as the doormats keep the stove from rattling against the plastic bin on washboarded roads.

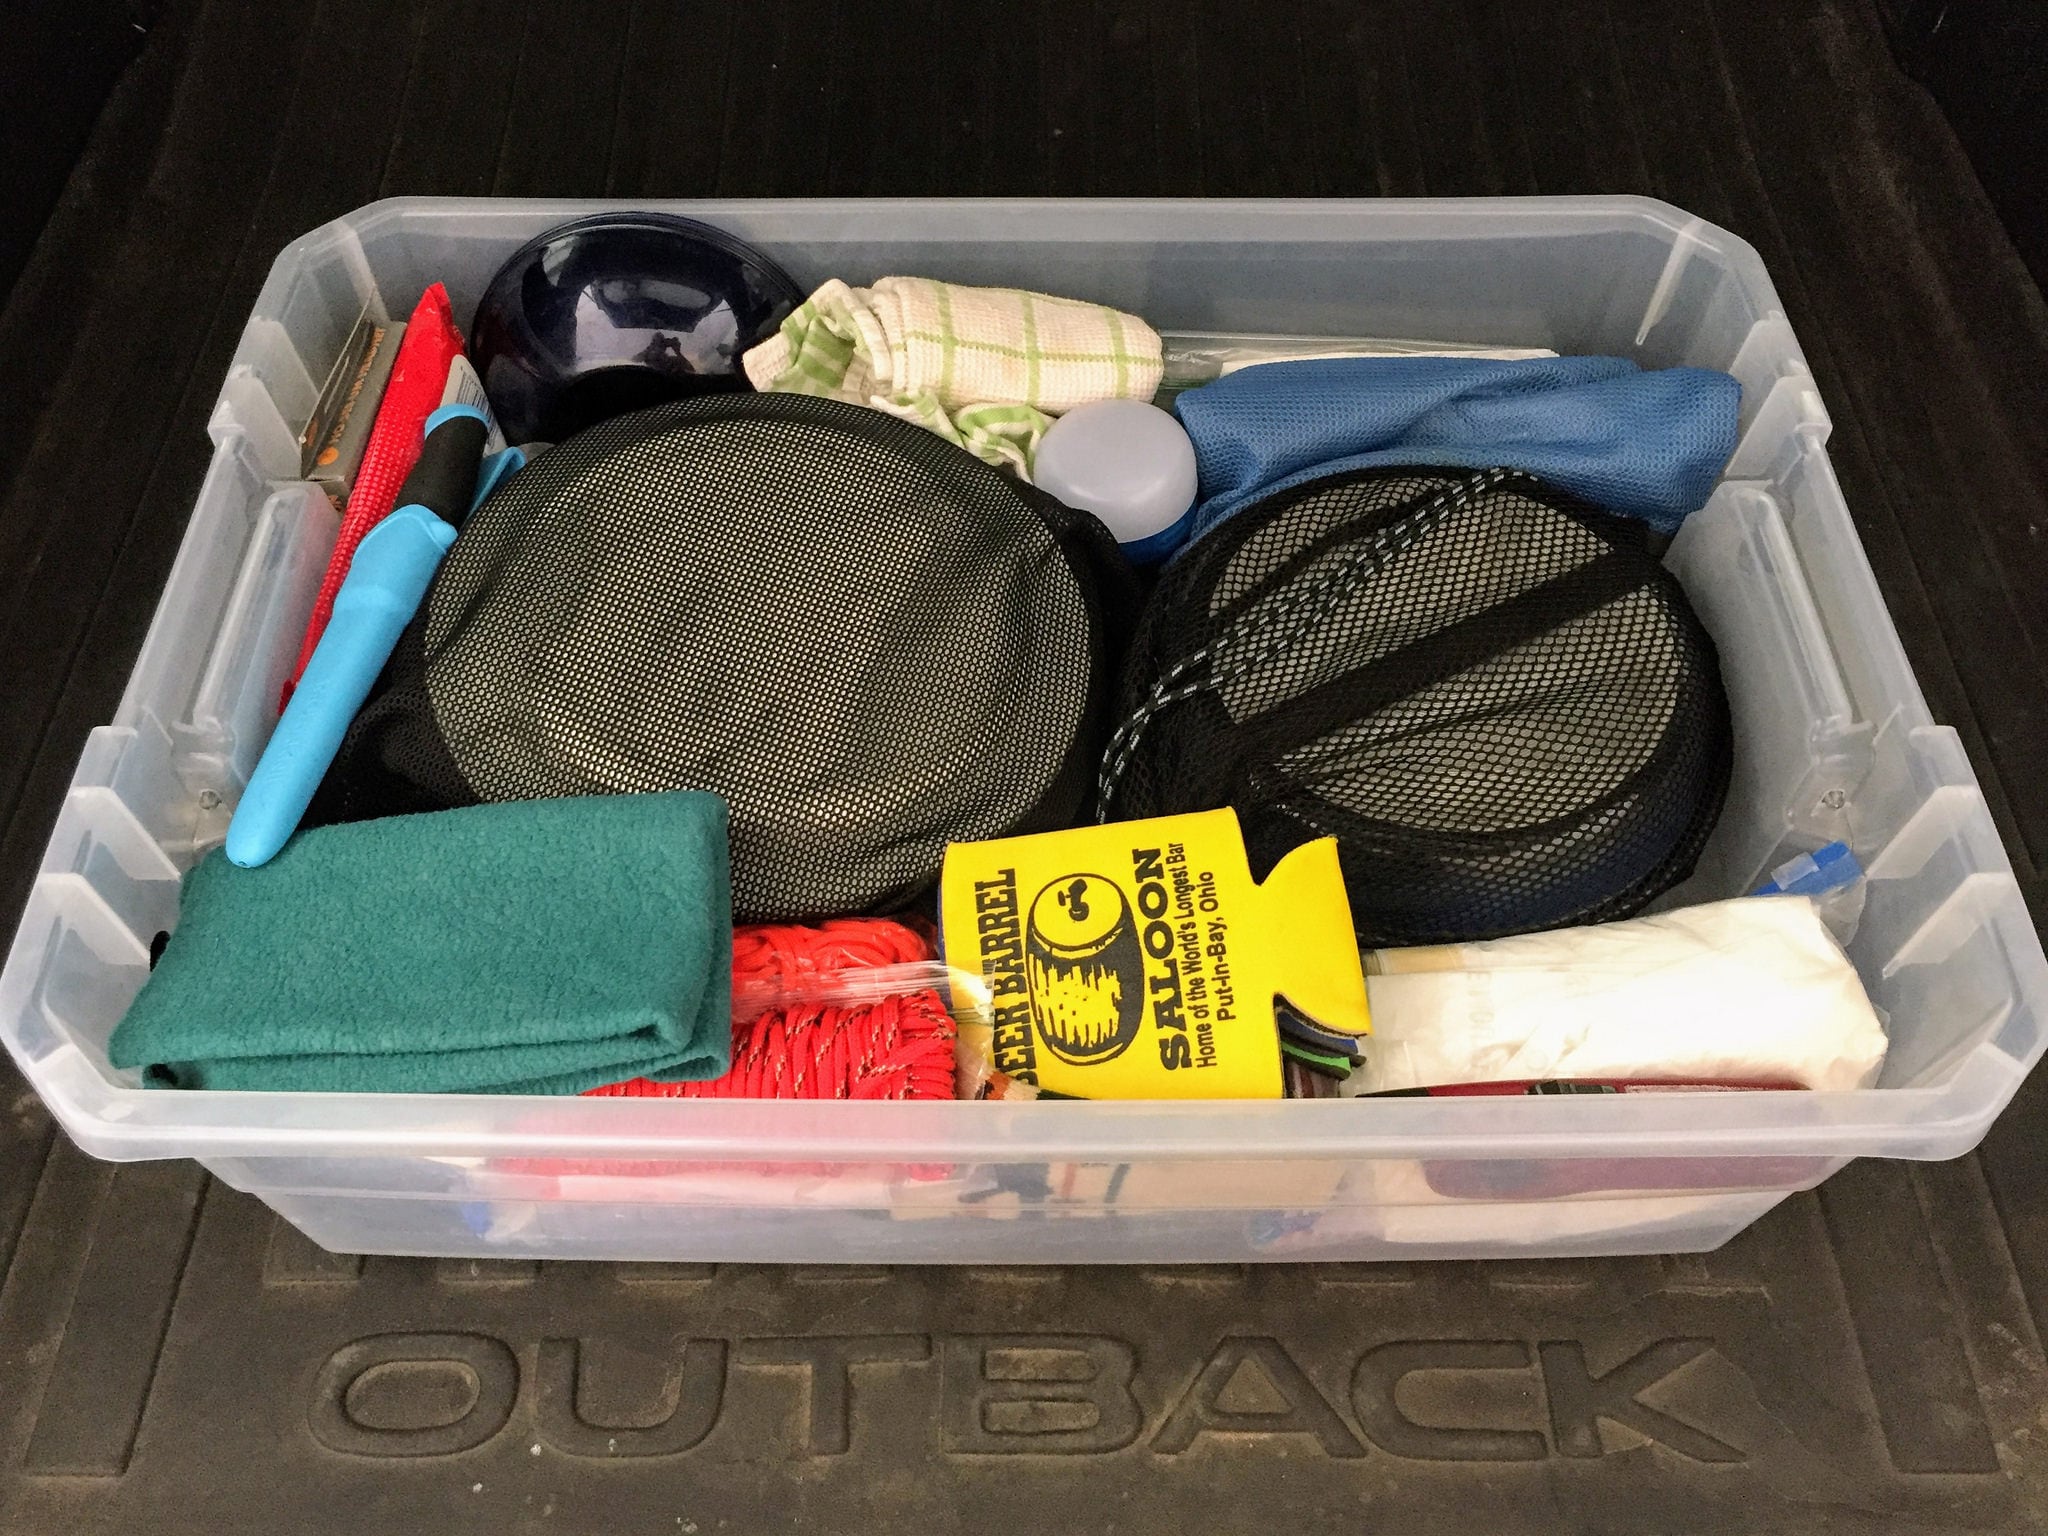
Bin contents
- Flexible plastic cutting boards (3)
- 1lb Coleman propane canister
- Nesting pot/pan set (3 each) & handle (an older version of GSI Outdoors Bugaboo that's sadly no longer available)
- Silicone coaster/pot handle (2)
- Plates (7)
- Bowls (7)
- Disposable paper plates (about 6)
- Butter knives (7)
- Big spoons (5)
- Regular spoons (5)
- Forks (7)
- Spatula
- Stirring spoon
- Tongs
- Camping spatula & spoon set
- Kitchen scissors
- Can opener
- Kitchen knife
- Bottle opener
- Small lantern (2)
- Tervis-style insulated cups w/lids (3)
- Yard trash bags
- Kitchen trash bags
- Paper towels
- 2.5 gallon ziplock bags
- Gallon freezer bags
- Quart size freezer bags
- Beverage koozie (4)
- Para cord
- Bug head nets (2)
- Two-sided dish sponge
- Dish scraper
- Bug spray
- Hand sanitizer
- Wet wipes
- Toilet paper
- Small blacklight
- Lighter
- Dish towel
- Pack towels (3)
- Carabiners (2)
- Medium binder clips (3)
- Spices
Notes
I quickly made a rather poorly-produced amateur video showing all of these items while camping a few weekends ago. I'm (somewhat reluctantly) linking to it here so you can get a better sense of how it all fits together. I'll try to put together a better one in the future.
I keep the serving utensils, cooking utensils, plates & bowls in separate bags. I happen to use some old Eagle Creek travel bags for that, but gallon ziplock would work just fine, too. Also, the utensils, bowls, and plates I use are all lexan-style.
The large 2.5 gallon ziplock bags are used for dirty dishes, when we're feeling lazy and would rather just bring them home to the kitchen dishwater. That probably describes 75% of our weekends. Ok, fine...maybe 90%.
Yes, we bring three flimsy plastic cutting boards, but they're mostly just used as clean surfaces to set food on. We do most of our slicing and dicing back at home before we leave.
I use the binder clips as bag clips for chips and other snacks.
The small blacklight is used to look for scorpions at night. I kinda just tossed it in there one day, but it can be fun to play around with, especially in the desert.
[/powerkit_collapsible]
[powerkit_collapsible title="Campfire bin"]
Campfire bin
What I use this for
This storage container is identical to the one I use for my main camping bin. I bring it when we're planning on having a campfire, or on longer trips when we might have a campfire. It also contains our camp shower, though that rarely gets used unless we're camping for quite a few days—trips in which we'd also likely have a campfire. We might also bring this bin when we might need some shade or rain protection, or expect to sleep in Sam the Subie.
Bin contents
- Plastic serving trays (2)
- Telescoping campfire forks (3)
- Roll of paper towels
- Lighter fluid
- Lighter
- Fire starter
- Hatchet
- Folding saw
- Cooking oil
- Aluminum foil
- Trash bags
- Extra 1lb propane canister
- Utility towel
- Heavier duty plastic shopping bags
- Camp shower
- Para cord
- Bungee cords (4)
- Bag of tent stakes
- Tarps (2)
- Clamps (5)
- Bug netting, blackout cloth, and magnets
Notes
We use the tarps, clamps, bungees, tent stakes, and para cord—along with some telescoping tent poles that get packed with our camp chairs—to create various shelter configurations, often utilizing the roof rack or open rear gate of my Subaru Outback.
The bug netting, blackout cloth, and magnet set is a custom solution I use for covering the windows when sleeping in the car. I'll have more specifics on this in a future post, but it's basically comprised of a set of no-see-um netting and dark "blackout" cloth trimmed to fit my various car windows. I have about two dozen rare earth magnets that I've individually covered with gorilla tape to create a sort of tab so I can easily grab them. I use the magnets to mount the netting or blackout pieces over the open car windows at night. That way, I can have some good airflow without dealing with insects, or sleep through the bright rising sun (or, sometimes, a full moon that's too darn bright).
We use the heavier plastic shopping bags (meaning, the ones just slightly nicer than grocery bags) to hold our clothes and other items when we're using campground showers. Since everything seems to get wet in public showers, the bags help keep our things dry, especially when shower curtains are missing. If we're using our own camp shower, the tarps and related items also allow us to create a makeshift shower privacy curtain if we need one.
The serving trays make it much easier to eat dinner in a camp chair near the campfire. I sometimes snag these for our daytrips too.
[/powerkit_collapsible]
[powerkit_collapsible title="Daytrip bin"]
Daytrip bin
What I use this for
We grab this smaller bin (roughly 16" x 13" x 9") for daytrips, which serves us well for basic picnic-style meals. We tend to keep our daytrip meals very simple, like cold sandwiches and some sides, so there's not much we need. It's rare that we'd heat anything up, so we don't need to bring a lot of gear as a result. To make things easy, we just use disposable plates and bowls from our tailgating supplies.
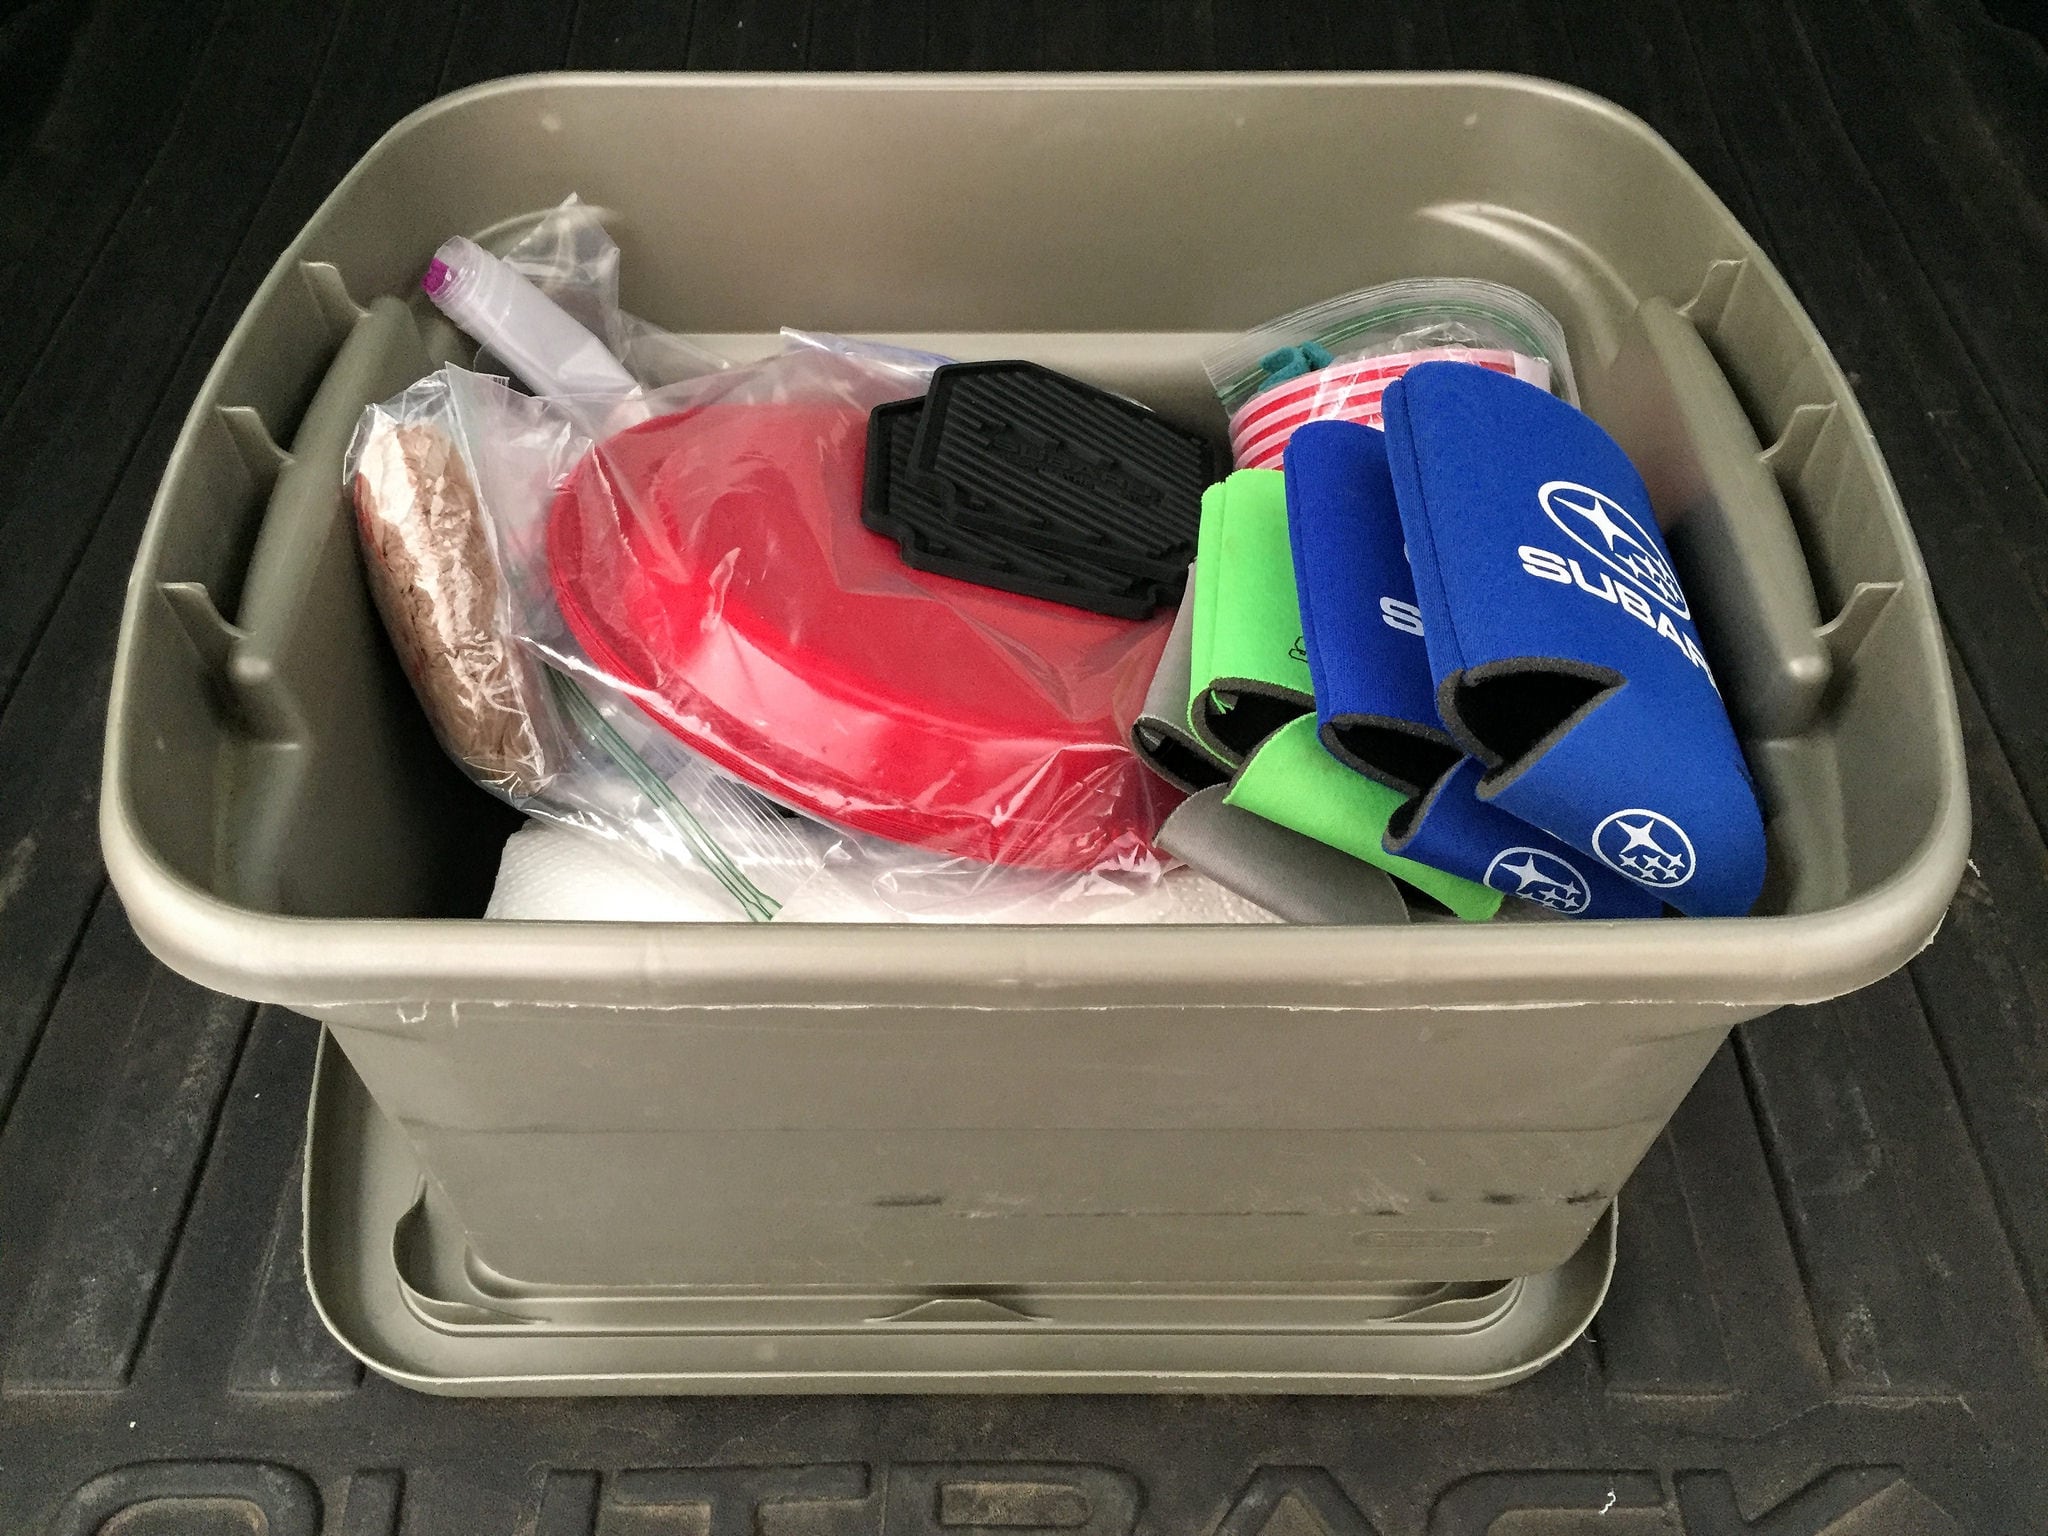
Contents
- Roll of paper towels
- Baggie of shopping bags
- Beverage koozies (4)
- 2.5 gallon ziplock bags
- Gallon/quart/snack ziplock baggies
- Disposable plates & bowls
- Disposable solo cups
- Plastic silverware
- Silicon coasters/pot holders
- Lighter
- Kitchen knife
- Binder clips
Notes
Why have a lighter when there's no stove on the list? Two reasons. First, we might use it to fix the ends of newly cut para cord we might use to string up a shade tarp. On the rare occasion that we do want to heat something up (probably hot chocolate or cider), we would have grabbed my backpacking stove, fuel, and pot—which requires a lighter. Those three items are small enough to toss into this half-full bin, so it's an easier solution that bringing the normal bin.
[/powerkit_collapsible]
[/powerkit_collapsibles]
Creating your own camping bin
Now that you have a sense of what I bring and why I bring it, it's time to put together your own bin. Start with brainstorming the items you'll need. It might help to mentally walk through an average trip. Everyone travels a bit differently, so consider what you'll need and what you don't.
What does your average trip look like?
Are you cooking a big meal, or just roasting some hot dogs? How many people will need plates, bowls, and cutlery? How much food prep will you need to do at camp? What other items will you need access to (such as a can opener, bottle opener, vegetable peeler, etc)? What's your dishwashing strategy? Do you need cups that work with hot water? What might you need for a campfire, if you often have one?
Basically, the point here is just to run through all the usual scenarios you'd encounter and list things you may use. Then, pare down the list to the things that you think should come along every time you go. Those are the items you put in your camping bin.
In addition, consider any items that you should have along, just in case. For instance, I only occasionally use a can opener, but we sometimes buy camp groceries on the drive to the campsite, so I make sure I have one of these in my kit—even though it might only get used once in awhile. Same goes for the bug head net; it's something I might not know to bring on any specific trip, but would dearly miss if I did need it. Be careful with how many "just in case" items you bring, though; it can be easy to end up with a cluttered mess of rarely used items.
How will the bin fit in your vehicle?
This might sound a bit silly at first, but I assure you it's not.
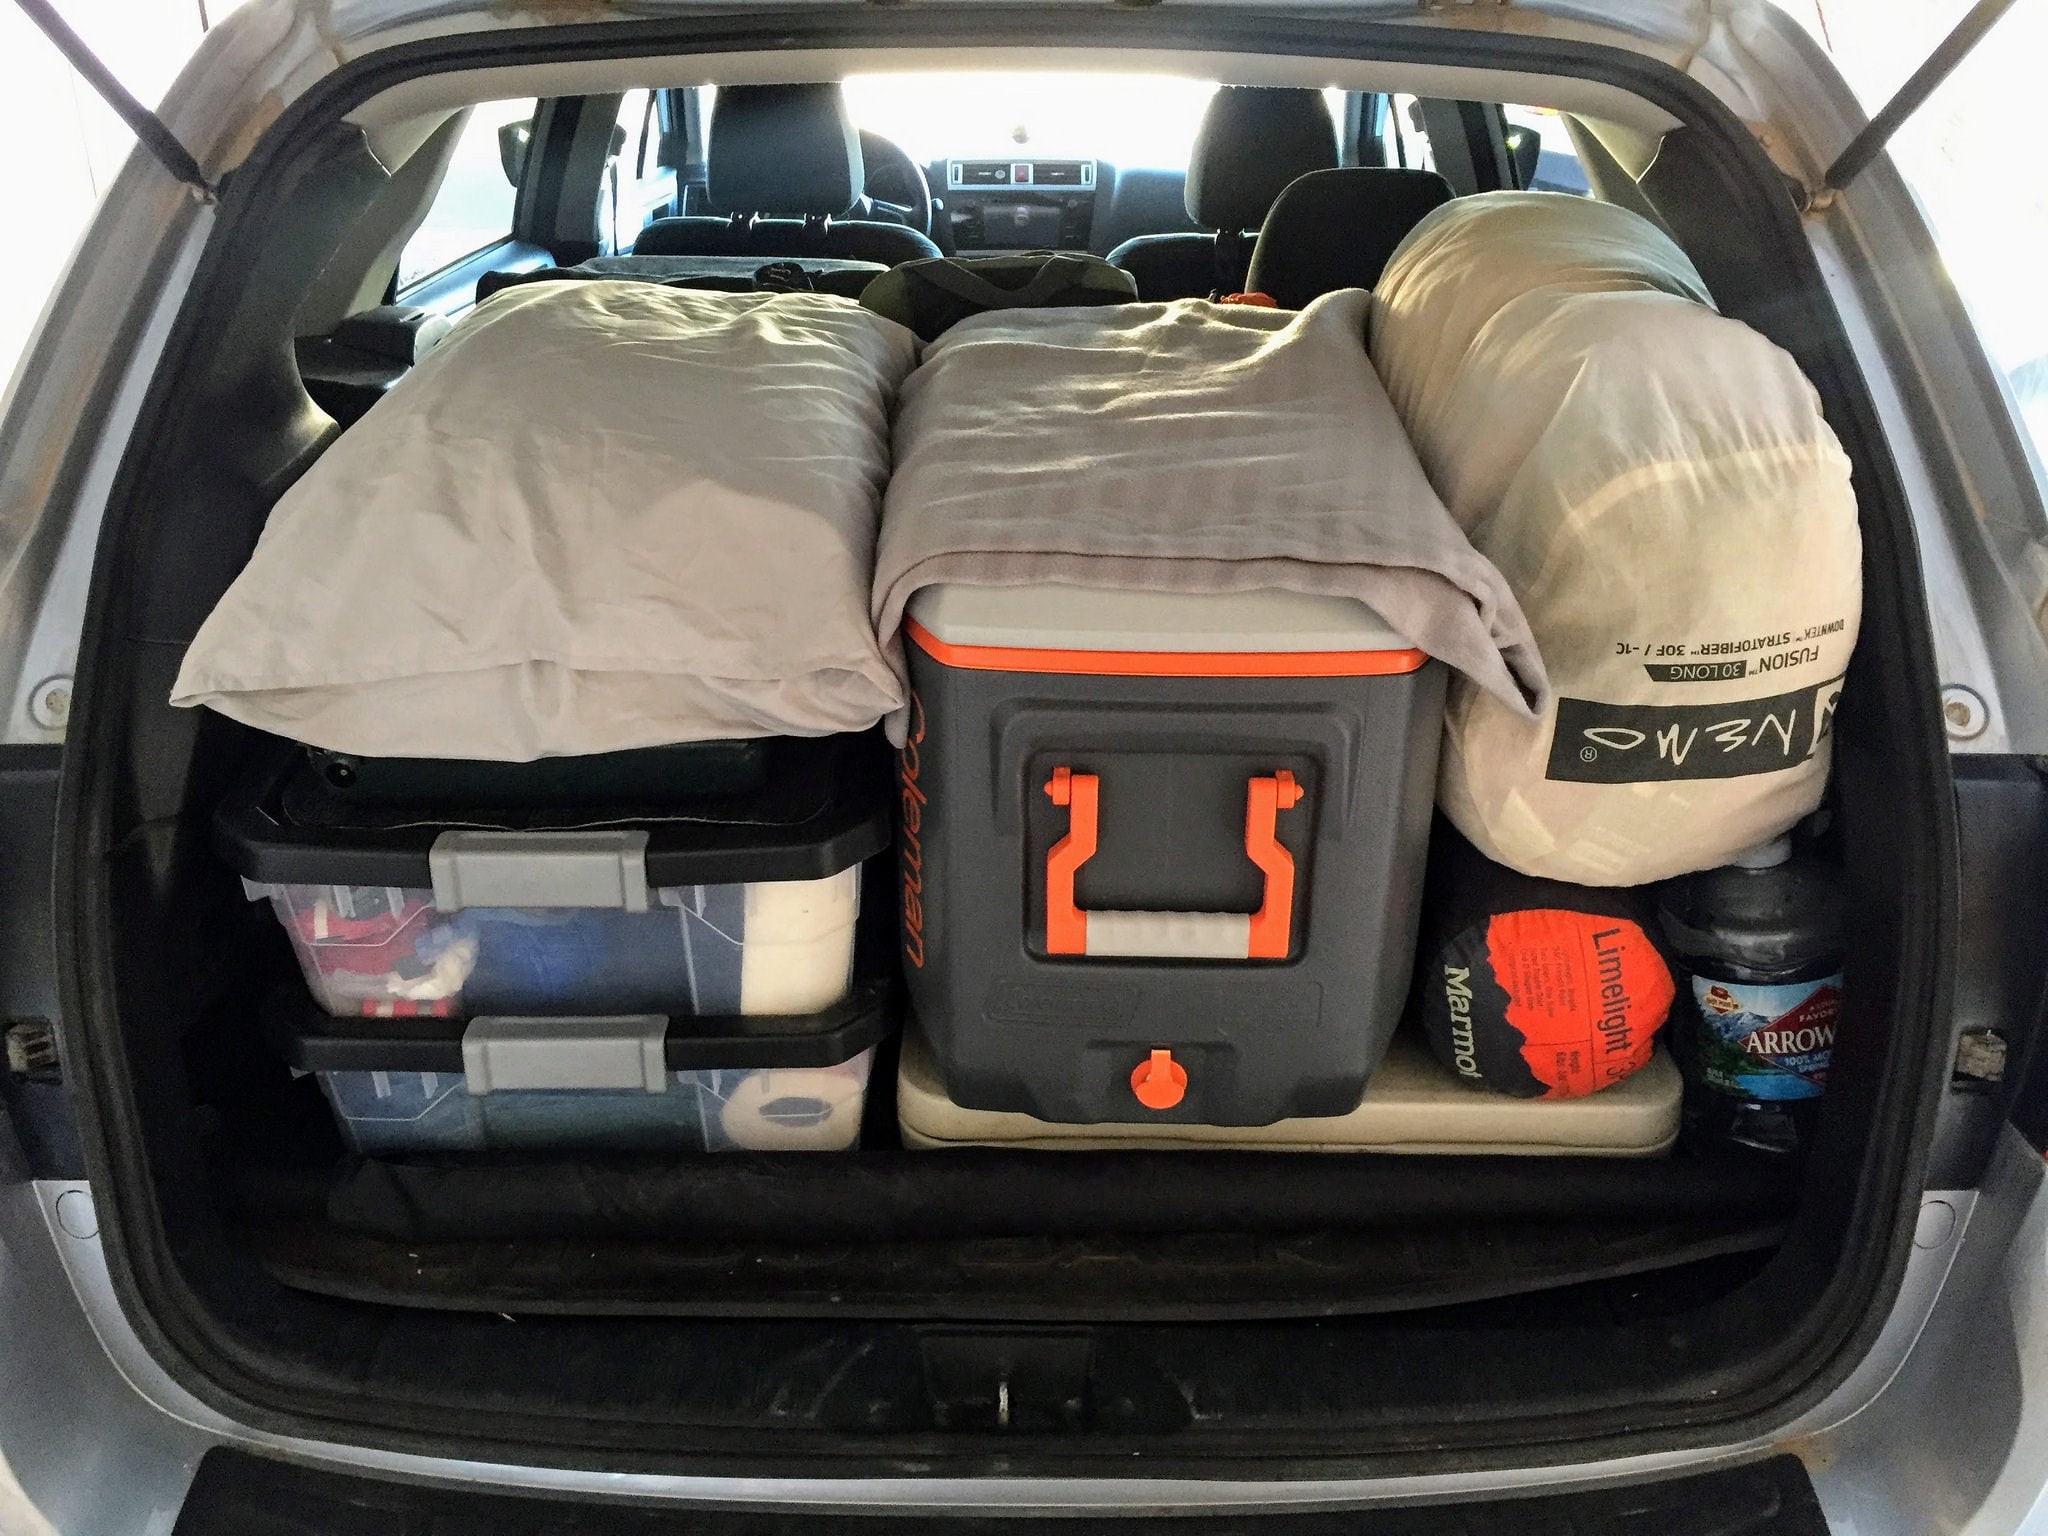
If your main camping gear bin is awkward or doesn't fit cleanly in your vehicle, it'll add frustrations you don't need. I've found that it's best to "test load" your vehicle with your main big items: tables, chairs, tent, cooler, sleeping bags—and consider what things must go where. For example, my camp chairs must go across the back of rear seats if I want my cooler to be easily accessible, so that influences how wide of a bin I can use. If you're planning on using multiple bins, you'll also want to consider how well they fit together, too. I bought matching, stackable bins specifically so that it'd be easier to pack them in the car together.
I used to use a taller, more narrow bin, but it was too tall to put anything useful on top of it and it created a weirdly-shaped void that usually resulted in unused space. If your bin doesn't "play nice" in the vehicle configuration you'd prefer, find yourself one that does. It's worth the hassle now to get it right than dealing with repeated consternation every subsequent trip.
Putting it all together
Now that you have your camping bin items together and have found a bin that will work for your space and gear, it's time to bring it all together. After a few times packing and repacking your bin, you'll probably notice that things seem to fit better if you pack them a certain way. I try to pack the bigger items in the same spots each time, and then fill in with the other items around them. Smaller items I use frequently go in designated spots (usually corners, for me). It's useful to have a system—that way, you don't have to rummage through the whole thing just to find that little spice container. That's basically what this entire post is about—creating systems that make your camping life easier.
What other bins would be useful to have?
My main camping bin is primarily focused on camp kitchen items. I suggest that you have a similar one, as it makes it easy to bring everything you need right to your cooking area. But that doesn't mean you can't have bins dedicated to other types of gear, too. For instance, we also have a sleep bin that contains our comforter, sleeping pads, pillows and lightweight throw blankets that we often use in warmer weather. I also have one for much of the gear I usually bring kayaking. If having a pre-organized gear bin would reduce the hassle of packing and help you get out more often—as it does for me—then you owe it to yourself to put one together.
Replenishing the bins
Since our goal is to be able to pack quickly—so that we can leave right after work on Friday, for instance—we keep these bins fully stocked and ready to go. Instead of having to look through the bins before each trip to see what needs to be replenished, we try to take care of that while we're at the campsite or on the road.
Our solution is to use the free Microsoft To Do app so we can add to a shared "camping bin replenishment" list as soon as we use something up at the campsite. Uh oh, down to only one trash bag? Add it to the list. Lantern batteries going dim? Add it to the list. Propane canister feeling a little light? Add it to the list. Do it right when you think about it. Yes, it's ok to whip out your phone at camp to do this. I also add anything here that I might want to add to the bin for the next trip. Again, log it when the idea hits you; don't expect to remember later.
Once we're back home from the trip, we'll replace anything that needs replacing (including recharging the batteries for the small lanterns) before we put the bins away. This is important—if you're not diligent in replenishing the camping bin, then you'll undermine your ability to just "grab and go" or you'll end up without something you need.
Auditing your kit
Once or twice a year, I like to take everything out of the bin and review if it's still something I should be hauling around. For instance, have I really used that blacklight? Maybe that can stay at home from now on. Doing this review helps reduce clutter and make it easier to manage the stuff you actually do use regularly.
I want to hear about your camping bin
Did an interesting item make it into your camping bin? Have a tip I missed above? Think I should add something specific to my own camping bin? Let me know in the comments. I'd especially love it if you linked to a photo of your own camping bin. I love hearing what everyone else brings.
Pin it
How to make more hiking or camping friends
Solo adventuring can be great—it's easy to do exactly what you want right when you want to do it. And it's a perfect time to dive into some introspection and contemplation.
But there's often no substitute for experiencing a new place with friends. Unfortunately, not everyone has a go-to travel partner, or an available crew to camp with. If you're looking to expand the number of friends you get outside with, you've found the right post.
Your existing group of friends
The first step is to check with the friends you already have. Maybe one of them has been dying to get outside, and just needs someone to suggest a destination. Or maybe you never quite realized that someone loves to hike or camp, but similarly doesn't have someone to go with. It's funny how often I see someone post a photo of a hike they did, or a new tent they just bought, and thought to myself, "wow, I didn't know they enjoyed that sort of thing." So, ask your friends. Post a few messages on facebook, then mention it at your next happy hour get together. Start here first.
Your existing irl social networks
After you've checked with your circle of friends, expand a bit to the other social networks you belong to. Check with your co-workers—the ones you can stand, at least. Check with the folks at your _____________ club, whatever that might be. Work, school, hobbies, parents of your kids' friends, neighbors, regulars at your gym class...we're all connected to various groups of people we already somewhat know, each of which may yield some new hiking partners. But only if you ask.
Meetup groups
Meetup has been an absolute treasure trove of outdoor clubs for me. I regularly kayak with three groups, day hike with another two, and occasionally jump on backpacking trips led by couple others. But it wasn't always that way.
A few years ago, I decided that I didn't have enough backpacking in my life. While several of my friends routinely said they wanted to go, I could never quite pin them down for a trip. So I headed over to Meetup.com and searched for some groups. I found half a dozen that were backpacking-focused and seemed pretty promising, joined each, and took a look at their trip calendars. There was one trip coming up to one of my favorite destinations, Aravaipa Canyon Wilderness, which requires permits that the trip leader had already secured. They had a spot open, so I RSVP'd yes. A few days later, I was sleeping under cottonwoods gazing at the stars with five people I had just met. They weren't all going to be future friends, but one of them is. And best of all, I got a fun overnight trip out of it.

A week later, I went with another meetup group that was heading to Havasupai, one of the jewels of the Southwest. I hadn't been there before, and the permits can be hard to get. It was only four days long, but I made a ton of friends on that trip—many of which are among my most cherished friends today.
Within a week, I was organizing unofficial trips for my new friends and have helped lead trips (and happy hours for connecting with new members) ever since. That group basically became my primary "outdoor adventure" crew, the ones I spent most weekends with. I'm not guaranteeing you a similar outcome, but it's a common meetup experience I've seen so frequently that I'm confident you'll make some outdoorsy friends if you give it a sustained shot.
"But I'm too shy for that"
Meeting new people and doing a trip with them isn't necessarily easy or fun for everyone to do. I understand, I do. I generally felt the same way. I'm not an outgoing guy. I'm rarely the popular one in groups. I was worried I wouldn't be able to keep up. I was worried that there'd be some creep or asshole on the trip that drove me nuts. I was worried that someone might be totally unprepared and we'd have to help him along the whole trip. I was worried I'd be the outcast on the trip, that I just wouldn't fit in. There were a thousand other worries I had, too. And yet, none of those things happened. Not one. That's the thing with most fears—your imagination is far worse than what's likely to actually happen.
If the idea of this simply terrifies you, and you're unwilling to force yourself to try it just once or twice—no matter how uncomfortable it might seem—then don't. It's that simple. Stop reading and focus extra energy on the first two steps, instead. But if you're intrigued, even just a bit, but still pretty anxious about the idea? Well, I say go for it. Talk a friend into going with you. Start with a group that does a social activity so you can meet the regulars first. You'll feel less anxiety if you know you can bail during one of these event more easily than an outing in the wilderness. Don't see any outdoor recreation groups that offer one? Email the organizer and suggest it. Likewise, if you're a woman and worry about spending a weekend with a bunch of strange, possibly horny, men who might constantly hit on you? Well, email the group organizer and suggest a girls-only trip. There are often ways to mitigate the fears or hesitations you might have. Start slow and work up to an actual outing if you need to. Or do what I did and just thrust yourself into it——like jumping into a cold lake instead of trying to ease your way in. Either way, give it a shot.
But what about small towns?
I should note that I live in Phoenix, a large metro area with great weather, abundant public lands, and plenty of people who enjoy getting outside. You may not live in such a place. You may live in a small town, far from a population center large enough for a single outdoor rec meetup group, let alone the dozens I can choose from. Bummer.
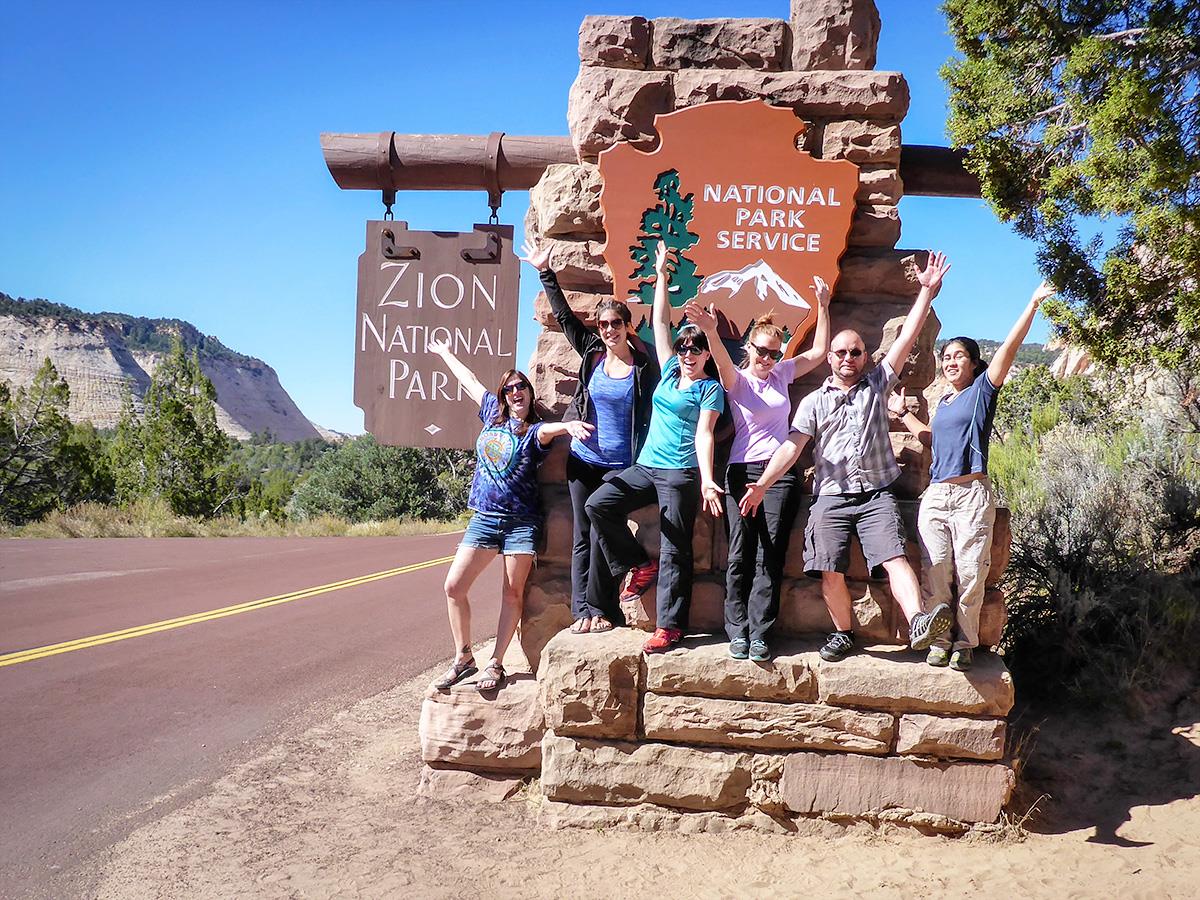
But all is not lost. Try searching for specific destinations instead. In the search box, type the place you want to go (it works best if it's a somewhat coveted destination). Change the "distance from" your location to "any distance" and select "all meetups" from the options on the right, then look through the results. You may find groups from across the state, or even from across the country, leading trips to that destination. It's not uncommon for people to join trips being led by groups far from own city.
Facebook groups
Check facebook for various hiking or outdoor-related public groups in your area. Often, individuals from these groups will lead hikes or other outings, sometimes formally and sometimes informally. If you don't see events being mentioned, ask if anyone might want to join you. Even if you don't have a lot of luck here, you'll probably enjoy conversing with them anyway. In addition, these facebook groups often offer the side benefit of providing some great ideas on future destinations to explore.
I couldn't find a kayaking trip scheduled for this Sunday in my normal meetup groups, so I jumped into a new facebook group I recently joined for kayaking the lower Salt River outside of Phoenix. One post and one day later, I have a small group of paddlers joining me on Sunday morning. It turns out that there are often people who would love to join a trip; they just need the suggestion to go. I see this regularly in other hiking facebook groups I belong to. Don't see an outdoorsy facebook group for your area? Create your own and see what happens.
Other clubs & organizations
You're probably already familiar with a number of national outdoor/conservation/recreation groups, many of which have a local chapter or partner that's active in your state. For instance, the Sierra Club in Arizona has a pretty regular calendar of member led-hikes and activities where you'd undoubtedly find others who enjoy the outdoors. Groups like IMBA have lists of local mountain biking clubs you could get involved in. American Hiking Society has a similar list of hiking groups. Hike it Baby has a network of local branches offering outings for families. There are obvious too many to list here, but a quick search will likely uncover plenty of local groups to investigate.
There are a number of new female-focused hiking groups springing up recently, such as Hike Like A Woman. Some of these are set up as national networks with local chapters—often with one or more local ambassadors—that organize hikes and other events.
There are also a number of local or regional outdoors groups, too—and even some outdoor retailers that offer women-focused events. REI's Force of Nature program also hosts a number of classes and events geared specifically for women. Other organizations, such as Outdoor Afro, Latino Outdoors, OutVentures, and Unlikely Hikers host events for communities often underrepresented out on the trail. I've listed just a small sample of the groups out there, so spend some time googling in your local area.
An often overlooked place for finding outdoor clubs is community colleges. Student orgs can be pretty hit-or-miss and don't always persist thru the summer, but it's worth checking your local community colleges for any active groups. The community college crowd usually has a much wider age distribution than four-year universities. So while you'll likely find many twenty-somethings in these clubs, you won't seem totally out of place even if you're 40-something.
Guided hikes & volunteer projects
In the suggestions below, the goal is to connect with others who enjoy the outdoors and who also live in your area. Since these things can vary greatly depending on where you live, you'll need to do a bit of digging to see what's available in your own area.
Some outdoor outfitters, like REI, offer various outings and outdoor ed classes. If you're anything like me, these are your people. It shouldn't be hard to get a conversation going about various trails or destinations, which provides a perfect segue into a "sounds great, so when do you want to go?" comment. Climbing gyms are also great places to make some new friends, though not everyone who climbs indoors enjoys outdoor activities.
Volunteer service projects on our public lands, such as trail maintenance or trash cleanups, can also be a great way to meet people who enjoy the outdoors. Not only might you make some new hiking friends, but you'll be giving back to the outdoor community. Check in with your local land manager for opportunities near you. You might also want to contact local outdoor outfitters, conservation groups, and "friends of" groups, which often sponsor or organize volunteer service projects, too.
If you have a county or regional park system, you might want to see if they do any guided or interpretative outings. You'll want to focus on places where locals routinely go, not the more touristy destinations that might attract out-of-towners. For instance, most visitors to metro Phoenix probably don't even know about the Maricopa County Regional Park system, so they're unlikely to attend their events. That might not be the case for nearby Lost Dutchman State Park, which sees its fair share of tourists given its popular RV campground and proximity to the famed Superstition Mountains Wilderness.
Some cities and counties also run their own outdoor programs through their respective recreation departments. Many times these are focused on general exercise and fitness, but plenty of them also include outdoor recreation activities—especially in places with urban mountain preserves and other outdoor rec opportunities.
Other social media networks
If you're a regular user of social media, especially open networks like instagram and twitter, then you probably "know" quite a few people. That is, you follow them, they follow you, and you at least occasionally have some sort of conversation with them. Well, maybe it's time to meet in person for a hike!
Sure, distance is often an issue for these sorts of relationships; these networks are worldwide, after all. But that doesn't mean you can't put a little energy into following more people in your own area. It's particularly easy to do this on instagram. Simply search by some local hashtags and you're bound to find others who enjoy the outdoors. It might take some time to develop an online relationship with the people you find, but it's a quick and easy way to find fellow hikers. Like facebook groups, you're also sure to learn about some outdoor gems in your area. Oh, and feel free to give me a follow on twitter or instagram while you're at it.
An important note on "meeting people from the internet"
Nope, this isn't a cautionary disclaimer. It's the opposite, actually. Sure, you should be safe when it comes to people you don't know. That's true whether they're people you meet at the grocery store, on the internet, or at your local church.

But, here's the thing. Most people are just fine. Sure, some can be socially awkward. Some are weird. Some are even creepy. And anytime your spidey sense alarm goes off, it's best to pay attention. But the vast, vast majority of people are perfectly safe to spend time with, especially in a larger group setting—whether or not you've met them on the internet.
Fifty years ago, it was perfectly acceptable to make friends at the bowling alley, back when being in a bowling league was far more common. But let's face it, it really wasn't much different than meeting someone from the internet. They were a complete stranger, you got connected because of a shared interest, and here you are doing stuff together in real life. It's basically the same thing as what happens with meetup, except that now you can actually stalk their profile a bit before you ever show up. And that's just one of many precautions not available to previous eras.
The internet is a fabulous tool for finding people with similar interests as you. For finding your tribe.
The bottom line
If you want to make outdoorsy friends, you live in the very best era to do so. Go on, make it happen!
Photo credits
Jessica Schultz took the featured image, as well as the one of our group at Havasupai. She's currently adventuring around the West in her Airstream full-time. Follow her on instagram or at CampfireHappy. You'll be happy you did.
Want more stuff like this? Subscribe to the email list to get notified of new posts.
Camping? No, I'm just sleeping at a campsite
"I'm not camping, I'm just sleeping at a campsite," I explained.
They looked skeptical, trying to process what that sentence could possibly mean.
To them, camping was itself a largely weekend endeavor: full of beer coolers and dutch ovens, carloads of friends, pine trees and hammocks. It was the central feature of the weekend—billed as a chance to let off some steam, day drink with some friends, eat more than you should, and escape the city heat. The point of the weekend was the act of camping itself.
But that wasn't what I was doing. I was camping—well, I was sleeping in a tent at a campground, at least—specifically to avoid paying for an expensive hotel room. As a result, I hadn't brought much beyond the basics: a tent, headlamp, sleeping bag, and sleeping pad. I also had some snacks, a disposable cooler, and a barebones cook kit, though I had opted to grab a cheap sub on my way to the campground instead of cooking some elaborate dinner over a campfire. I was doing it all wrong, in their minds.
Don't get me wrong, I love camping for camping's sake. There are fewer things I enjoy more than sharing some adult beverages with good friends next to a campfire with a view. I'm constantly pestering my friends to join me for a night or two on the Mogollon Rim during hot Phoenix summers. Lounging in a hammock, staring up at the star-filled night sky above, the cool breeze carrying with it the relaxing scent of pine trees? Yes, please! I need that in my life.
But for me, camping is both a means and an end. It's not solely a weekend activity with friends, it's also the way I can afford my other travel adventures. And there are many other travel adventures to be had, after all.
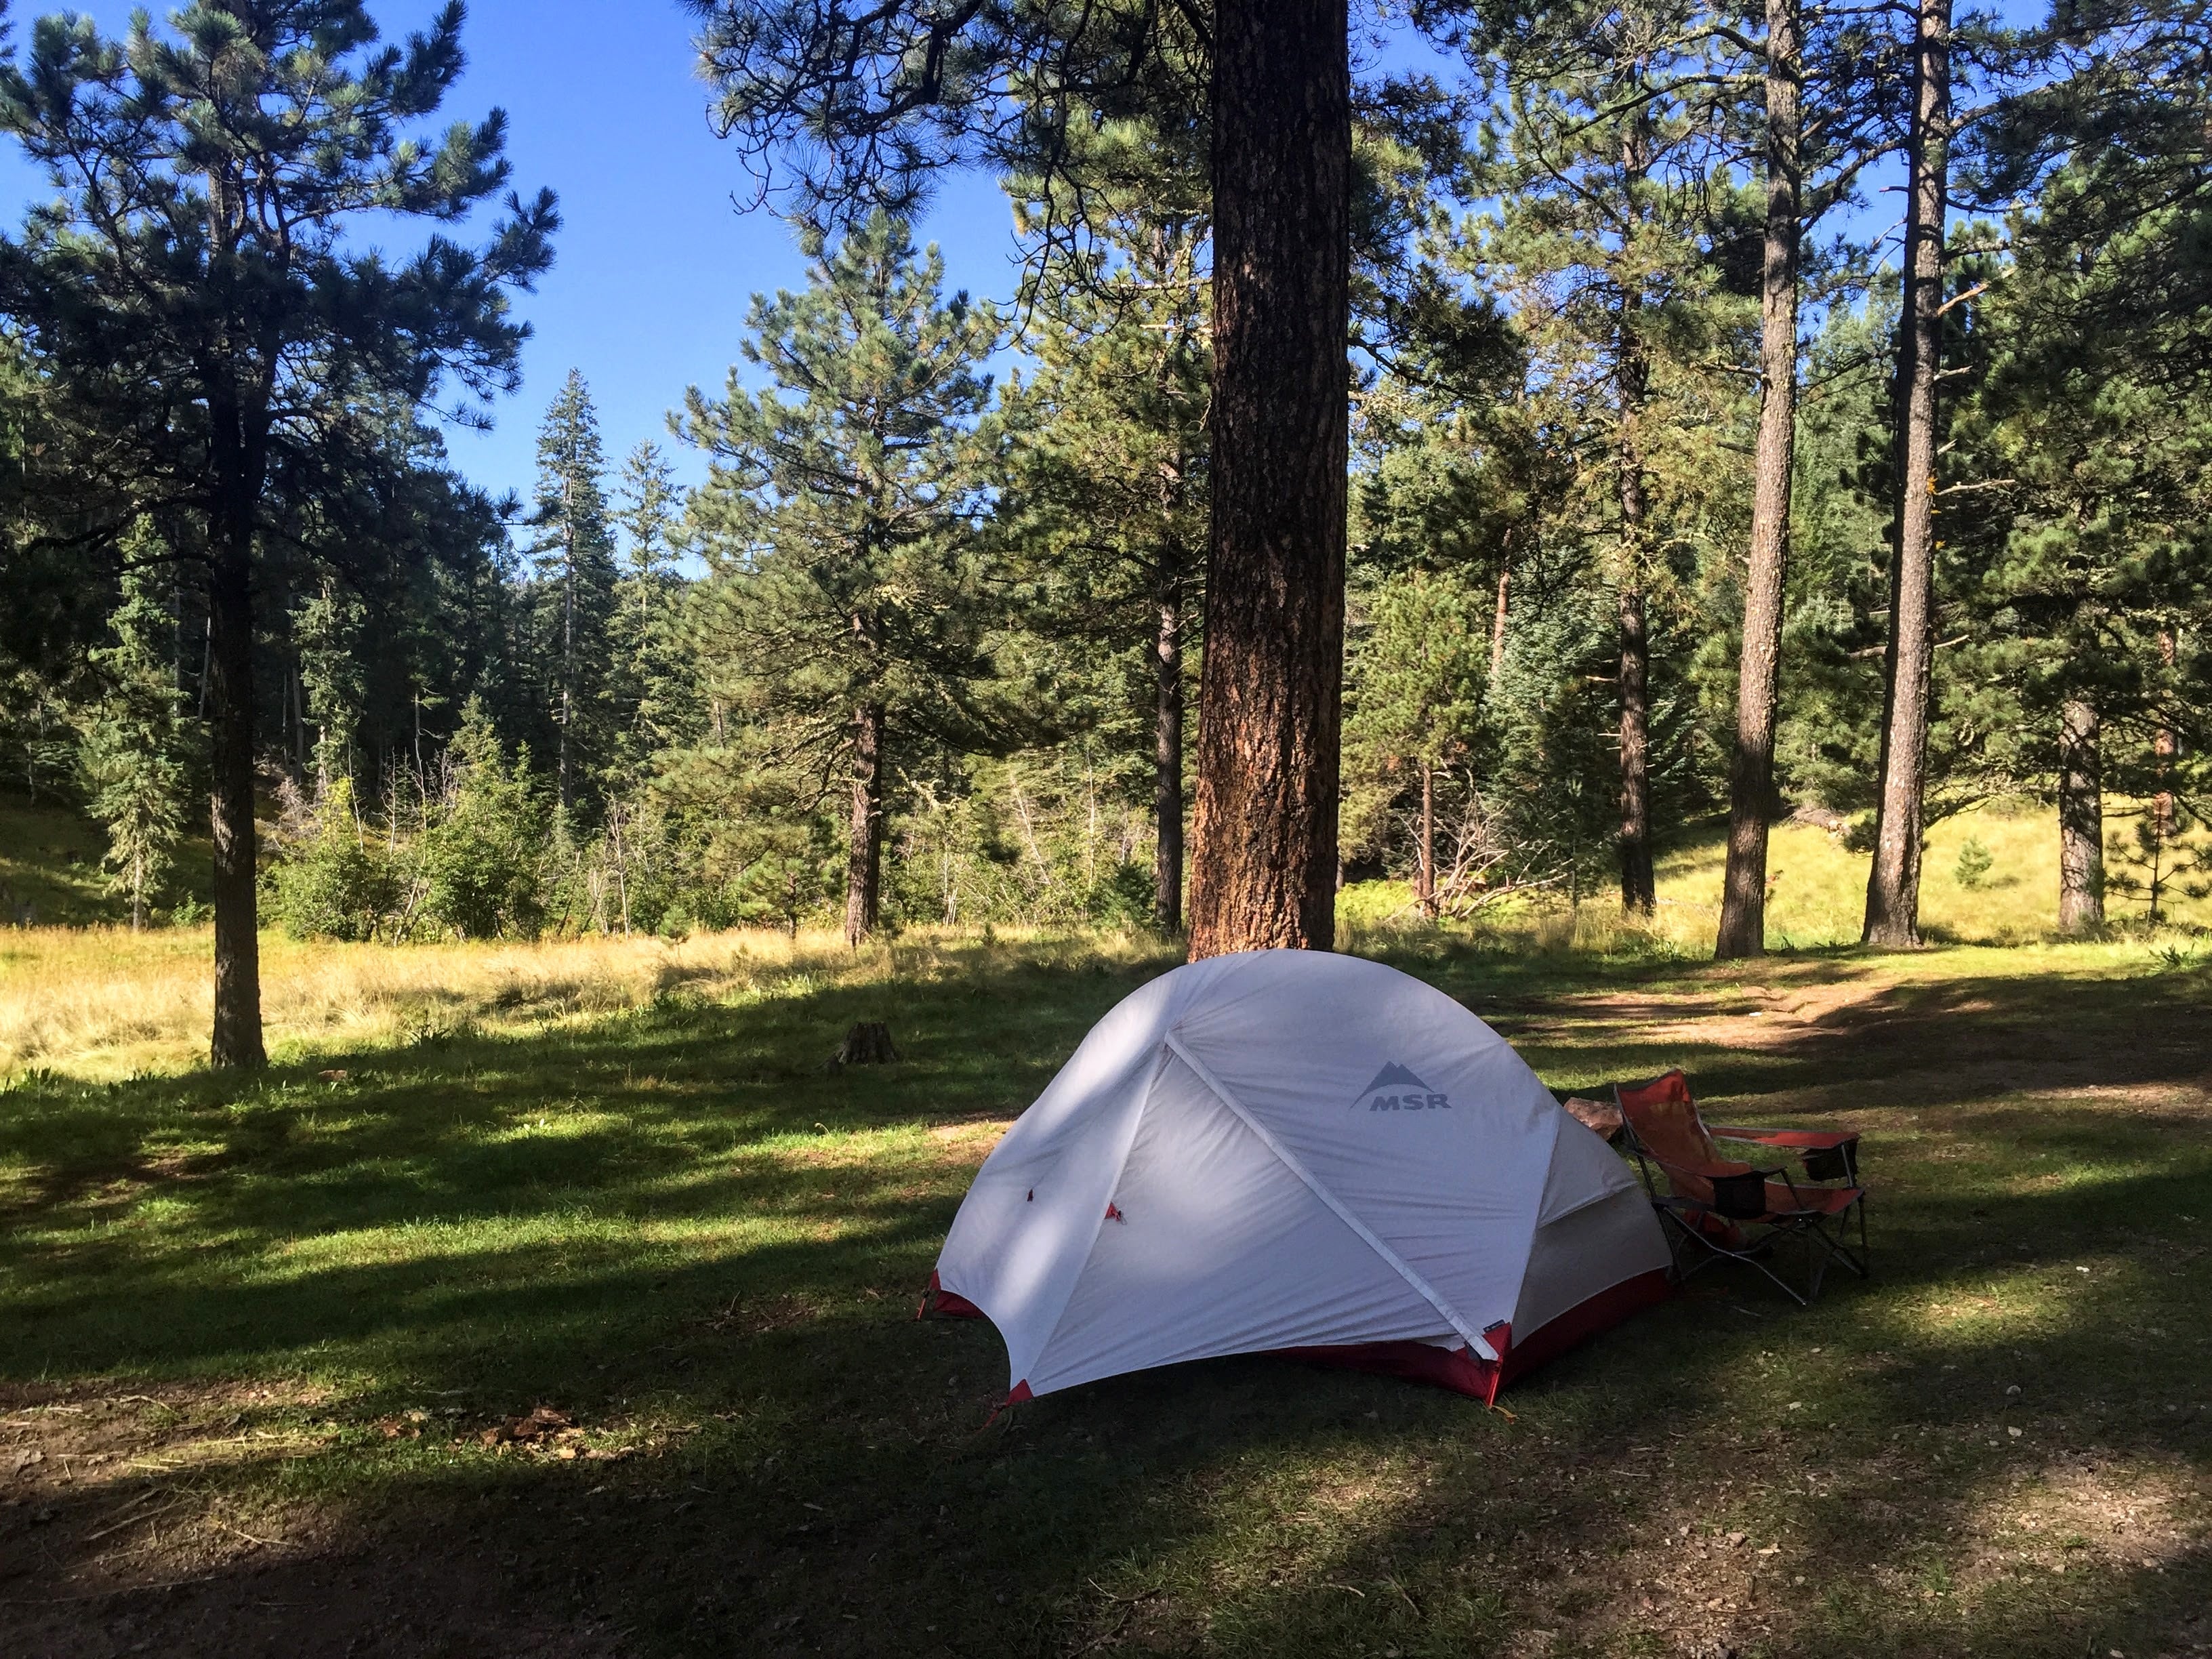
Camping is the single best strategy to save money while traveling here in the USA. Hotels are expensive, and they often entail additional hidden costs. Once you have some camping gear, the primary cost of camping is a far cheaper campground fee and maybe the occasional $5 propane canister. Or you can find a dispersed campsite on our public lands and save the campground fee altogether. For budget travel, camping is a great deal—even if it requires a bit more time and gas...and far less glamour.
If you can get comfortable with camping for traveling's sake, then you can unlock a whole new set of travel adventures. So when I've set my eyes on a new trip, and glanced into my wallet only to see moths fly out, I've quickly turned to "sleeping at a campsite," or what you might call travel camping.
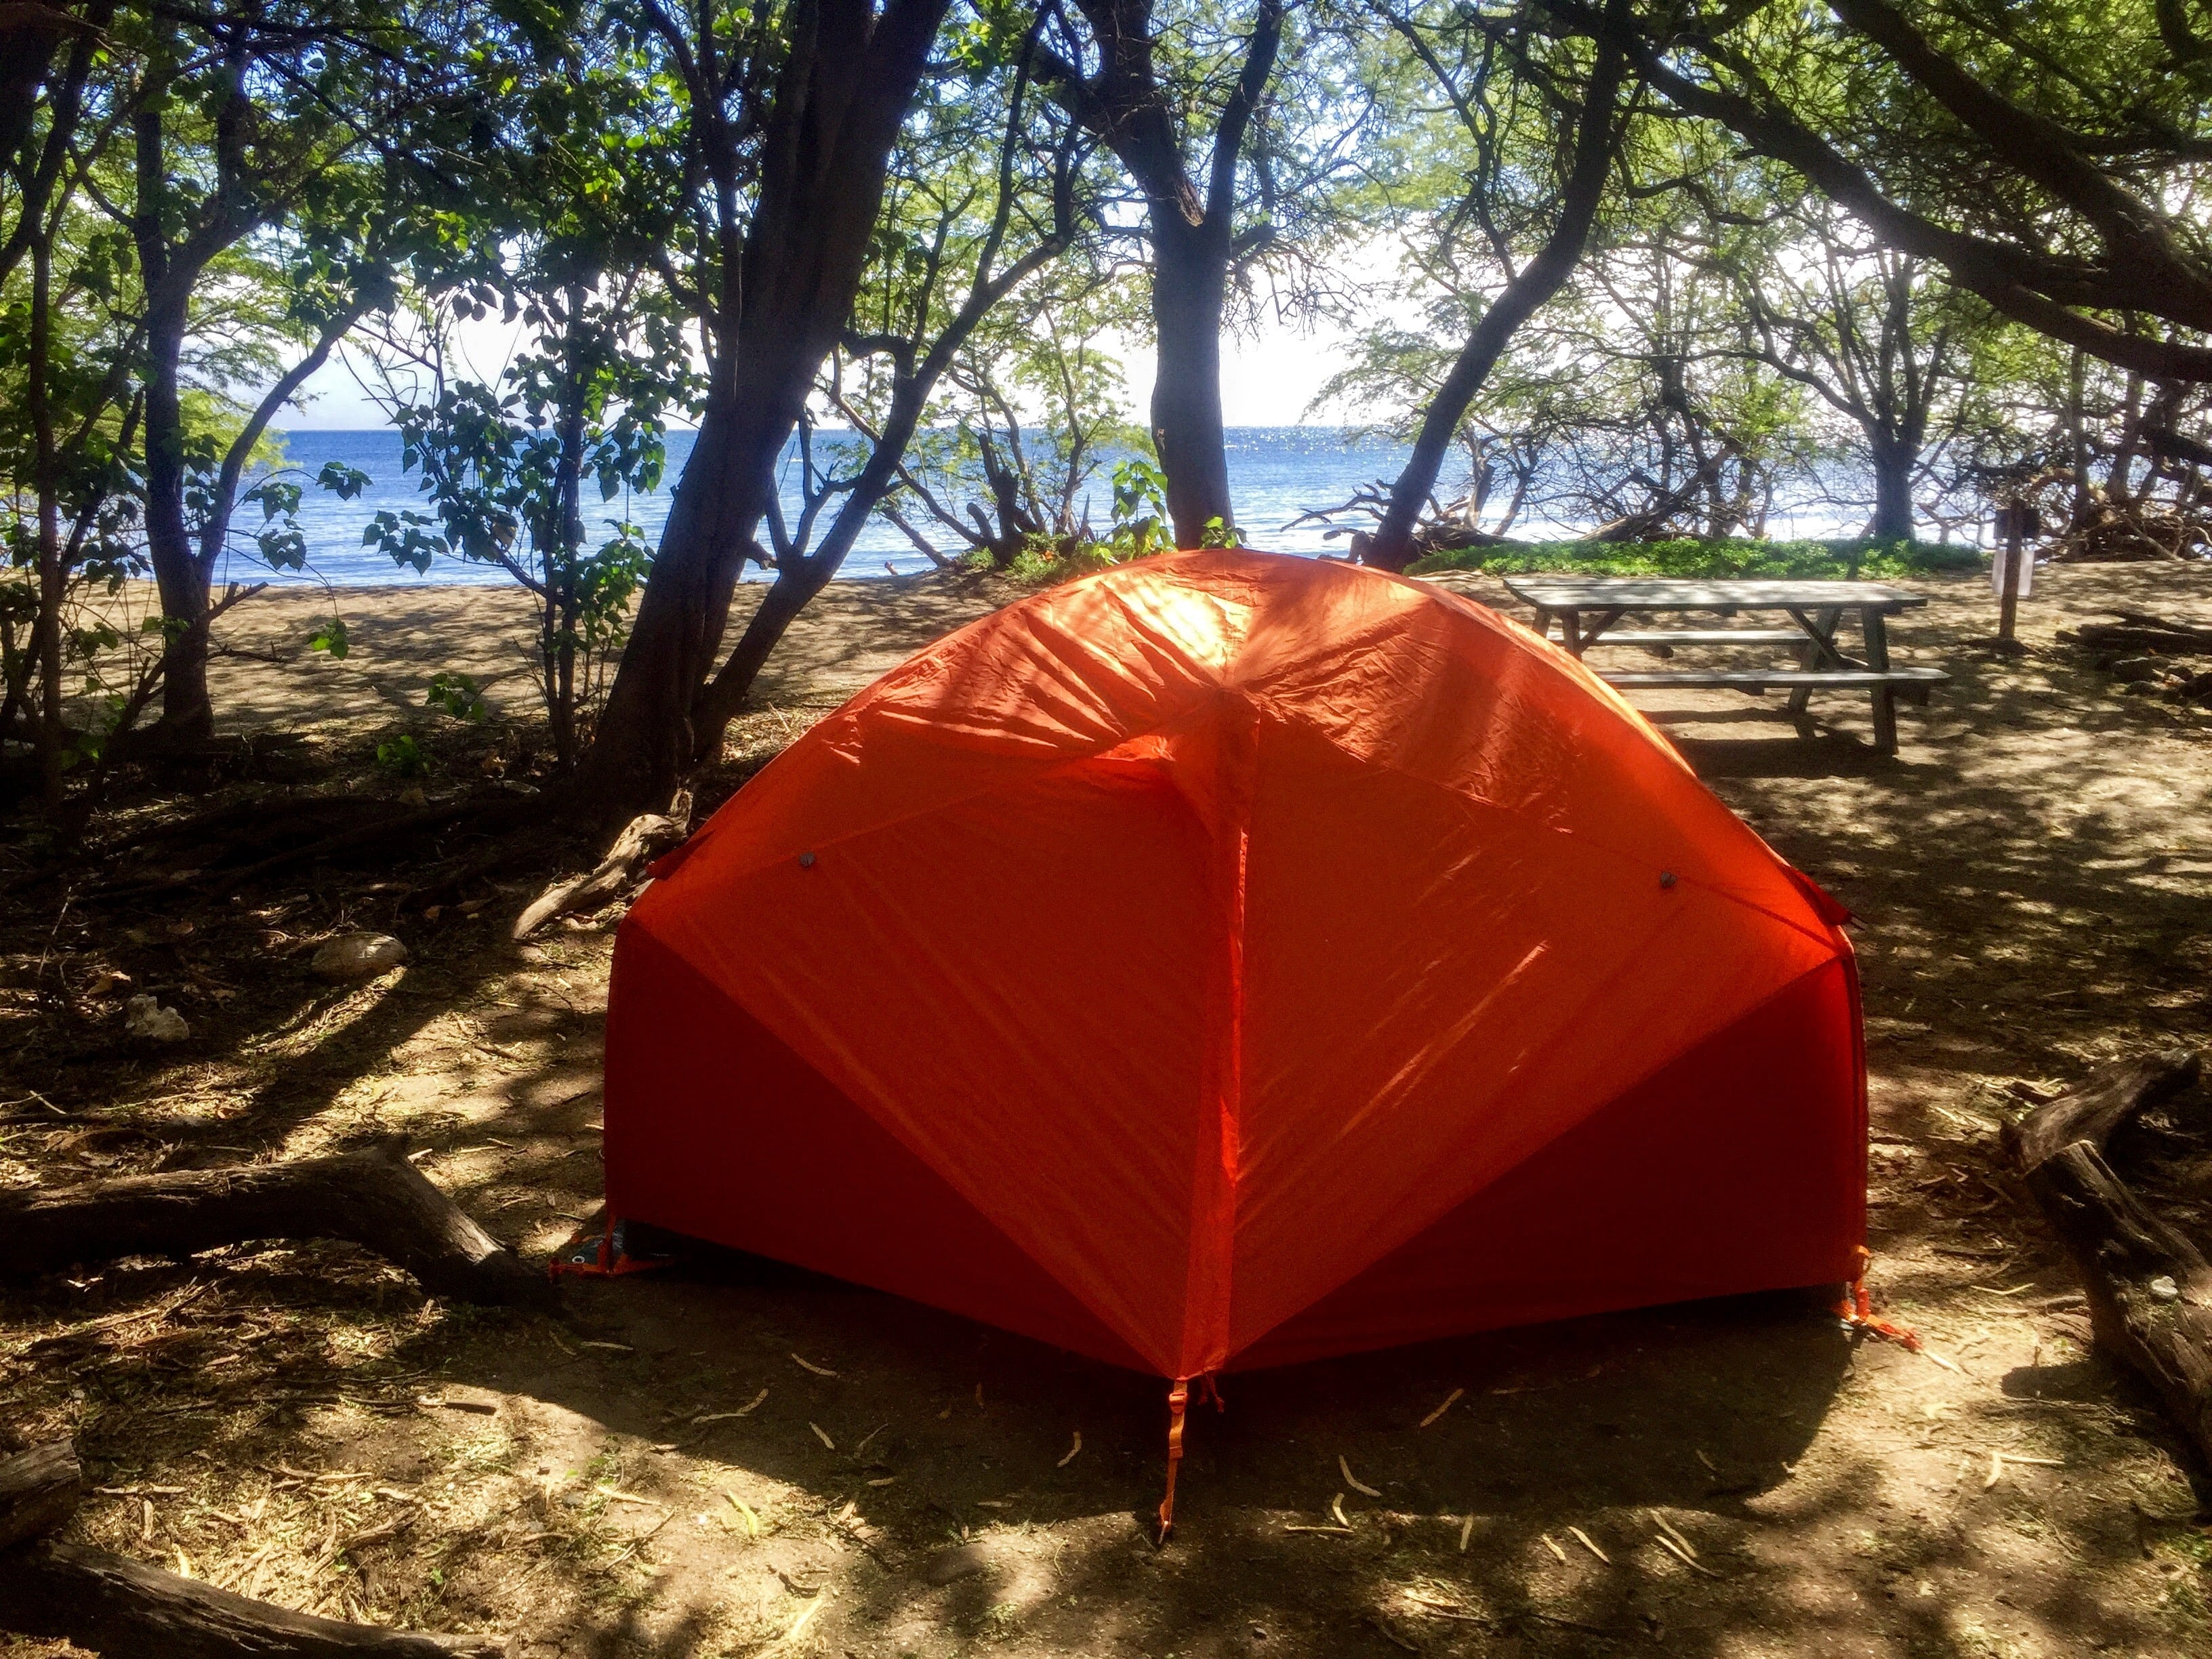
Want to travel to Maui, but can't afford the $300 hotel rooms? Maybe tenting it at that $20 campground that's 10 minutes outside of town isn't so bad—especially if doing so allows you to spend 9 days on the island instead of just 2.
Want to take that long road trip to visit a bucket list destination, but can't afford both gas and hotel rooms? Maybe a quick overnight stay at that state park along the way can help.
I'm not saying that you shouldn't stay in a hotel occasionally, or cash in some points for a room with your own private bathroom and complimentary little shampoo bottle. But adding the travel camping routine to your repertoire? Well, that gives you quite a few more options to play with. Suddenly, skipping that second hotel night stay to camp instead means that you can now afford that special boat tour, or maybe to extend the trip an extra day, or to indulge in a night of bar-hopping around the trendy downtown district. That flexibility can sometimes mean the difference between an experience you'll never forget, and a slightly more private place to take a shit.
If you follow my travels, you know that I spend a ton of nights each year sleeping in a tent. But the majority of those are actually travel camping nights—not nights I'm spending backpacking or "camping with friends" (though I'd certainly love far more of those last two). Most of the nights I camp aren't for the camping at all—it's simply a way to spend more of my time traveling, exploring, and adventuring. And that's why I do it. And why you should too.
My primary goal with this website is to help you Just Get Out More. Since travel camping is one of the key strategies to doing that, I'll be writing in much greater detail on how I go about doing it in the not-too-distant future.
How to make ice last longer in your cooler
Making ice last longer in a cooler requires a bit of pre-planning and following some best practices while you're on the road. Here's a simple guide for how to get the most out of your ice cooler.
The basic underlying principle
The basic concept behind making ice last as long as possible is this: limit the warmer things it comes into contact with. Basically, every tip below is intended to serve this one goal. For instance, the more warm outside air the ice comes into contact with, the faster the ice will melt trying to cool that air, and the sooner you'll be buying more ice. By focusing your attention to reducing the things that the ice needs to cool off, you'll make the ice last that much longer.
Preparing for a trip
Always pre-chill
This one is pretty easy and has the most immediate impact on your ice. Don't start with a warm cooler or with room temperature drinks or you'll immediately be starting from a deficit. It can take up to 2.5 pounds of ice just to cool two six packs kept at room temperature. Since I keep my coolers in the hot garage here in Phoenix, that means bringing the coolers inside the night before a trip and adding a small refreezable ice block to pre-chill the cooler itself. I also make sure all of the items that will be going into the coolers are properly cold too. That way, when I finally load everything in the morning, my ice won't be wasted cooling everything down to a cold starting temp.
Use separate coolers
For longer trips, always bring separate coolers for your food items and for your beverages (and any other items you more regularly need to access). By doing so, you'll ensure that the items that need to stay cool the most—the food items–aren't accessed as frequently and stay colder.
For example, on long weekend trips, I usually use a 70qt cooler for our main food items, supplemented by a 28qt cooler for drinks. The 28qt cooler goes in the backseat so that we can snag a soda refill while we're on the road, whereas the larger food cooler lives in the back of the vehicle. We also sometimes add a "stash" of additional beverages in the large cooler for replenishing later in the trip. Having a separate drink cooler is especially useful at camp, where you might have it closer to the action than your large food cooler. If you're planning on having some adult beverages by the campfire, it's especially useful to limit access to just this cooler alone.
If you're bringing food for what seems like a small army, you can also divide your food coolers into various days of the trip. That way, you're only opening the "Day 6/7 cooler" on days 6 and 7, which will help ensure that those items stay cold longer.
Keep it organized
It pays to stay organized when filling your coolers. That's because the more time you spend with the cooler lid open, searching for that bottle of mayo or that pack of hot dogs, is more time that you're replacing cold air with warmer outside air that the remaining ice will have to cool.
I suggest a few practice runs playing around with the layout of your cooler and the items you commonly bring on trips. Having a standard way of organizing the cooler means that you—and hopefully those you usually travel with—will always know where things are. If you want to be extra organized, you can even tape a layout map to the top of the cooler. You might get teased a bit by your campmates, but you'll have the last laugh when your ice survives the whole trip.
Give priority to perishables
Put the items that are the most perishable, like meats and dairy, closest to the ice. Items that need to stay cool the least, such as vegetables, go near the top. This seems like a no brainer, but I'm amazed at how many people fail to do this.
Use a lid barrier
I'm a big fan of using a lid barrier in a cooler. I use a cut-out of reflectix (a sort of aluminum-lined bubble wrap that is used as insulation) to cover the contents of every cooler I use—even the flimsy soft-sided ones. As the ice melts and I consume items from the cooler, the lid helps insulate the ice and food from the resulting warmer dead air above it. In fact, I also line the sides of my primary food cooler with reflectix, too, which seems to add quite a bit to its performance. It's a great deal in my book, as you'll recoup the cost of an entire roll in just a few trips. If you can't go the reflectix route, you can also trim something like a cheap foam camping pad or even the lid of a styrofoam cooler. Even a plain old towel is better than nothing.
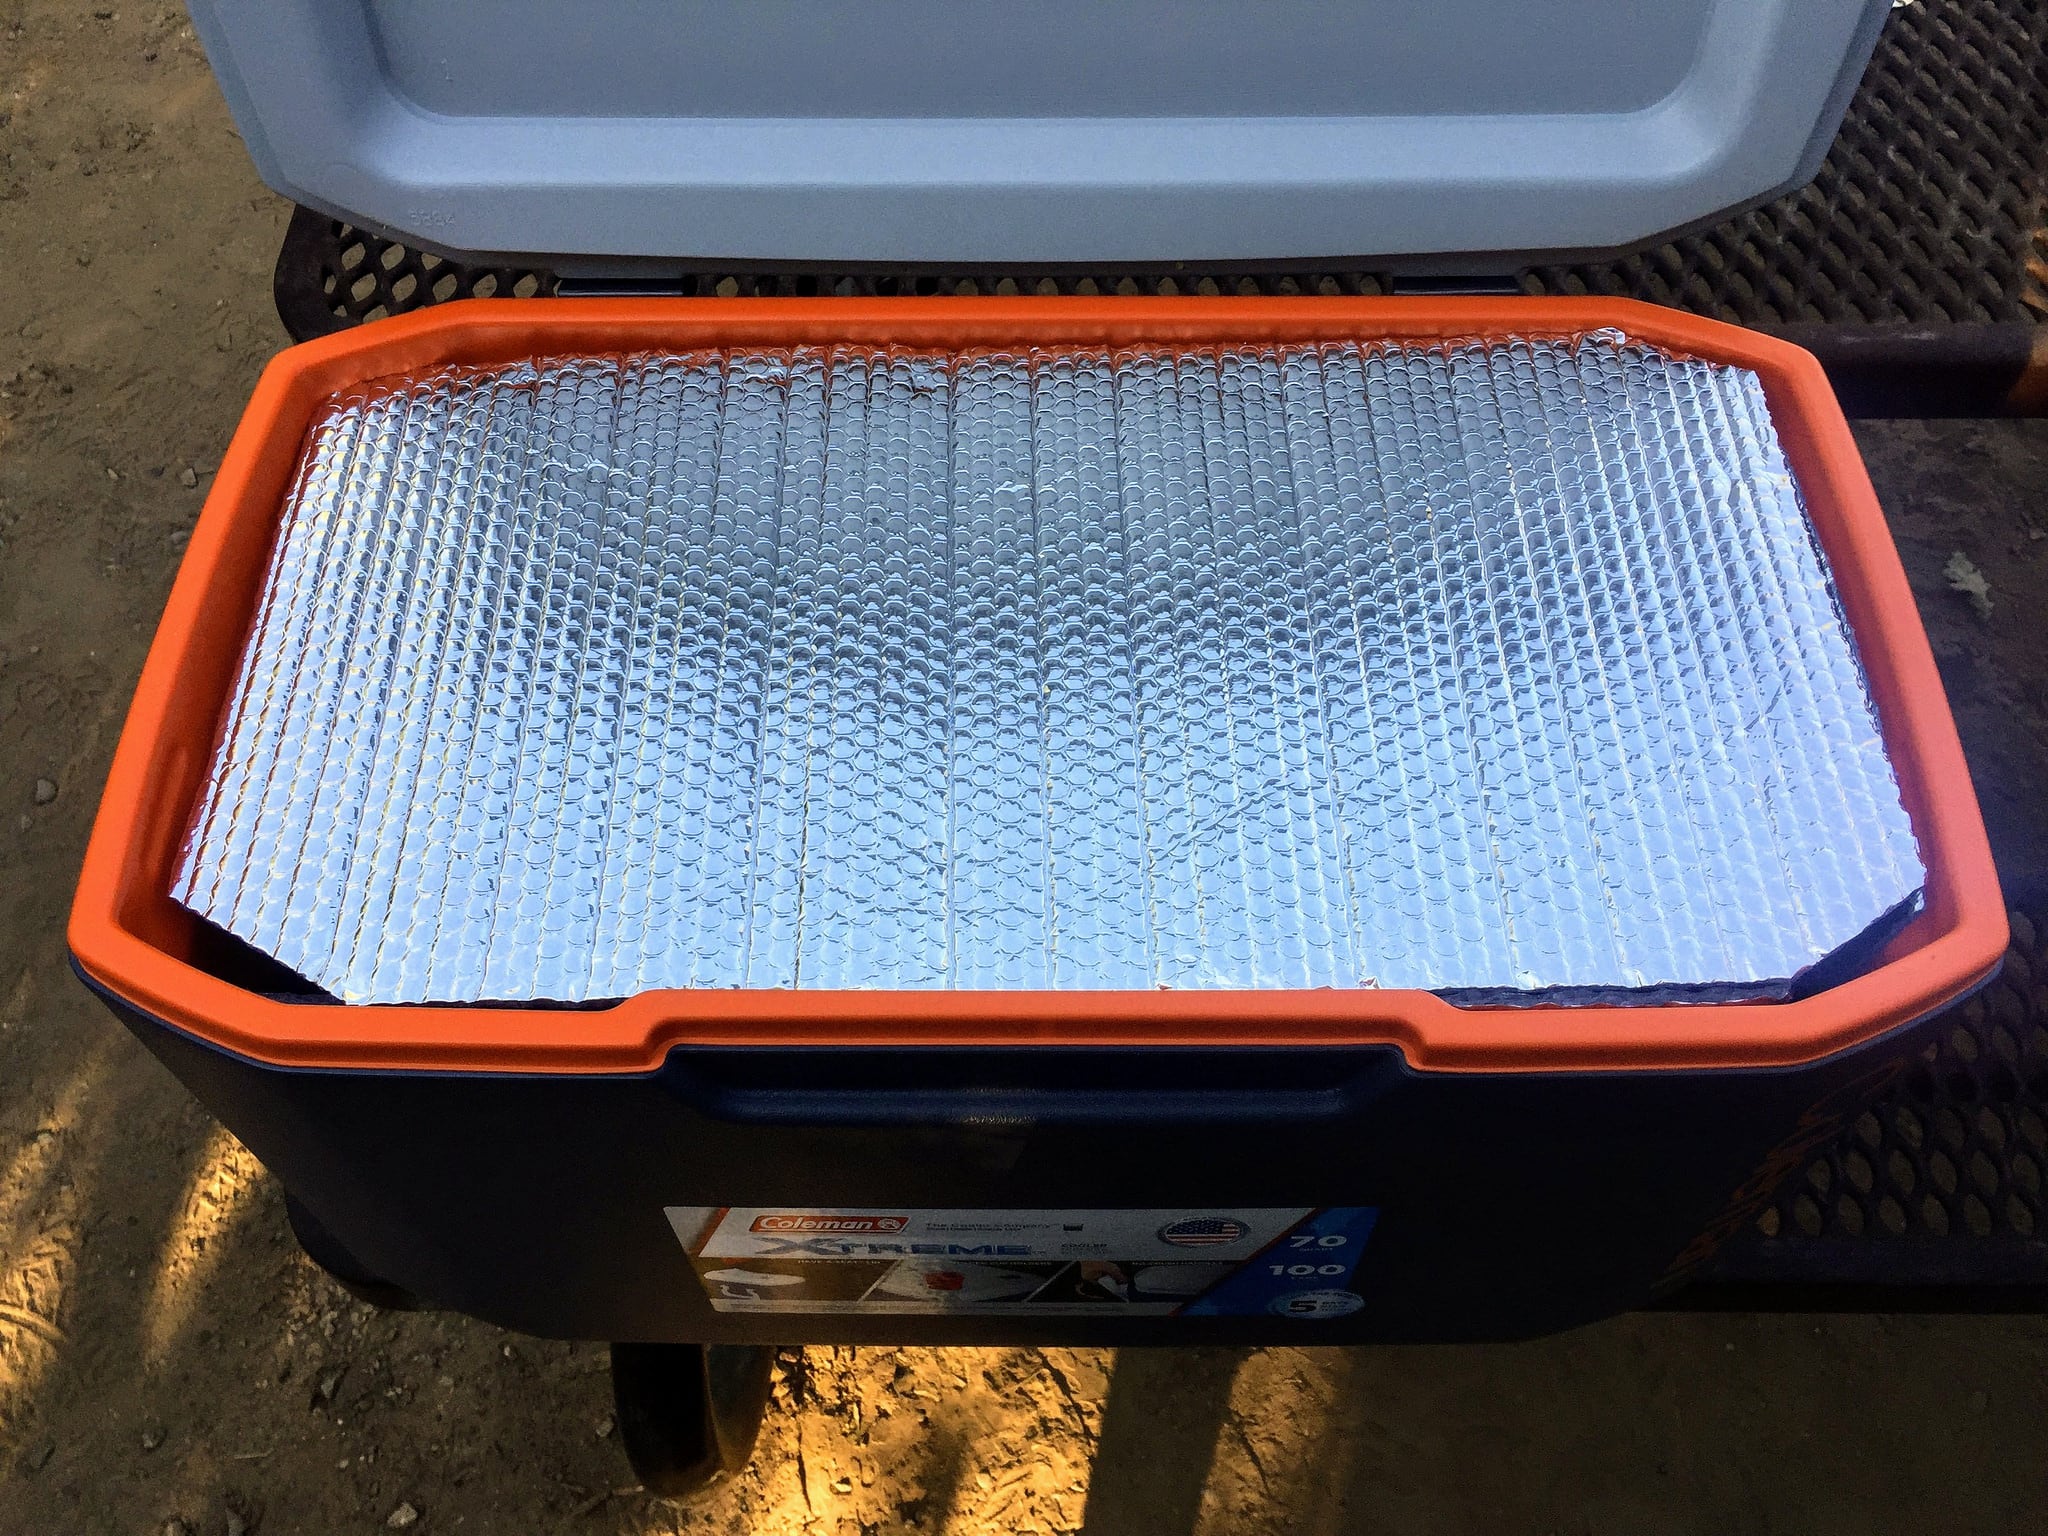
Adding the ice
Cooler manufacturers recommend about .75 pounds of ice per quart. That means roughly 50 pounds of ice for a 70qt cooler! By following the steps outlined in this guide, however, I routinely get away with about half that. For long weekend trips of 3-4 days, I typically use one 10lb block of ice in my food cooler, and then split a 20lb bag of cubed ice between my food and drink coolers. Occasionally, I'll split another 10lb bag between the two coolers late in the trip, especially if I've added more beverages or food.
Block ice vs cubed ice
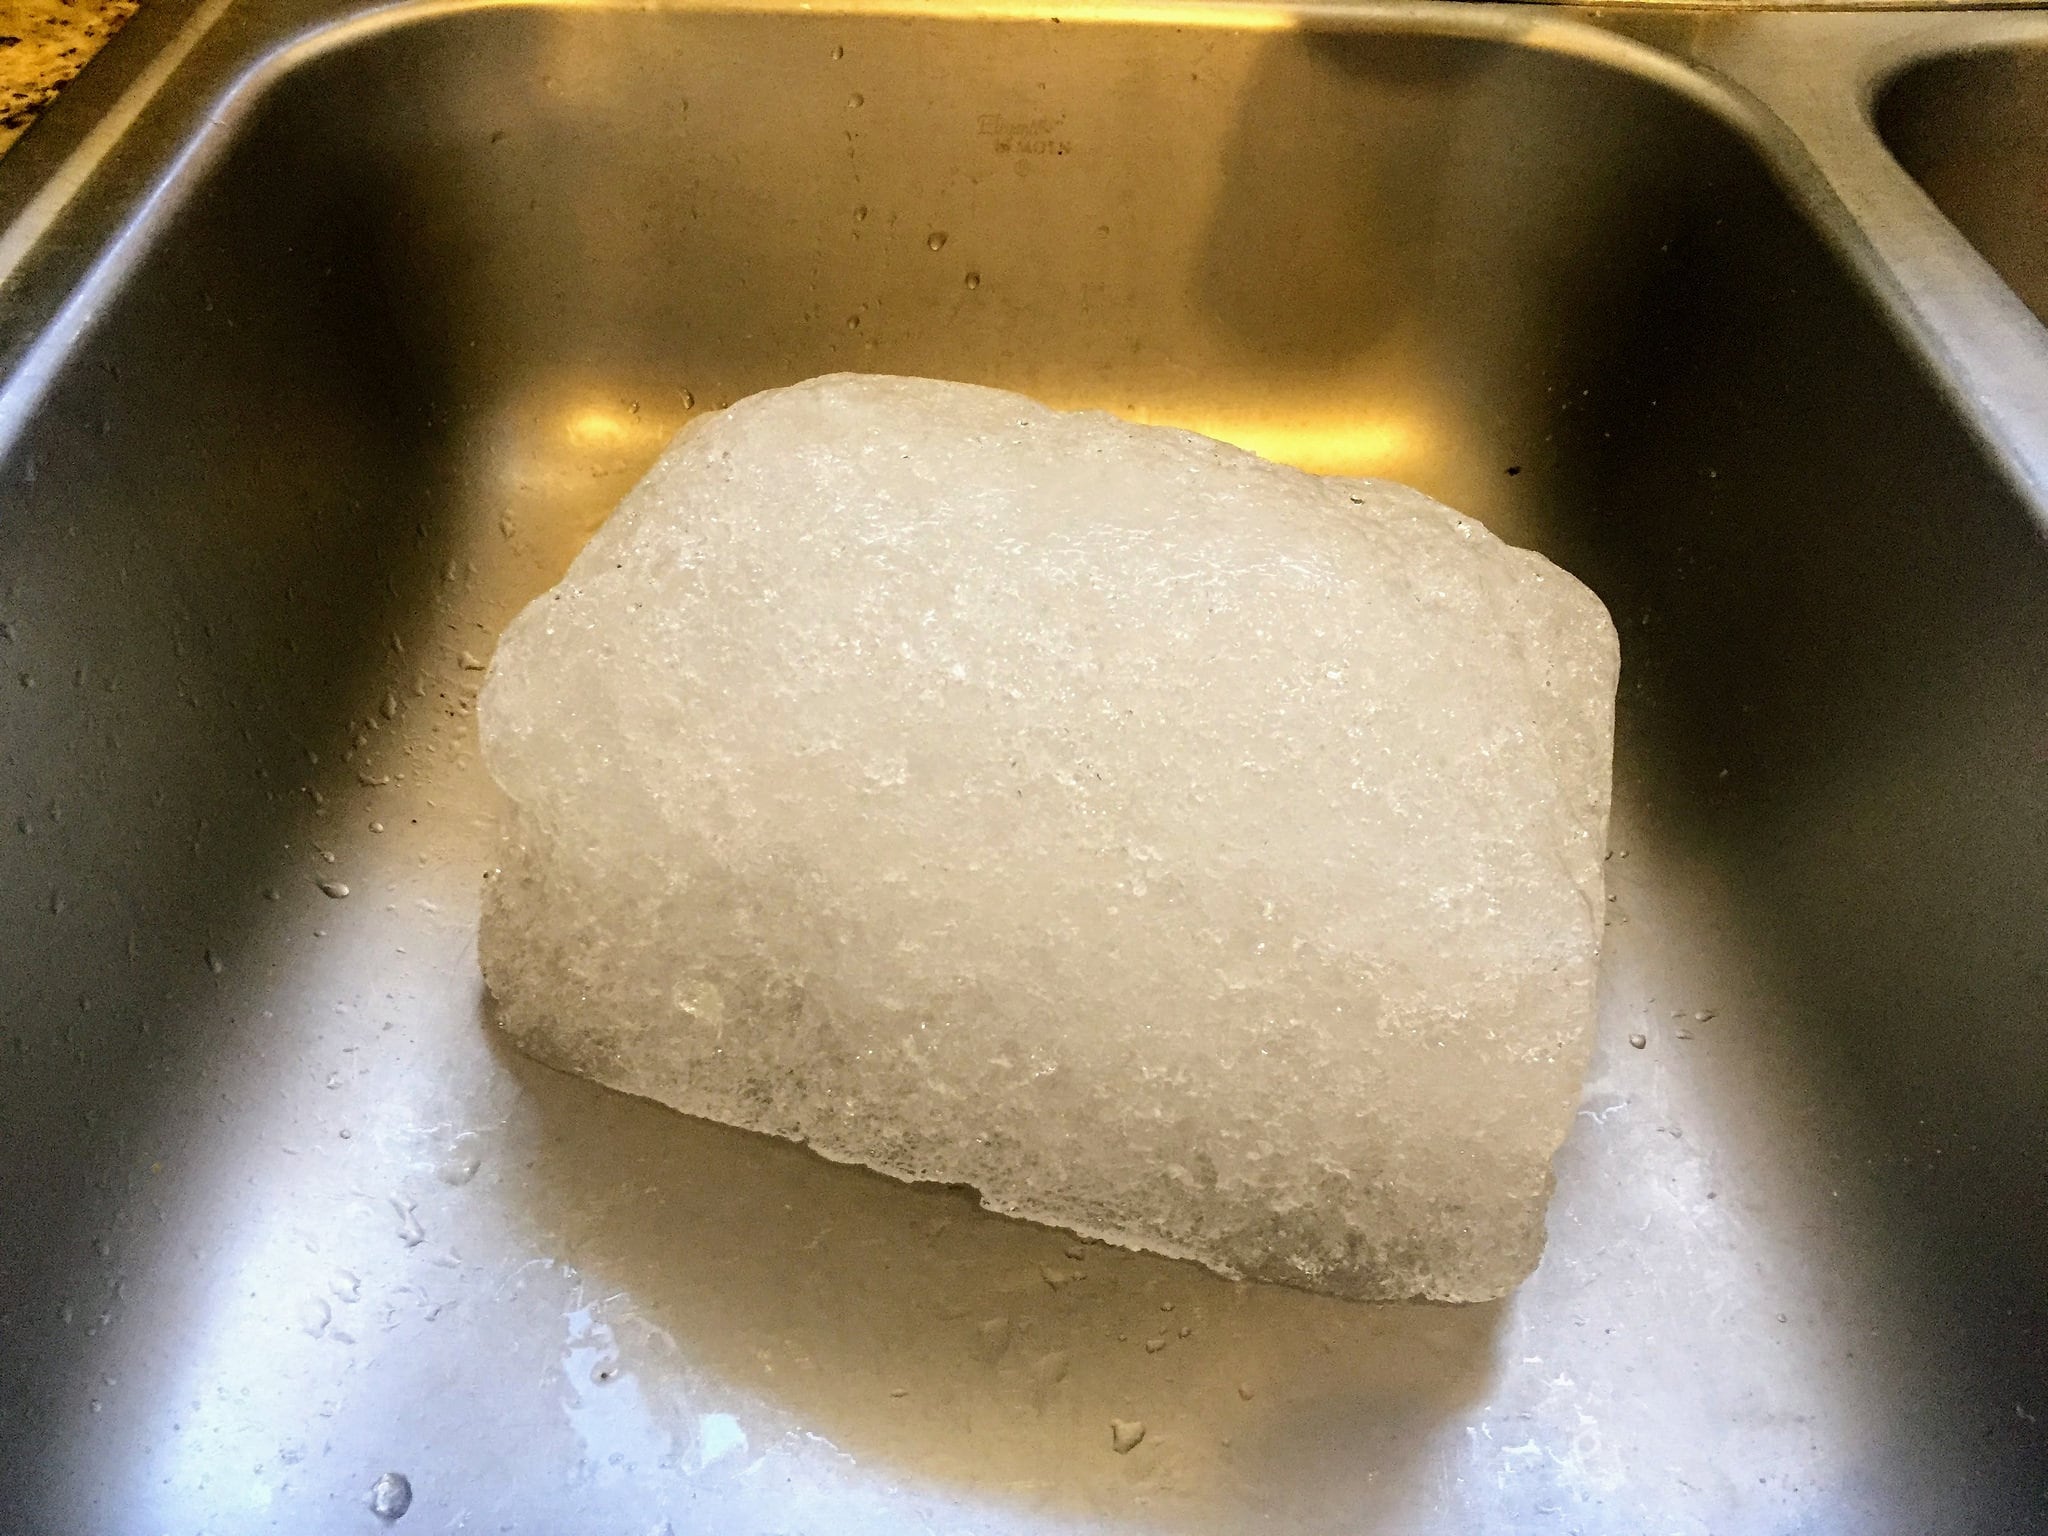
Don't fall for the "block ice vs cube ice" debate.
Get both.
Cubed ice is best for more effectively chilling items, while block ice will last much longer. For most uses, a combination of both works the best. Start with one or two blocks of ice, fill the remaining space with the items you want to keep cold, and then add the cubed ice at the end. The blocks form a central core of solid ice, while the cubed ice falls between the gaps. You get the best of both worlds.
Keeping your food dry
Ice melts, so be sure that everything that you want to keep dry is wrapped in a ziplock bag or waterproof container. Yet somehow, icy water seems to make its way into some of those bags and containers over time. As a result, I use a cheap $2 plastic bin inside the cooler that I load all of my food items in. The bin sits on top of the ice and also helps keep everything organized and accessible. It's easy to remove all of the food with one hand, or hold it up while I toss in some more ice.
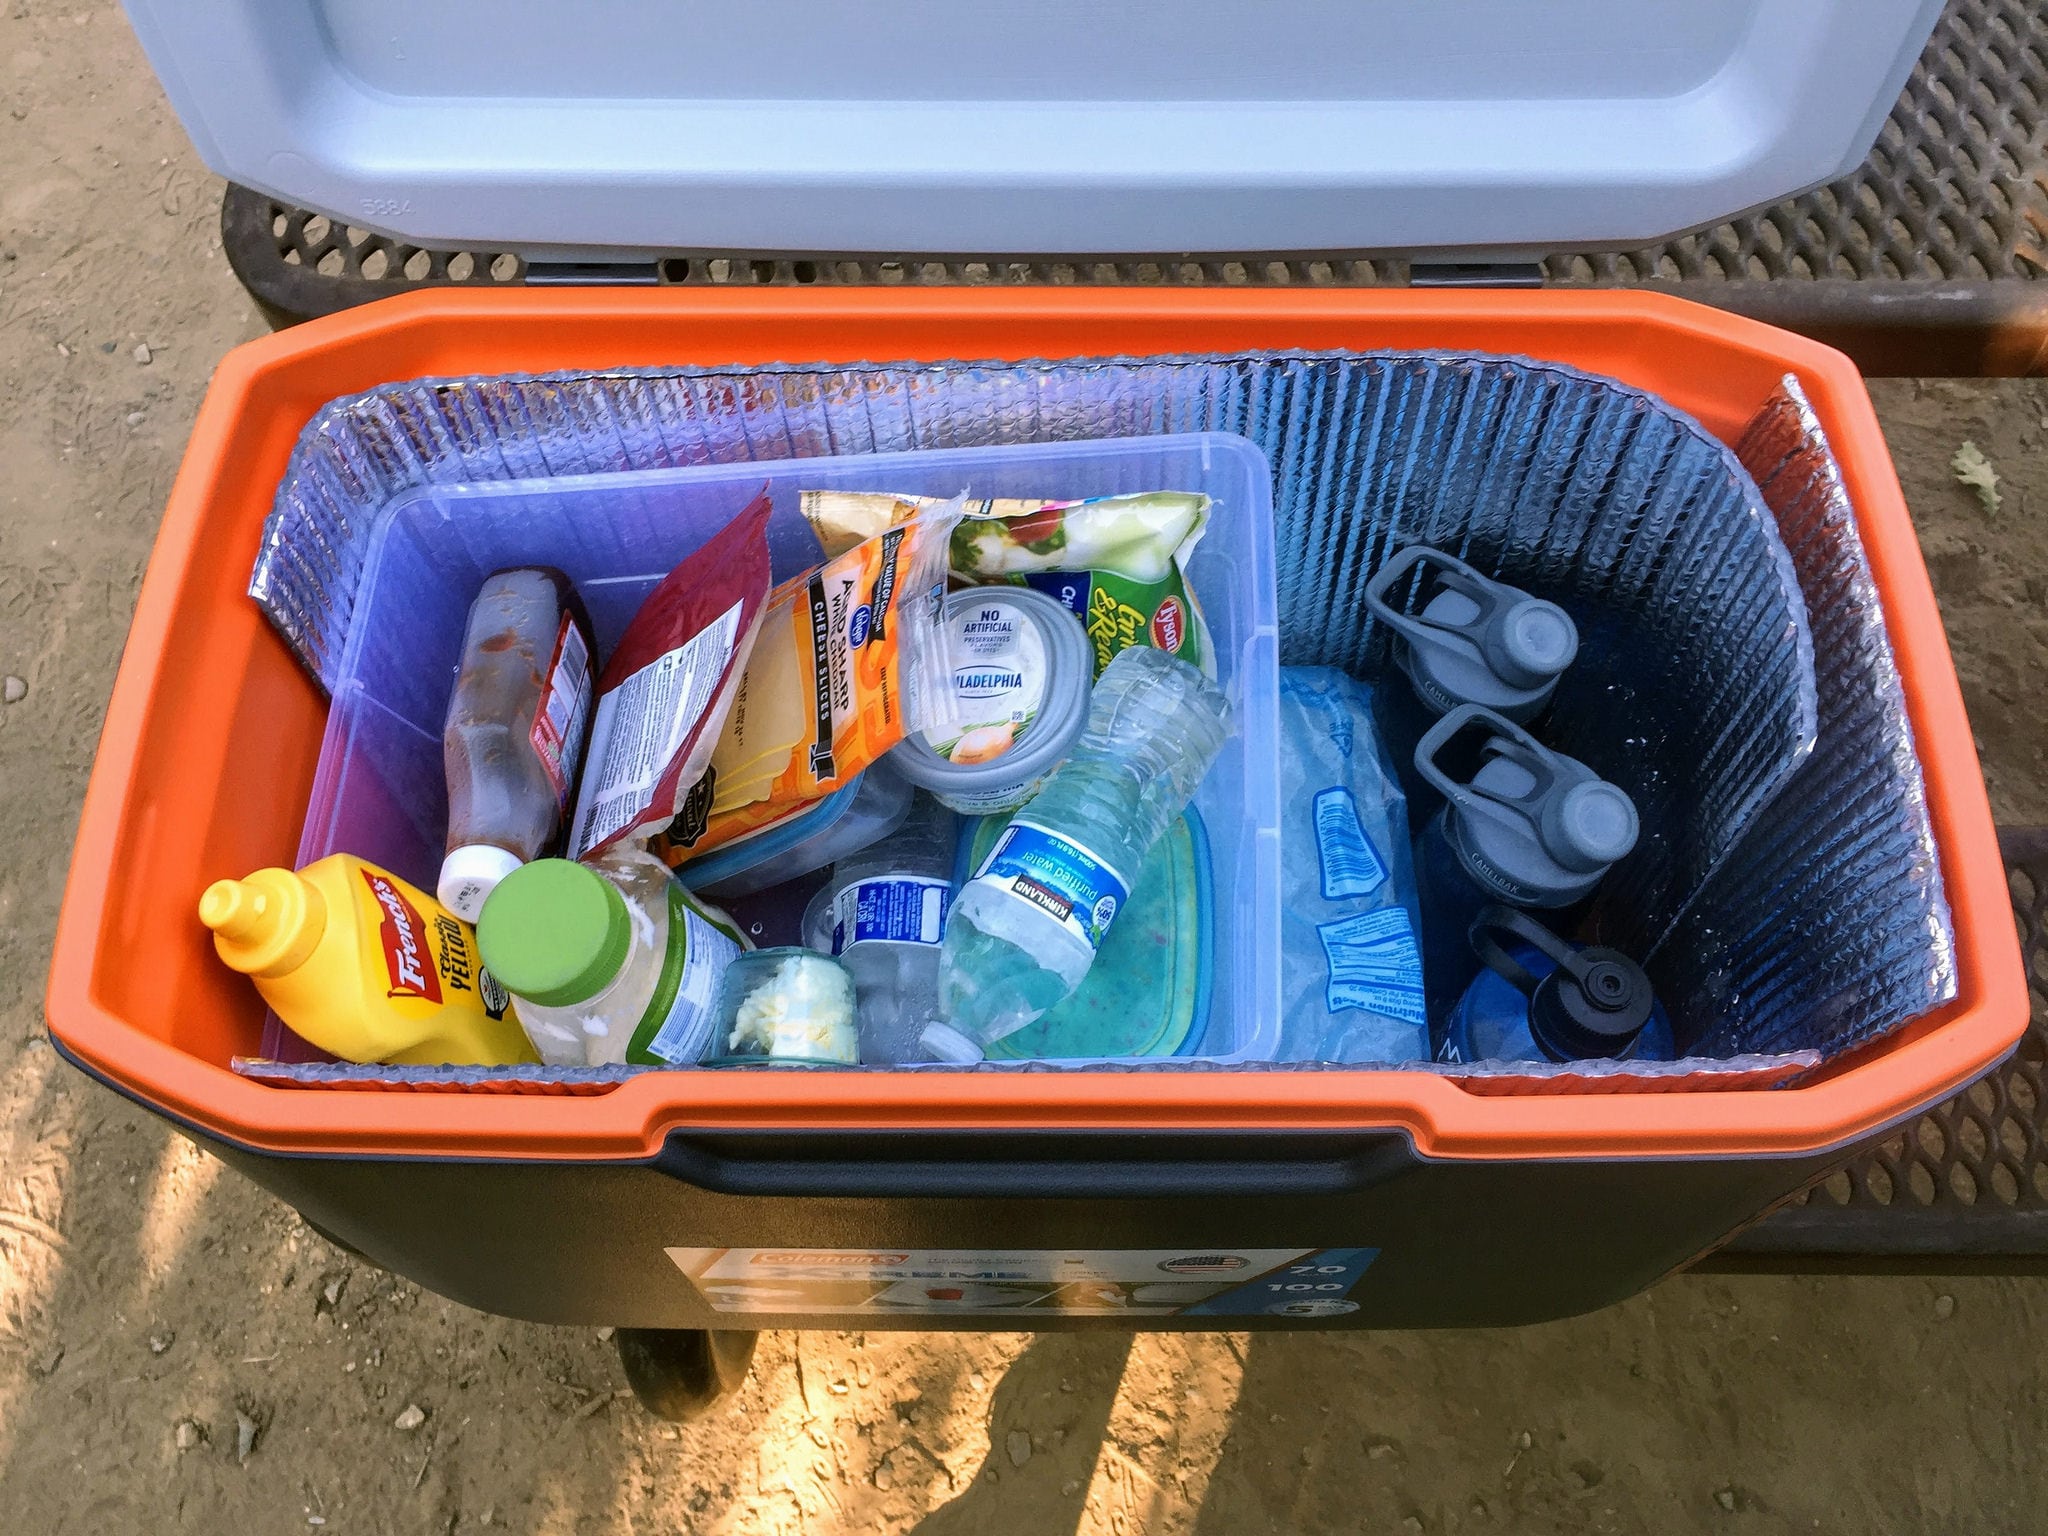
Use frozen water bottles
My favorite trick for helping to keep ice longer is to freeze several liter water bottles for use as additional ice blocks. I often toss these into the food bin mentioned above to ensure that things stay cold (you can see a couple in the photo above, too). Once these frozen bottles melt, they conveniently transform into cold water bottles. Sometimes, I'll do the same with more rugged nalgene-style water bottles. It's great to have icy cold water for that mid-trip hike.
I also freeze one or more larger 2-quart bottles I've filled with water. Because they're larger blocks of ice, they last longer and help supplement the ice I otherwise need to buy. The best part of this is that you can just toss these bottles back into the freezer after the trip and they're ready for next time. You'll occasionally need to replace these after they've been thawed and re-frozen several times. When I'm using a small cooler for a daytrip, I'll often skip buying any ice and just use these frozen bottles instead.
Fill it up & reduce dead air
A full cooler will stay colder longer than one with a lot of dead air. So first, make sure to choose an appropriately-sized cooler for your adventure. Then, be sure to fill it with enough ice for the trip. Still have space? Maybe it's time to add a few more frozen water bottles. If you still have extra space left in the cooler, consider filling it with a towel or other insulator, like foam pads or additional sheets of reflectix. The goal here is to leave as little space as possible for warmer outside air to settle inside the cooler when it's opened.
Use dry ice to keep things frozen
Dry ice will help keep your food cold—even frozen—for much longer than normal ice, but it requires some special planning and safe handling. For instance, you'll need to wear gloves to handle it, and it must be wrapped in paper, not plastic. Because it's the solid form of carbon dioxide, it doesn't melt into water the way ice does. It's not sold at just any ol' gas station like regular ice, so you'll need to do a bit of research first, too.
If you use dry ice, you'll need to give some special considerations to how you'll organize your cooler. Most importantly, it can cause damage if it comes into contact with the sides of your cooler. There are a few ways to deal with this, but the easiest seems to be buying a styrofoam cooler and cutting it down to create a sort of "tray with sides" that the dry ice can sit on. Beyond that, you'll also want to keep in mind that because it's so cold, anything touching it will freeze. That makes it great for keeping frozen things frozen, but it can also wreak havoc on items that you don't want to freeze.
One technique for using dry ice involves using it in a dedicated cooler to refreeze some reusable "blue ice" packs. Basically, you use blue ice blocks in your normal cooler, with a spare set lined around a dry ice block in another cooler. When the blue ice blocks in your normal cooler warm up, you simply swap them out with the ones in the dry cooler. Depending on your situation, you'll likely have to do this swapping several times during a trip.
While you're on the road
Keep sun and heat off the cooler
Always keep your cooler covered from the sun, whether it's in your vehicle or at the campground. The hot sun can make cooler ice melt twice as fast as one in the shade. I always cover my food cooler with a blanket or pillow and my drink cooler with a fleece or down jacket. You could also make a cover using reflectix, but I recommend putting something over it to reduce the insane sun glare you'd get. Having system like will ensure that your coolers remain protected from the harsh rays of the sun. It's also important not to leave your cooler on hot asphalt or other warm surfaces, like metal picnic tables that have been in the sun all day long. Again, a piece of reflectix might be a perfect solution for reducing the heat transfer when the cooler is on a hot surface.
Similarly, it's best to keep the cooler inside the air conditioned vehicle as you're driving, rather than on a roof or hitch carrier. If it's appropriate, don't keep your cooler in a parked vehicle that's baking in the sun. As any desert dweller can personally attest, vehicle cabins can get extremely hot just sitting in the sun. Keep in mind that if bears or other food-snatching animals are present in the area, you may not have a choice but to store your food in a hot car or a metal bear box in the sun. In that case, do your best to keep it as cool as possible; I sometimes employ towels or my sleeping bag to help insulate.
Keep the lid shut
Don't leave the lid open longer than necessary. Consider what you're getting from the cooler before you open it. This is pretty simple advice that goes a long way towards extending the life of your ice. Keep it shut.
Put food back quickly
It's easy to grab all of the food items you'll need for a meal and let them sit out while you cook, prepare, and eat. However, your ice will have to work less hard to cool foods that are still cool and haven't warmed up to ambient air temperature. So when you have what you need for your meal, return the remaining items to the cooler promptly.
Don't drain cold water
Just because your cooler touted a water drain on its label doesn't mean you need to use it. Recently melted ice is still helping to keep your food cold, so you don't need to drain your cooler just because you hear some sloshing. Melted ice water preserves frozen ice better than empty air space. The only time you need to drain water from your cooler is when you've purchased more ice and you need the physical space in the cooler.
Adding more ice
If you've followed these strategies, you won't need to add more ice nearly as often as you otherwise would. That said, I often adhere to the "better safe than sorry" philosophy when it comes to food items, so I might add an additional 10lb bag of ice while gassing up my vehicle during a road trip. There are many factors that come into play here, so it's hard to provide a useful recommendation for when you should consider adding more ice. If you're in doubt, you might as well spend the extra $2-3 bucks and buy an extra bag.
When you're at the store buying ice, try to grab ice from the back of the cooler where the refrigeration unit is usually located. While all of the ice in the cooler is below 32° F, the ice in the back is usually several degrees colder, as it doesn't come into regular contact with the warmer outside air when the door is opened. You might get an annoyed look from the convenience store clerk who faced all the ice to the front, but they aren't the ones paying for the ice so grab the coldest one you can find.
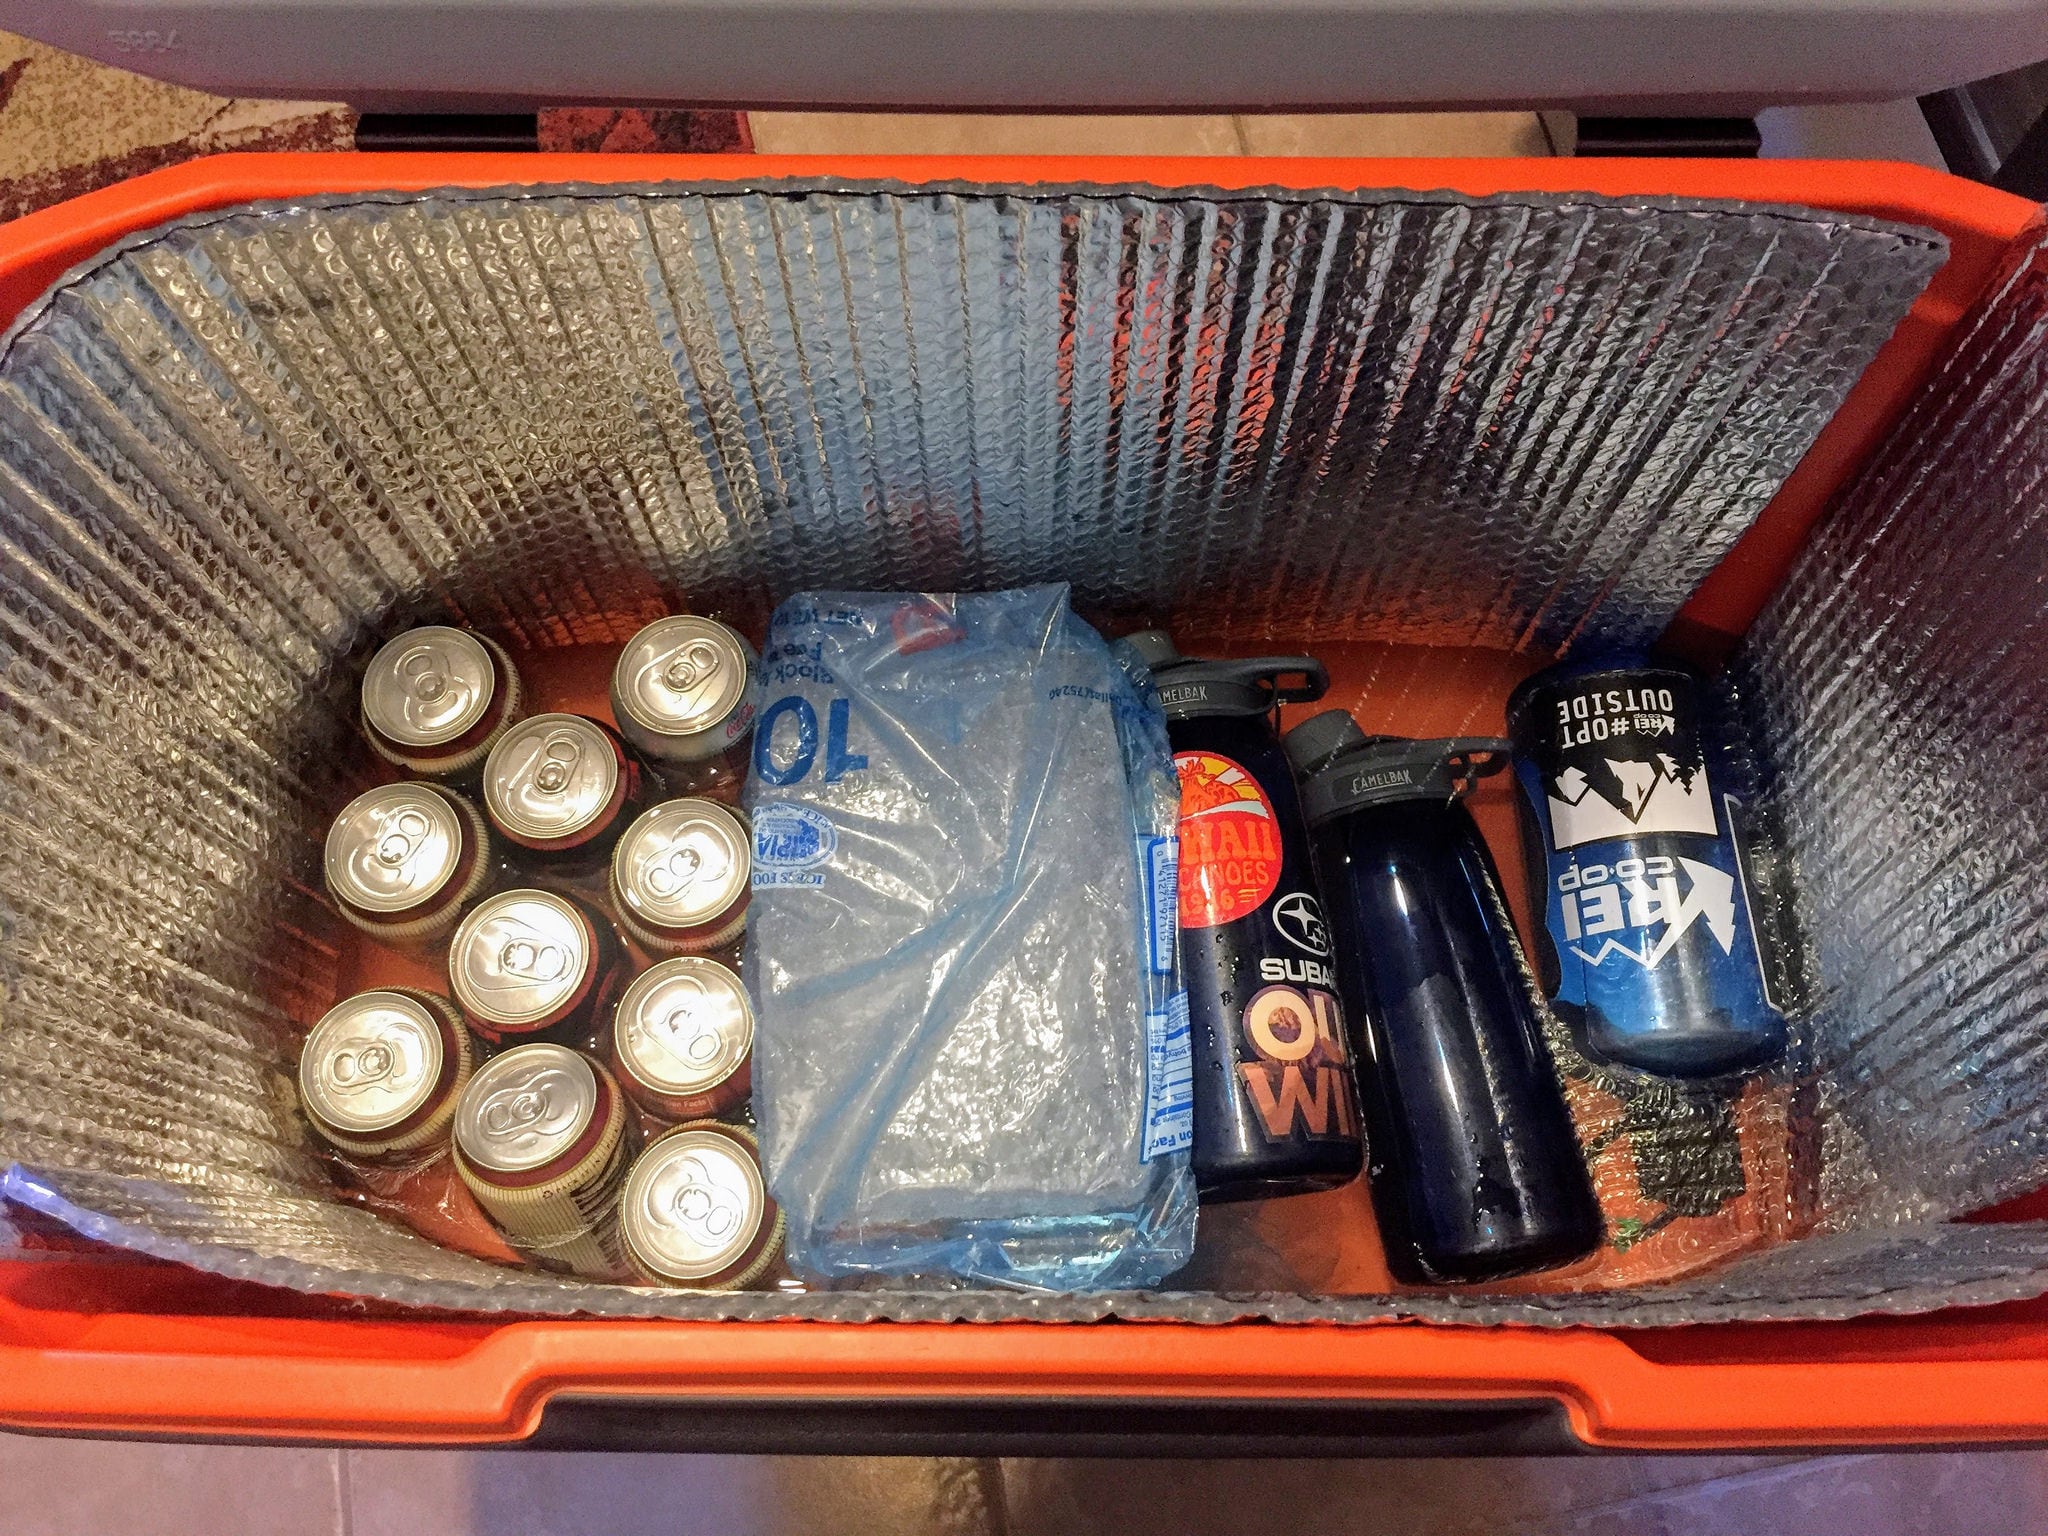
Use a smart thermometer
If you constantly find yourself wondering if the food in the cooler is, indeed, still cold enough, then it's time to invest in a thermometer. There are several inexpensive models (like this one) that will not just tell you the current temperature in your cooler, but will keep track of both the high and low temp readings. Keep it in your food bin in the cooler and you'll be able to keep close track of how your food is doing. Press a simple reset button to clear the recorded values as you place it back in and close the cooler lid.
Which cooler to buy
There are quite a few outdoor blogs with reviews and comparison demos of various cooler models out there if you're interested. But keep the following points in mind as you read through them and consider what to buy.
Maybe you don't need that Yeti...
For all of the swooning over high-end premium coolers like Yeti, I'm skeptical that there is a large market of people who actually need the added performance that they provide. I'm not picking on Yeti specifically here; to be fair, that's usually true of any high-end piece of outdoor gear. The top-of-the-line stuff performs marginally better, but almost always at many times the cost.
Does it make sense to spend an additional $350 to get that extra 10-15% of performance? Maybe it does if you're off on a two-week wilderness rafting trip. But for someone like me, who uses mine almost exclusively during weekend camping trips, or during occasional long road trips where I'm passing countless gas stations and grocery stores? Nah. I'd rather use that money for more travel, personally.
But skip the low end stuff, too
But that doesn't mean that you should just grab the cheapest cooler you can find. If you spend any significant time using a cooler, I'd recommend getting a good one. You just don't need to get the very best one you can find. Think about what features are actually going to be useful for you, and what sizes are most appropriate. Do you need a certified bear-proof cooler when you always keep your cooler in the car at night anyway? Take some measurements and be sure that the cooler will fit where you need it to in your vehicle. Things like that may end up mattering far more than whether it can keep ice for 5 days versus 6, especially if you're usually only out for the weekend.
The coolers I use
I recently upgraded my main food cooler from this Igloo MaxCold 70qt rolling cooler to this lovely Coleman Xtreme 70qt cooler. I'm pretty damn happy with the change, even though both claim to keep ice for 5 days and have identical capacities. Why?
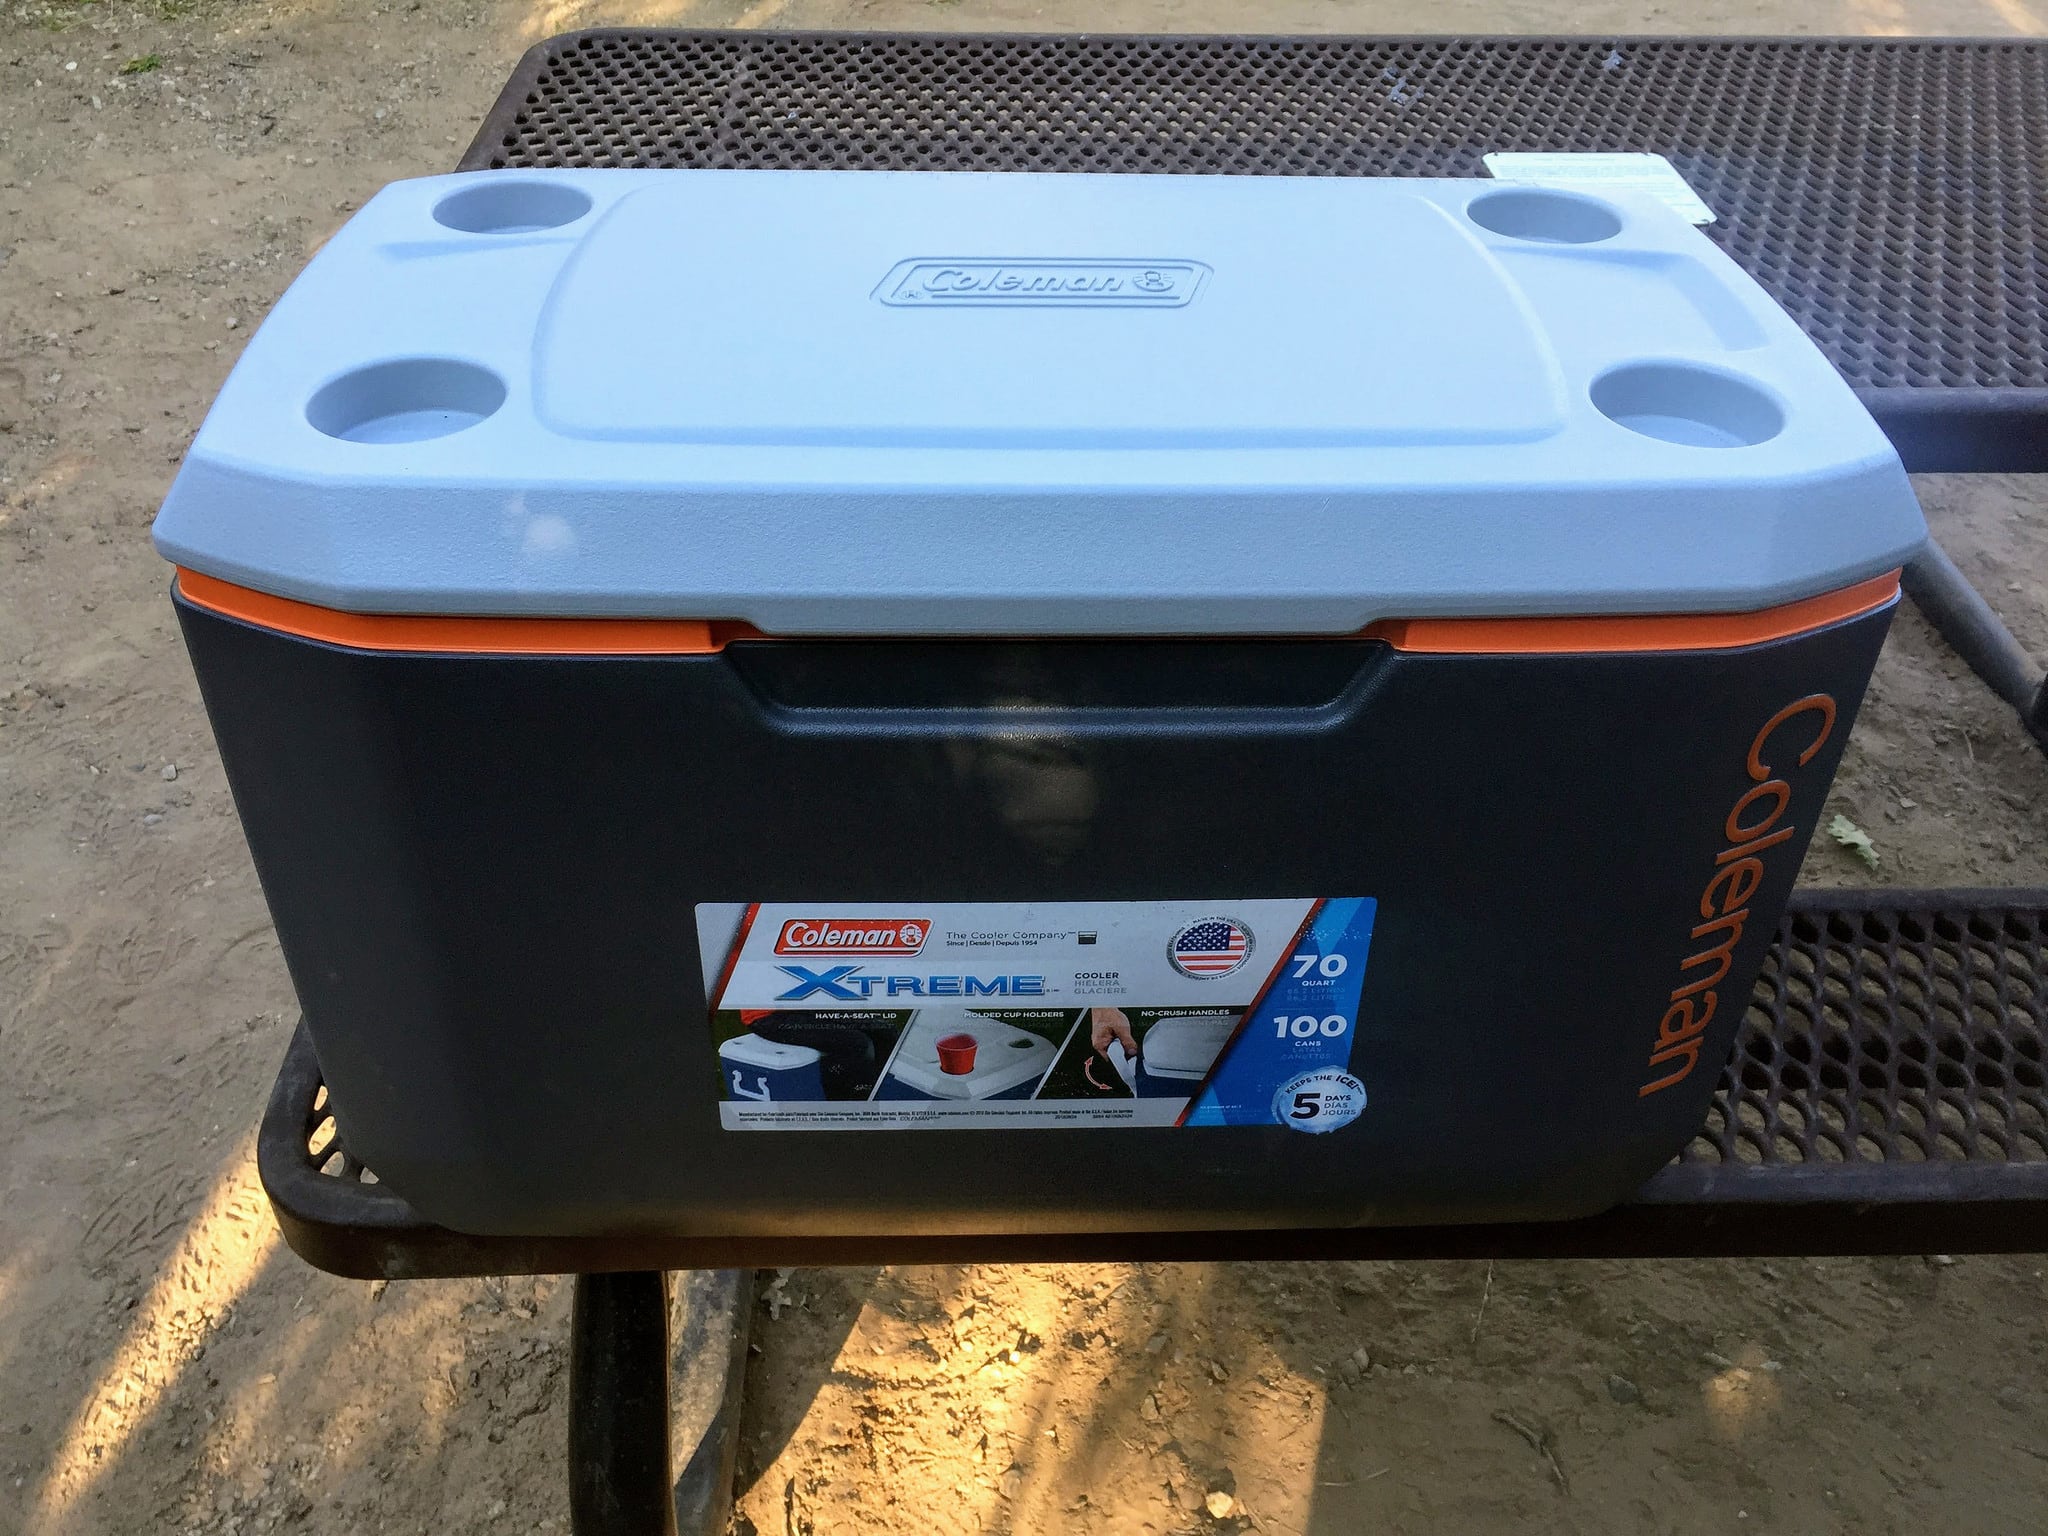
Well, the awkward cube-shape of the Igloo made it difficult to fit into my Subaru Outback without partially obscuring the view out the rear window. Also because of its height, I couldn't open the lid enough to grab anything while it was in the vehicle. I never used the wheels, since I rarely camp anywhere with paved campsite walkways. I also hated that its lid was easily removable, as it would routinely topple off when I didn't want it to. Most importantly, it didn't work well for how I like to lay out my cooler—it was too tall and not long enough. Don't get me wrong, this cooler is perfectly good and I'm keeping it for those times when it would be a great solution, like tailgating at college football games in the fall.
But for road trips, the more horizontal Coleman model works far better for me. The food bin I use fits perfectly on top of a standard ice block, while still providing easy access to water bottles or drinks along the two sides. It fits very well in the car, which is makes packing and unpacking everything else a breeze. I can even open it while it's packed away to snag a quick item. And it's unexpectedly handy to use as a quick seat. It sounds silly, but my overall experience is far better with the new cooler than the old one.
The main point here is that there are a number of considerations you should take into account when choosing a cooler. Don't be afraid to make a selection based on criteria other than its raw insulating capability.
Have any additional tips?
Let me know in the comments if you have additional tips or tricks for extending the life of your cooler ice.
Share or pin this
Help your friends and followers learn how to keep ice longer in their cooler, or stash this guide away for your next trip.
Disclaimer: I've included a few Amazon affiliate links in this post. If you decide to purchase something using them, it'll cost you nothing but will help defray my costs.
Campsite 12 at Kodachrome Basin State Park
Sometimes, you find yourself in a really great campsite. Last weekend was one of those instances.
While we often disperse camp on BLM or National Forest lands, we had decided to reserve campsites last weekend, given our rather aggressive itinerary. Kodachrome Basin State Park seemed like the natural first night's stop, since we'd be driving Cottonwood Canyon north through the middle of famed Grand Staircase-Escalante National Monument. We selected site 12 from the available options, and it did not disappoint.
What makes a good campsite?
For me, there are a few things that I tend to prefer in campsites. Please note that I'm referring to developed campgrounds here—not dispersed or backcountry sites, which I'd evaluate using much different criteria.
First, I prefer small to medium-sized campgrounds, usually between about 15-40 sites. Larger campgrounds tend to have very small sites that feel nearly on top of each other, and tend to be more crowded to begin with (hence, their large capacity). Extremely small ones often lack useful amenities, like flush toilets and sinks. Don't get me wrong, I'm fine using vault toilets and otherwise roughing it. But if I'm paying $15-30 for a place to sleep for the night, I expect a few additional conveniences. It's often nice to have showers too, especially if you've been outside all day. I tend to sleep better when I feel clean. I don't rely on firewood being available for purchase at the campground, but it's always nice to have as a backup or supplemental option.
While campgrounds can sometimes be a fun social experience, I usually prefer more privacy. So I look for sites along the outer loops and especially those that have a visual barrier between my site and neighboring ones. Shade can be an important factor too, especially here in the desert southwest, so some tree cover or a shade structure is often appreciated.
I usually don't care much about distance to the restrooms or water spigots; neither is usually too far way to cause much hassle. However, the inverse isn't true—proximity to the restrooms or water can mean a constant stream of visitors passing by your tent. Worse, occasional whiffs of an overly ripe vault toilet can really ruin the camping mood.
If you're tenting it as I often am, a flat tent pad that's not too rocky is key. After that, it's all bonus. Being a westerner, I have a relatively high expectation that really good campsites should offer some sort of expansive or scenic views, too. Proximity to streams or lakes is usually nice as well, though sometimes that means more bugs or higher winds.
Evaluating campsite 12 at Basin Campground
On par, campsite 12 was nearly perfect for our needs last weekend. The campground is the perfect size, and offered just the right amenities. The restrooms were clean and modern, and the shower stalls were spacious. While there wasn't any way to adjust the shower temperature, it was exactly the right temp for me. In addition, a sink for washing dishes and a self-serve supply of firewood—a handy to carry bundle for just $5, with proceeds benefitting the Boy Scouts—were appreciated conveniences.
The site is well isolated from neighbors with its own mini loop, making it feel like you were alone. Due to the configuration of the campsites, all RVs were on the other side of the campground. Best of all, it was at the far end of the campground near the head of the basin, making for some excellent panoramic views. We'll be back the next time we find ourselves looking for a campground in the area.
If you go
There are multiple campgrounds atat Kodachrome Basin State Park, but the one you're looking for is the largest one, Basin Campground. Campsites are $20 per night, plus an $8 registration fee. Check availability on site 12; if it's already taken, there seemed to be several other sites that looked like quality backup choices. Not all sites are reservable online, so you might be able to snag one on a first come, first served basis, too.
Five ways to keep cool while hiking in the desert
One of the keys to desert hiking is staying cool. The most obvious way to do this is to limit your desert hiking to the cooler months. But for some places, there aren't exactly many "cooler months" to begin with. As someone who has spent my own fair share of adventures in the triple-digit heat of the Sonoran Desert, here are my five go-to tips for staying cool in the summer heat.
Bring your own shade
Part of the reason it feels so hot to hike in the desert is that there is often little shade. The constant pounding of the sun can really wear you down. The easiest way to avoid this is to bring your own shade. And the easiest way to do that is to carry an umbrella. Umbrellas are great because they keep your skin and clothes cool, and they can help you avoid sunburn. Even if you don't want to carry one while you're actively hiking down the trail, they're great for creating some temporary shade during breaks and lunch.
A couple quick notes on umbrellas. Don't worry so much about buying an expensive umbrella made especially for trekking. They work slightly better to reflect sunlight and are a bit lighter; but for most people, I don't think they're worth the extra money. The desert is full of things that poke, snag, and stab—and you shouldn't be surprised to find a tear in yours at some point. It's a good idea to bring some duct tape on any outdoor adventure you take, and this is just another one of those reasons.
Stay covered
It might be counterintuitive to those visiting the desert to catch some sun, but you'll stay cooler by covering up rather than stripping down. Again, it's all about keeping the sun off your skin. The best endorsement you can find for this is from those that spend their workday outside. Drive some neighborhoods and see what the folks doing landscaping work are wearing. Invariably, you'll find they're donning lightweight long pants, loose long-sleeved shirts, and either a wide-brimmed hat or (especially if it's windy), a baseball cap over a bandanna that's covering their neck and ears.
The added benefit of this approach is that you don't need as much sunscreen (you'll still need it for exposed skin like your face and back of your hands), which most people don't reapply nearly often enough anyway. And as mentioned above, the desert is full of things that poke and scrape; after wandering through the brush, you'll appreciate the long pants and long sleeves. Trust me on this.
Get wet
The first rule of hiking in hot weather is to bring far more water than you think you'll need.
Don't break this rule.
One of the best ways to stay cool is to dampen what you're wearing. I use the extra water I've brought with me to do this regularly throughout the day. I add some water to the inside of the hat I'm wearing, letting it soak through to the outside before tossing it back on my head. If you have a quick-dry hat, you might want to toss a cotton bandanna inside to capture and hold the water longer. You can also wet the bandanna and drape it across your neck.
Ice your water
Not all of that extra water needs to be in a drinkable form, however. I often like to freeze a water bottle or two the night before a hot weather hike. You can use these as ice blocks in your pack to help keep your lunch and/or snacks cold (side note: a frozen snickers bar is an amazing snack in hot weather).
Feeling a bit hot? Take a break and snag the frozen water bottle from your pack. If your hike goes long and you start to run out of water, this becomes a very nice backup option as it melts. Otherwise, toss it back in the freezer when you get home and it'll be ready for next time.
You can also add ice cubes to the water bottle (or water bladder) you'll be drinking from. I usually transport my water to the trailhead in a cooler to help keep it as cold as possible before starting the hike. I also keep some cold water (as well as a post-hike beverage, like a soda or a "yay we did it!" trail beer) in the cooler, along with a snack that'll help cool me off. There's nothing like arriving at your car after a hot hike to find a cold beverage.
Time it right
Finally, when you hike is an important consideration during the hot summer months. Early morning is the best time to be on the trail, followed by after the sun starts to set. The desert is really alive at night, and not much wildlife will be out in the middle of a hot day. You shouldn't be either. Bring a headlamp and explore the desert at night—just remember, it's harder to navigate in the darkness, so be prepared.
Most of my mid-week summer hikes involve hitting one of the mountain preserves here in Phoenix right after work and just before setting sun. You get the gorgeous sunset, get to watch the desert come alive, and get to see the city lights at the summit before you head back down. And since the desert breeze kicks up around dusk, your hike will be far more comfortable than it would have been just two or three hours earlier.
Have another tip for staying cool? Tell me in the comments!
The secret about National Park visitor center restrooms
If you've been to quite a few National Park units—especially the ones that don't close at night—you may have noticed something odd about the layout of their visitor centers. In nearly all of them, the public restrooms are located on the exterior of the building, as opposed to down an interior hallway inside the visitor center. There are exceptions to this, certainly, but it's prevalent in the types of national parks where visitors are coming and going after hours, especially ones with a campground.
Because they're accessed from the exterior, these restrooms are open 24 hours a day, 7 days a week—even when the visitor center itself is closed.
That's a great tidbit to know, especially if you're camping in the park's campground or on nearby public lands.
Upgrade your park camping experience by making a stop at the visitor center restroom.
Unlike the available facilities at many park campgrounds, the visitor center restrooms will have flushing toilets, sinks, and even mirrors. And since they're often cleaned right after closing, you'll usually find them freshly stocked with paper products and in spic-and-span condition. You'll usually find a water spigot there, too.
This last weekend, Jen and I camped at Natural Bridges National Monument in southern Utah. The park campground is small and a bit sparse in amenities—there's no drinking water and only two pit toilets are available.
That might not sounding like a particularly appealing campground to some. But don't let that keep you from staying there.
It's a short walk down the park road to the visitor center restrooms, where you'll find flushing toilets, sinks and mirrors, and fully stocked paper products. And did I mention that the floors will have been freshly mopped?
And since few people seem to make use of these restrooms after hours, you'll likely have the place to yourself. We certainly did this weekend.
Keep in mind that many state parks and other recreation areas also have "always open" restrooms attached to their respective visitor centers, too.
So the next time you feel skittish at the thought of using a campground pit toilet, consider making a stop at the visitor center on your way to the campground each night (or morning, or both).
The single best way to save money on travel
Travel can be very expensive. But it doesn't have to be.
There's one simple way to save money on your trips:
Camp.
Yep, not an earth-shattering secret, I know. But it's still a powerful way to travel. Not only does it allow you to experience the local environment in a more intimate way, but it allows you to save some serious bucks along the way.
By camping instead of staying in hotels, you can often save enough to extend your trip by 30% or more. That's huge.
If your goal is to travel cheaply enough to afford an additional vacation or two this year, camping might be the answer.
A fraction of the cost
I never stay at the high end resorts or hotels, but I usually try to avoid the bottom-barrel motels, too. For me, a clean room and preferably a good pillow is what I'm looking for. That means that I'm routinely spending $75-200 a night on a room. That adds up quickly, especially considering how little time I usually spend in the room.
By contrast, camping is a fraction of the cost. Campsites at developed campgrounds usually run between $15-45 or so, with full service RV campgrounds starting around $50. And you can also camp for free in dispersed campsites in most national forests and BLM public lands—that's tens of millions of acres where you can sleep for free.
To put some numbers to it, here's what a stay in Grand Canyon National Park would cost you for a 3-night, mid-week trip over July 10-13, 2017. The cheapest hotel currently available on hotels.com is a nice 3-star Best Western in Tusayan, about 6 miles from the park boundary.
Best Western in Tusayan: $270/night ($810 total)
Mather Campground: $18/night, ($54 total)

➞ Savings: a whopping $756
Maybe this is a bad example, and you'd be cool with staying 60 miles away in Flagstaff where you might be able to snag a $120 hotel instead. Ok, fine. But you'd still be saving $300 by camping. And you'd be within walking distance of the sunrise or sunset over the canyon. And yes, you'd still have flushing toilets and showers, plus a picnic table and fire ring—and even a free ranger campfire program.
It's not just about not paying for a hotel
The most obvious expenditure you'll save by camping is on hotel bills. For my travels, that's usually the highest cost. But camping provides another possible cost-saving measure: the ability to cook your own meals.
Cooking for yourself will undoubtedly save you gobs of cash. Sure, it's much more work to cook for yourself. But if you're looking to save money, this is another great way to do that.
Don't want to cook? No worries, you can just as easily eat out and head back to camp whenever you're ready to unwind and go to bed.
Speaking of unwinding, is there anything better than an adult beverage around a campfire? Yeah, that's a lot more fun than drinking in the hotel bar or alone in your room.
Camping isn't always an option
Granted, camping won't always be an option. If your goal is visiting Manhattan...well, camping probably isn't a particularly viable choice. But it does work for a surprisingly large subset of America, especially when you're on the move between places.
Weather plays a major consideration as well. I don't recommend camping during your summer swing through Phoenix, for instance—though you could camp an hour north in the cool pines of the Mogollon Rim without any issues. Likewise, camping in extreme cold or snow offers other unique challenges that you might not want to deal with.
On the other hand, lodges in popular national parks often sell out weeks or months before the campgrounds.
Camping does require an initial investment
Now, you'll need at least some gear to make camping a reality. But you probably don't need as much as you think. Even better is that after that initial your gear will last years and years, reducing the cost of future trips.
The most basic gear needs:
- tent
- sleeping bag
- sleeping pad
- headlamp
You don't need the very best of these, though the more you spend the better gear you'll get. But for occasional use, some of the cheapest models you can find at Wal-Mart or on Amazon could be perfectly functional for your needs.
And you don't actually need a tent, or a sleeping bag, or a sleeping pad—you just need to accomplish the same function. You can use your own blankets as a sleeping bag, or a foam mattress topper as a sleeping pad, for instance. And I often sleep in the back of my Subaru Outback instead of pitching a tent.
You can also rent gear from places like REI, or simply borrow it from friends. In fact, that's probably the best way to get started.
The other benefits of camping
Saving money—often in order to extend my trip—is usually my primary motivation for camping during road trips. But there are quite a few additional benefits of camping you shouldn't overlook.
- Camping provides a more intimate connection to place. You'll learn more about your destination by spending time in its native environs.
- It's also good to disconnect from screens, and it's good to see the stars once in awhile. Disengaging from the digital world can refocus your mind on more important aspects of life—not just how many likes your last instagram post has gotten.
- Camping also fosters deeper personal connections with your traveling companions. Shared experiences such as camping create stronger memories and nurtures relationships.
But probably the most obvious benefit is the flexibility it provides. When you're self-contained, your schedule has a bit more give in it and you're not quite as locked in to your initial itinerary. So if you run across something unexpected that you really want to do, you can. And if you're not enjoying where you're at, you can move along to a new destination.
Stay tuned
You'll read quite a bit here about camping, including both tricks and gear to make your time outside that much better. So don't worry if you're not quite an expert just yet. I'll help you get there.
A short guide to park passes
When someone hears about my national park quest, they often ask me if I've visited a particular place that they have enjoyed. As often as not, the location they mention is not part of the National Park System.
That's not particularly surprising. There are a wide variety of land management agencies at the national, state, and local level—each of which have different purposes, rules, and fees. Unless you're really paying attention, it's easy to get confused.
If you're inclined to buy an annual park pass—which I hope you'll consider doing—it's important to understand what you're getting. I'm using metro Phoenix as the example here, so your local passes may vary.
So in the interest of clarity, here's a quick rundown:
Maricopa County Parks
This includes just the 10 or so regional parks in Maricopa County, Arizona. The big question is whether or not you'll be boating at Lake Pleasant—there's one annual pass for the lake, and a separate one for the rest of the parks. Other counties or metro areas may or may not have their own park systems and annual passes.
Arizona State Parks
This includes the state parks that are still open. Again, you'll need to decide if you'll be doing a lot of boating. The standard pass doesn't include the river parks on weekends (Friday-Sunday) or holidays, while the premier pass does. All states have a state park system, but their rules for annual passes varies.
Arizona State Trust Lands
This includes state trust lands (which are not considered public lands) and is actually a permit, so be sure to read the fine print as they include some important restrictions. You won't find any visitor services here. Most Western states have their own systems of state trust lands; their primary purpose is not recreation, so don't expect park-like amenities or rules.
Federal lands
This includes National Parks, National Forests, National Wildlife Refuges, and Bureau of Land Management lands where you pay an entrance fee. If it has the word "national" in the name of the area, it probably fits under this heading. There's a single pass called the America the Beautiful: the National Parks and Federal Recreational Lands Pass that is supposed to cover entrance fees for all of these.
A very important note here. Some National Forests, including several in Arizona, now exclude some very popular fee areas from being covered by this pass. They call some of these sites with "enhanced amenities" and others are technically operated by a private permittee or concessionaire, but you and I might not notice the difference. Yes, this is total bullshit that's still a better-than-nothing attempt to deal with the inadequate budgets Congress appropriates for our public lands. These areas also often have their own local Forest pass (Tonto Pass, Red Rock Pass or Grand Red Rock Pass, and the Coronado Pass are Arizona examples) with daily and annual options which vary with each national forest.
You can also get a highly reduced or free pass if you are:
- disabled
- at least 62 years old
- a 4th grader
- in the military or a dependent of someone who is
- a federal public lands volunteer
A few additional tips
- You can usually buy these pass at any staffed entrance station or visitor center.
- Many places have annual passes for a specific park location.
- These passes usually admit a carload but don't cover any additional fees—like camping or tour fees.
- Areas managed by a concessionaire aren't covered in the federal pass, even for basic things like parking or entrance fees.
Speaking of park passes, don't you think we should have an America the Beautiful pass for kids?